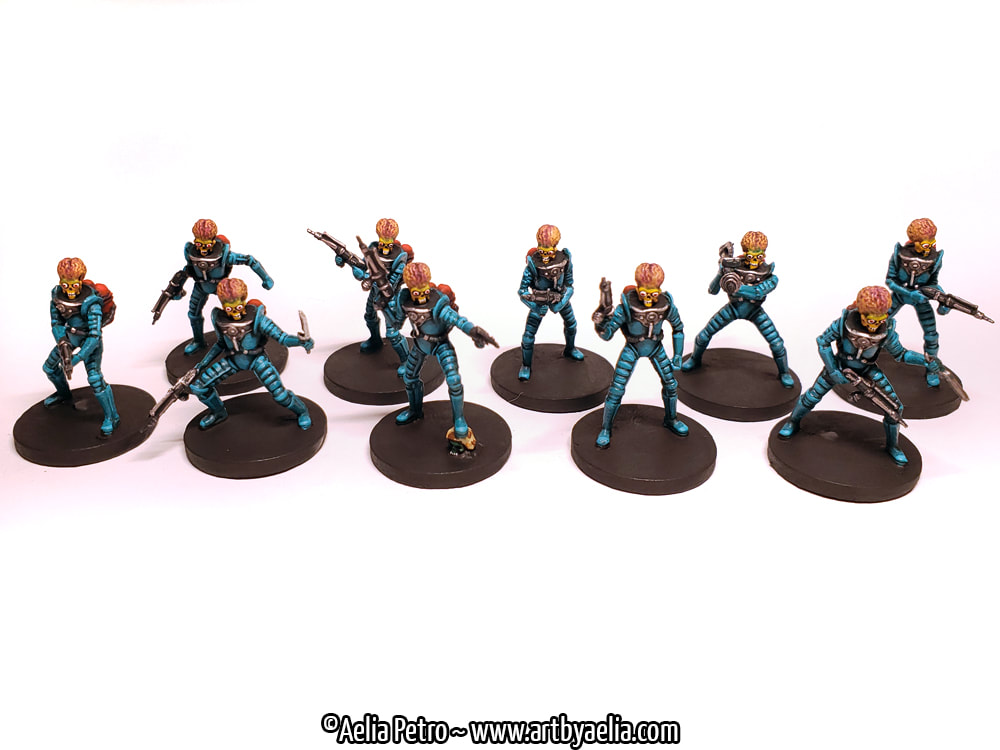
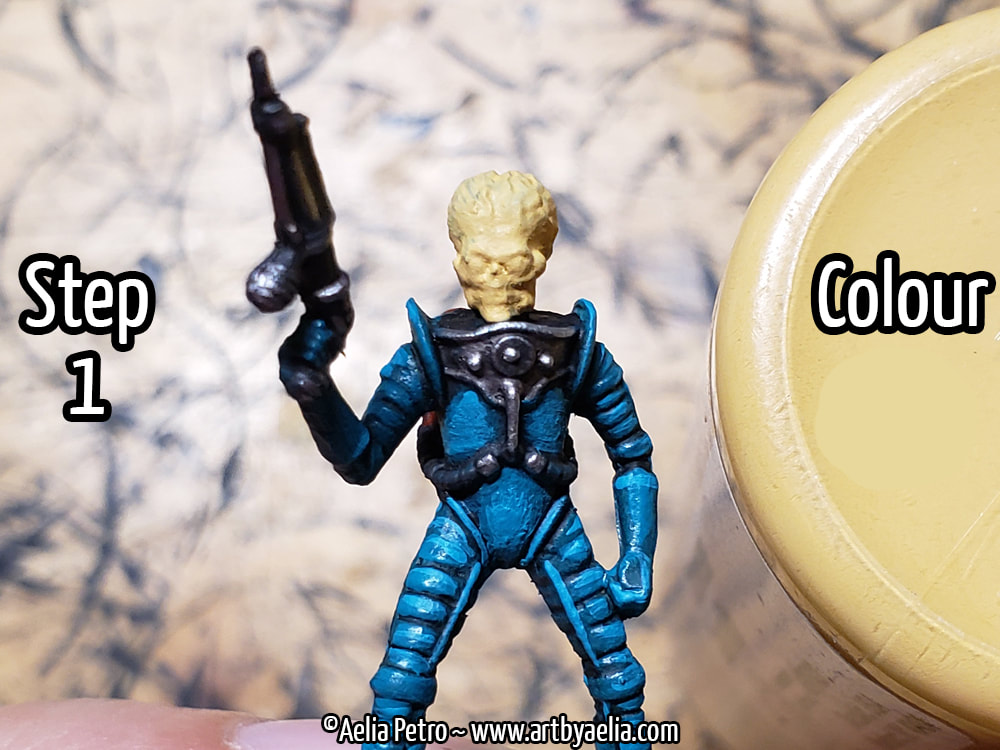
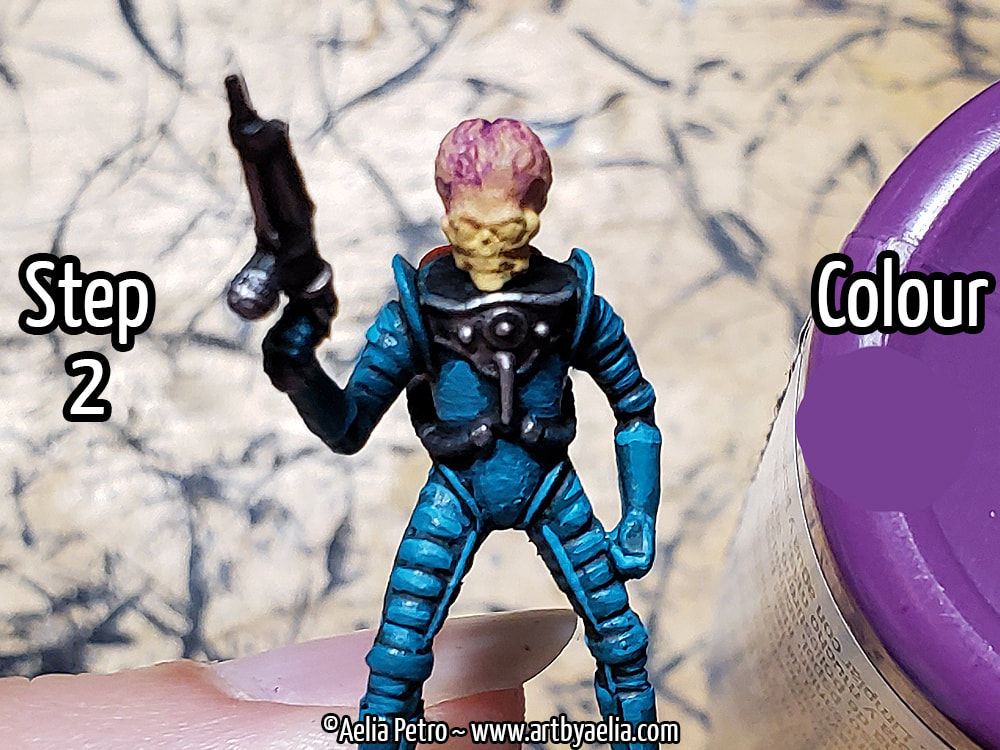
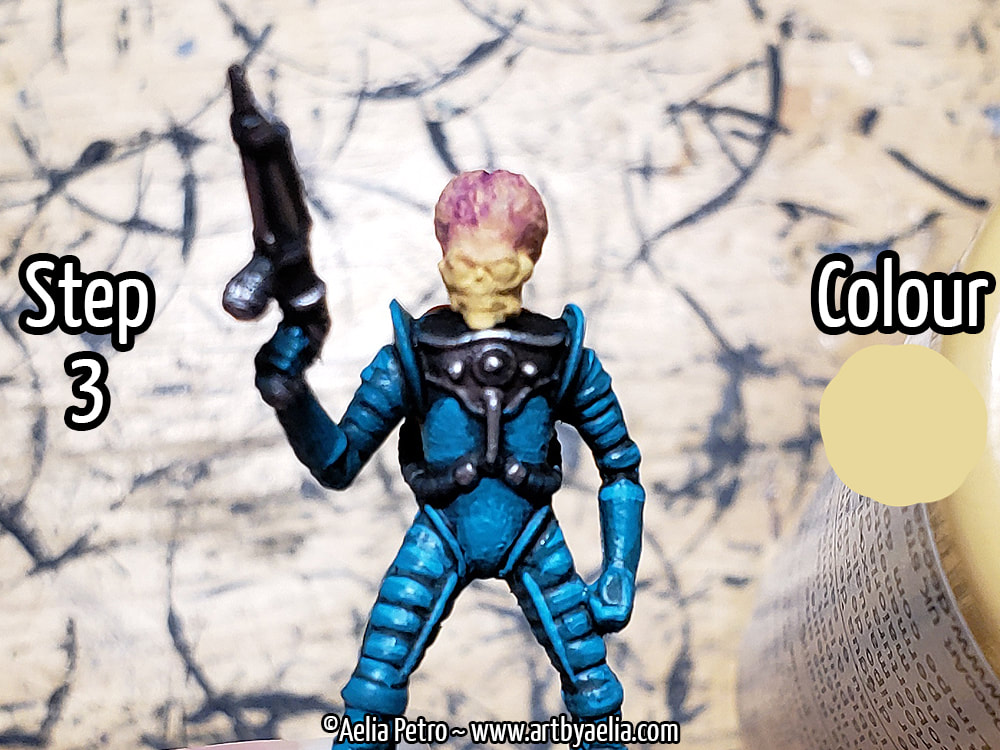
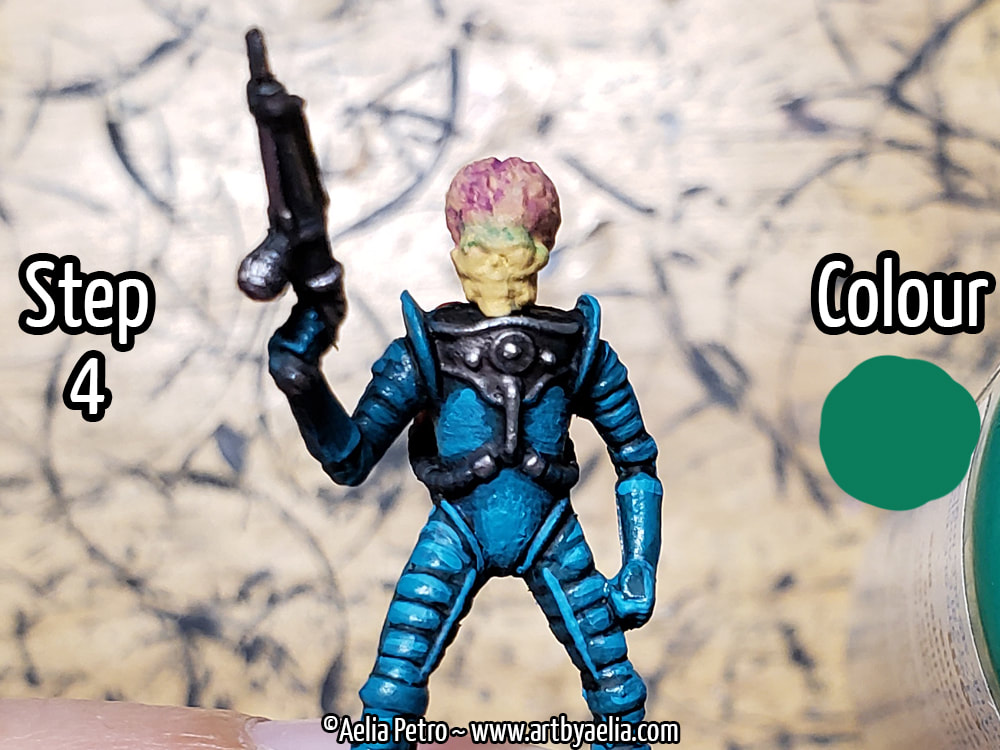
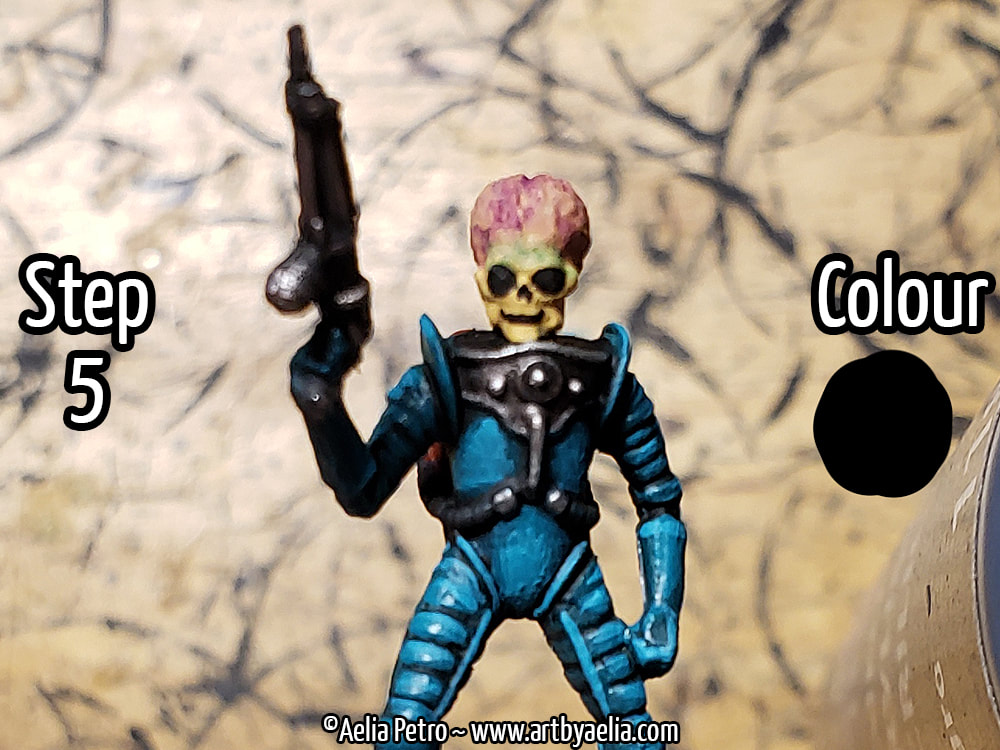
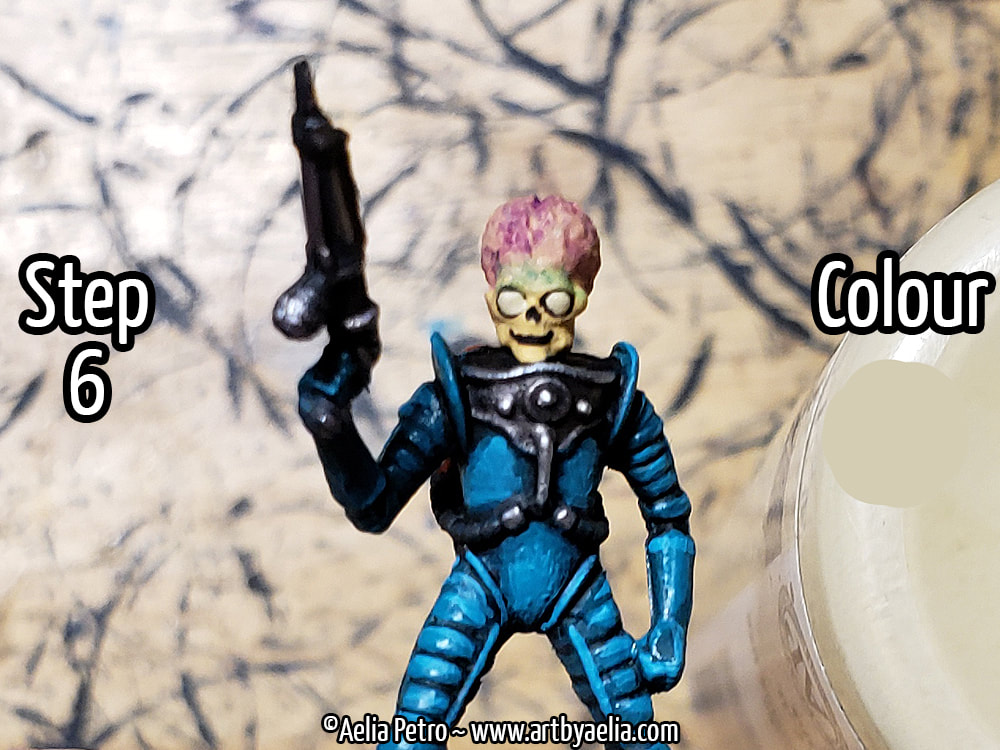
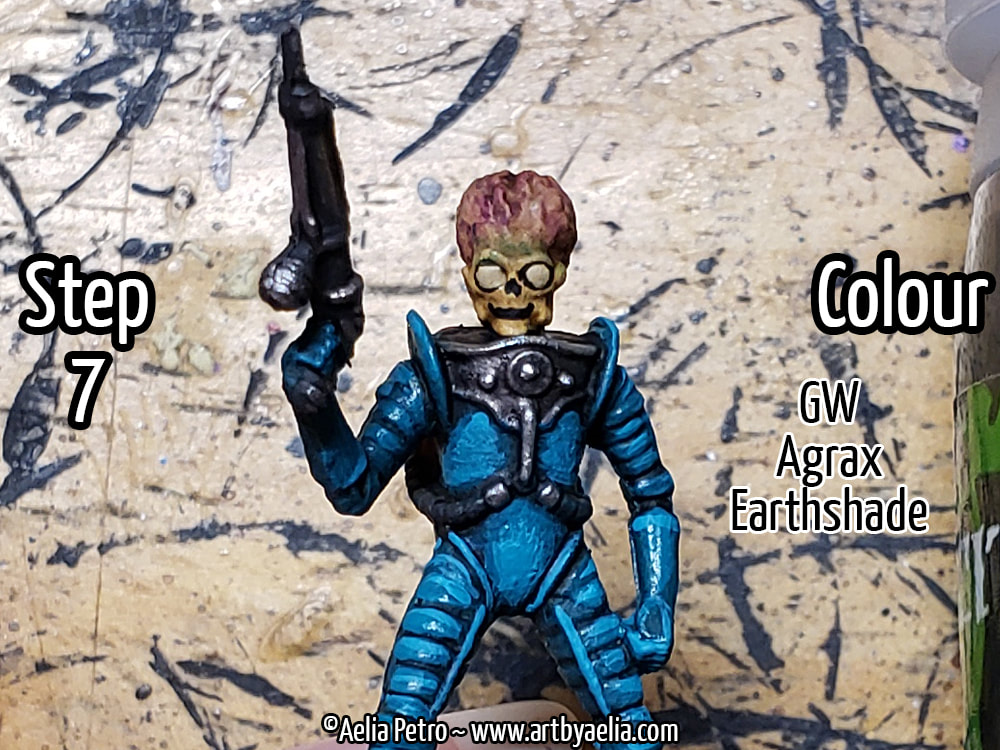
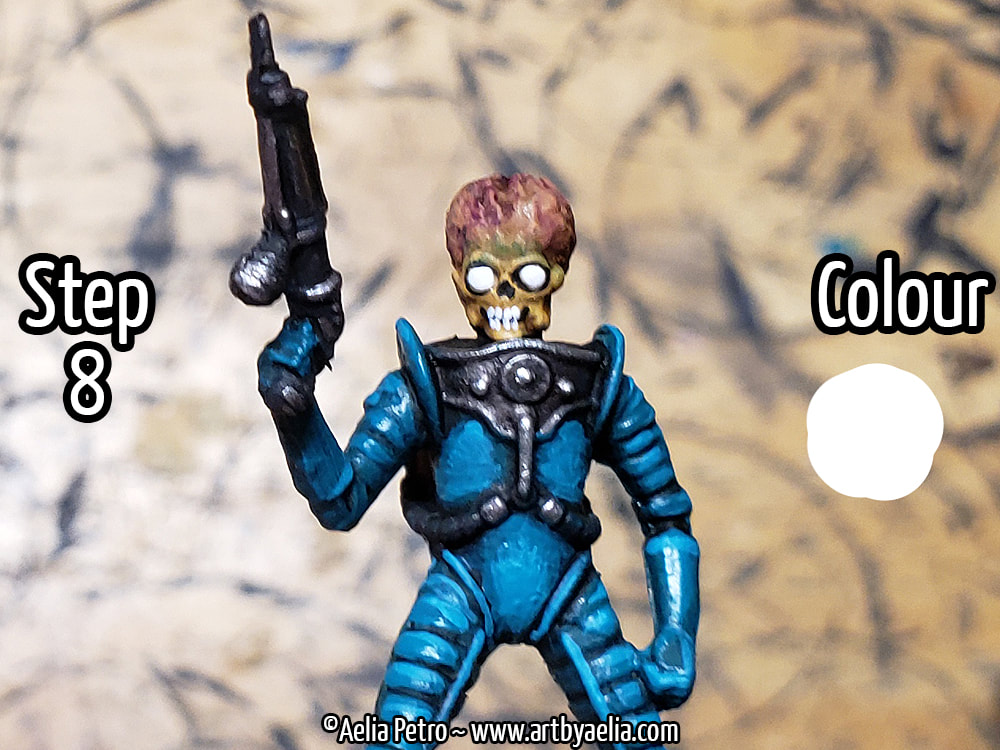
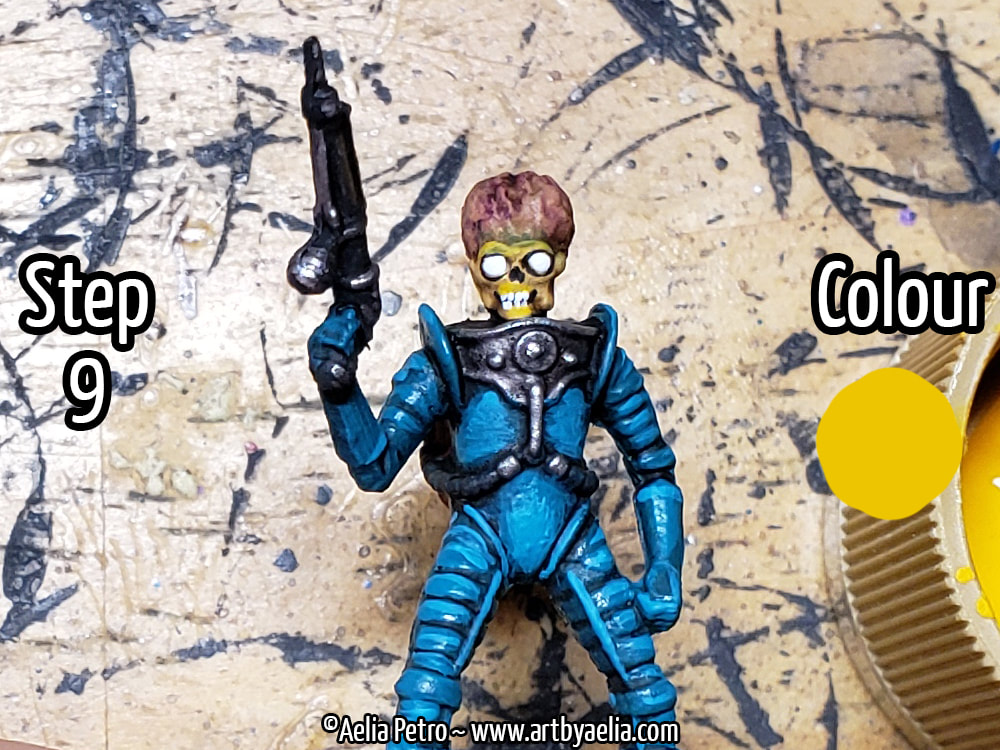
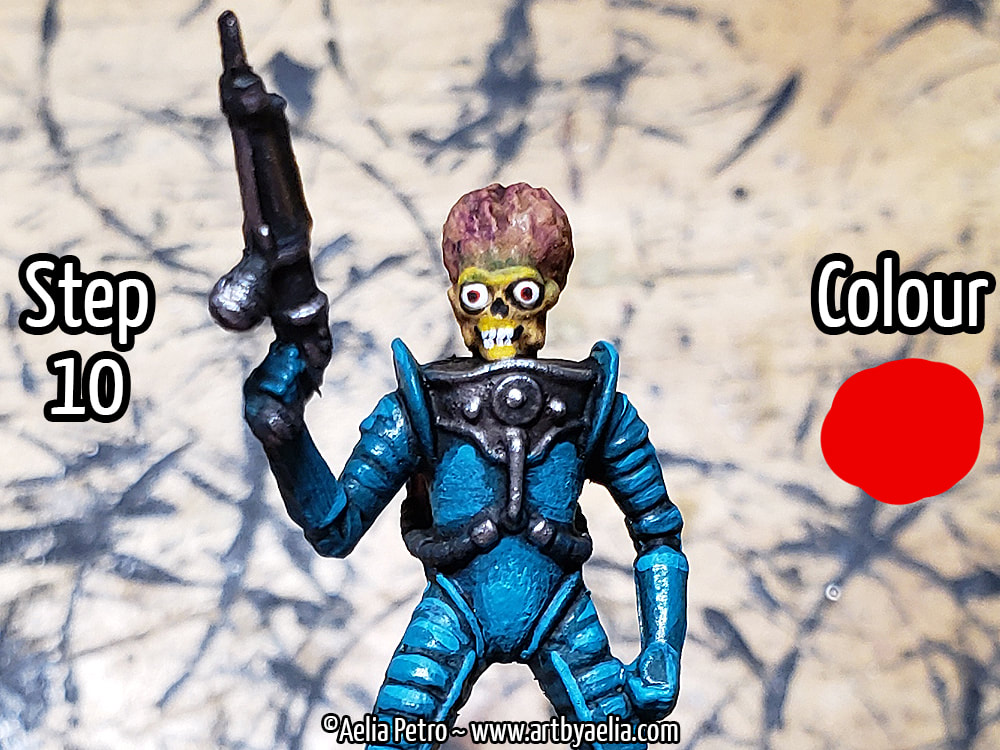
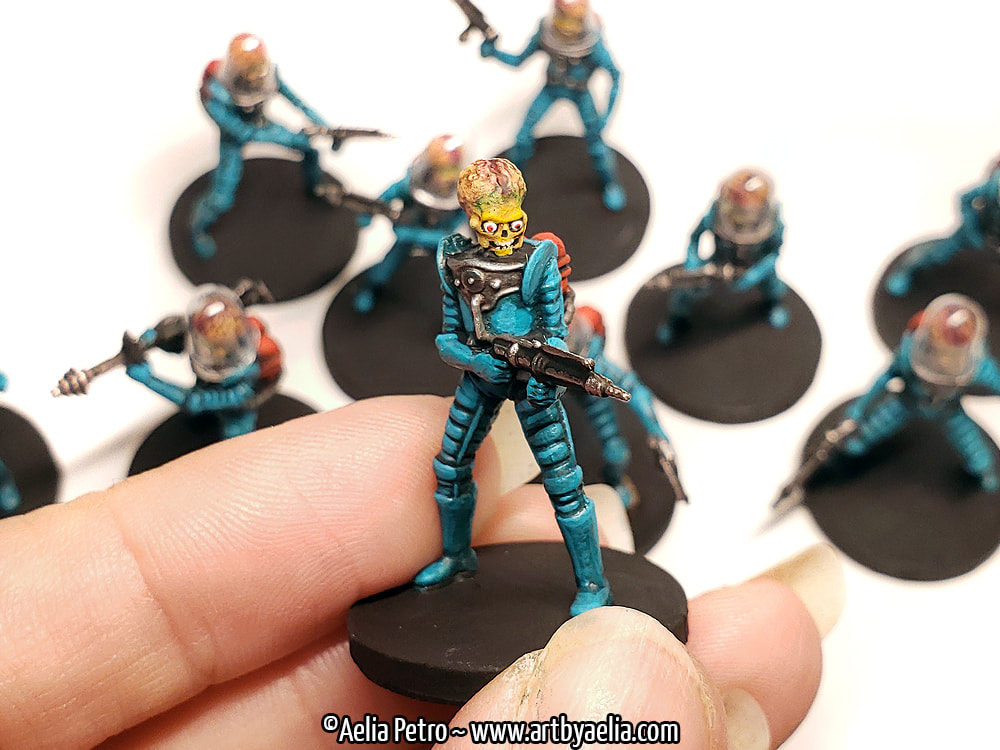
Aka: Painting Mars Attacks Martian Grunt HeadsI recently got into the Mantic Mars Attacks Miniatures Game. Poor timing on my part since the game has been out of production for some time, making much of it difficult to come by. I was able to get my hands on a used copy of the base game, and have been having a lot of fun painting the martian grunts. Here's a look at the process I used to get a look close to the martians in the movie (which are deceptively complicated).
That's all there is to it! If you're feeling fancy, a dot of gloss varnish on the eyes will make them pop, but it'll be less noticeable if you've got the helmet domes for them.
0 Comments
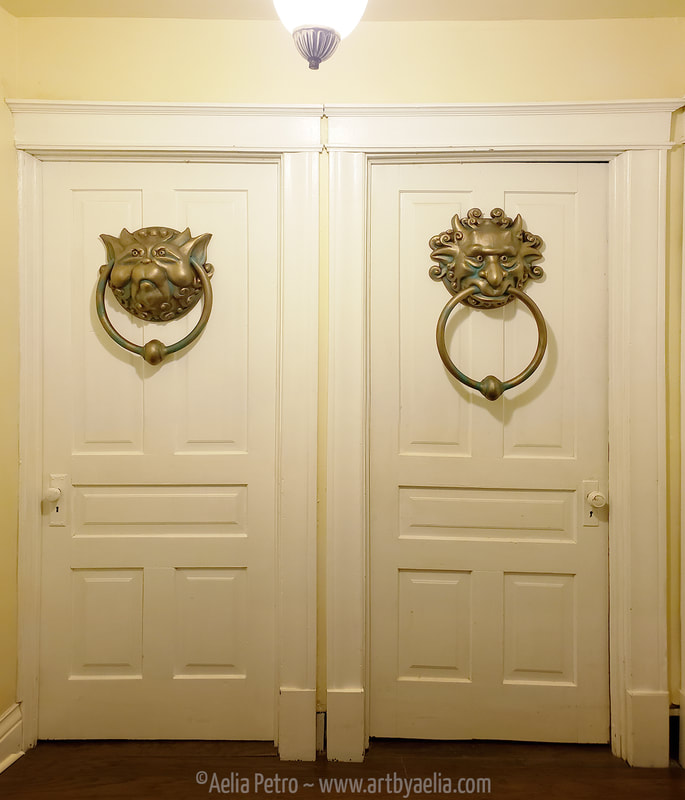
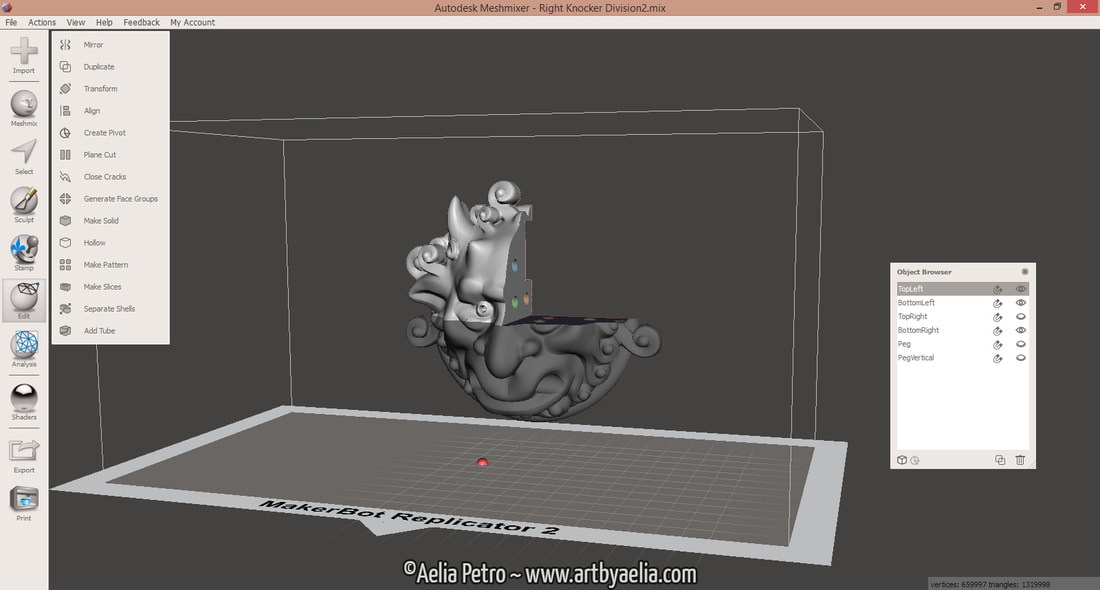
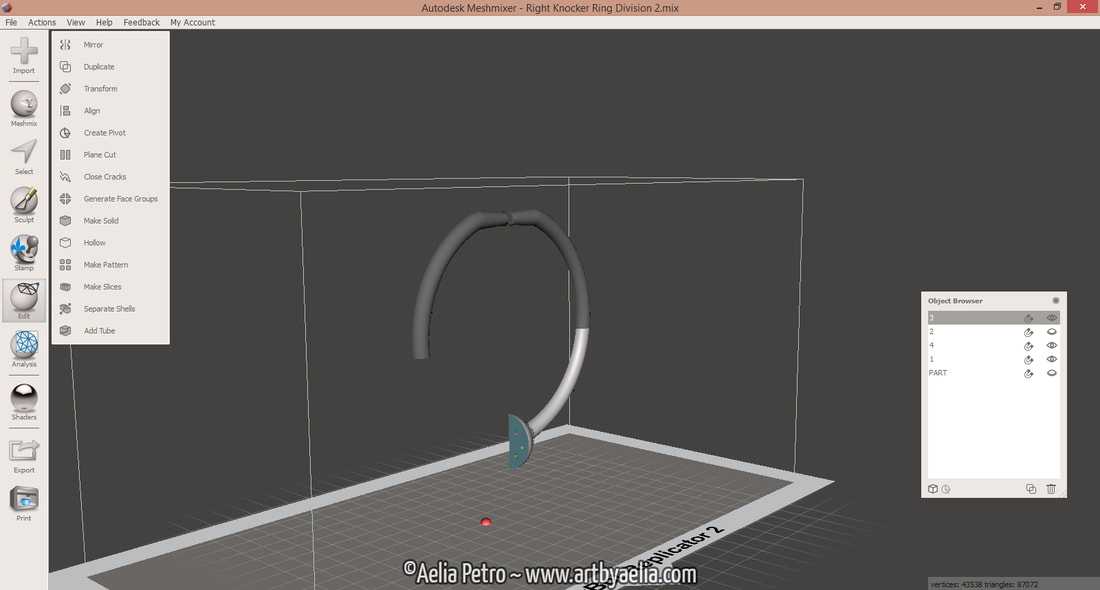
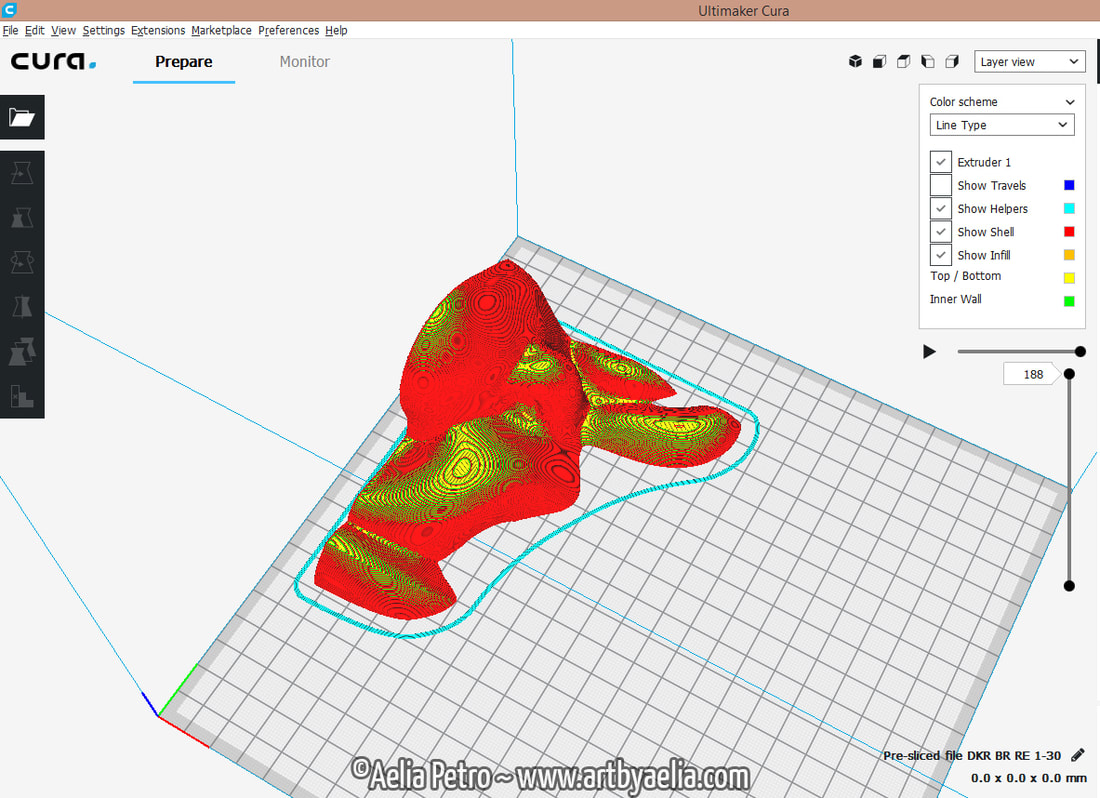
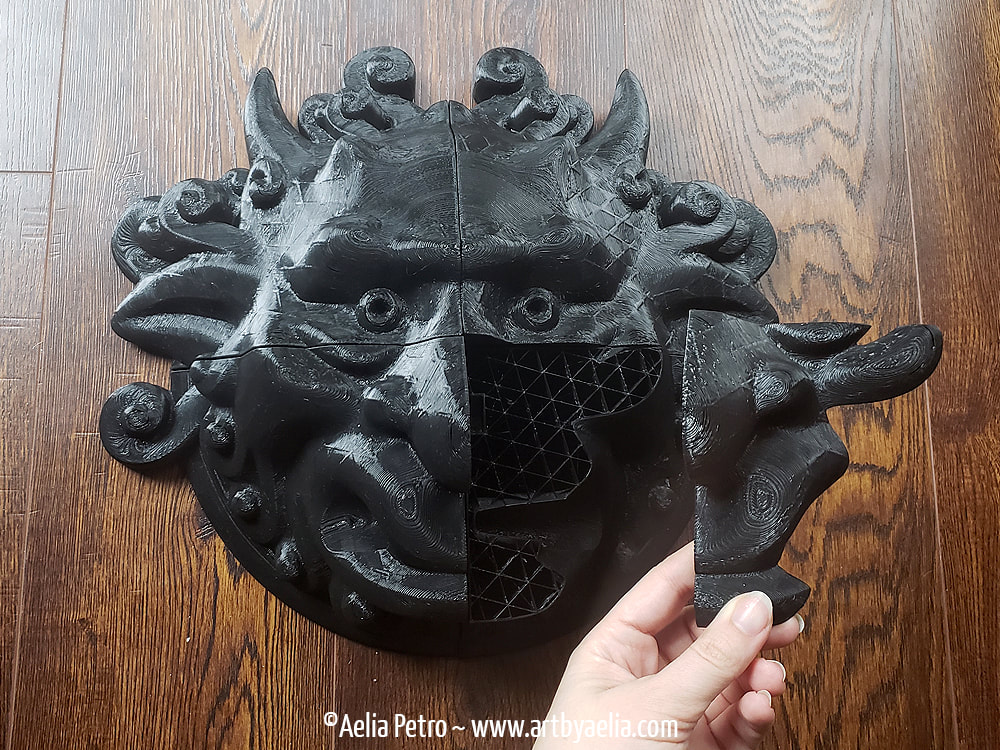
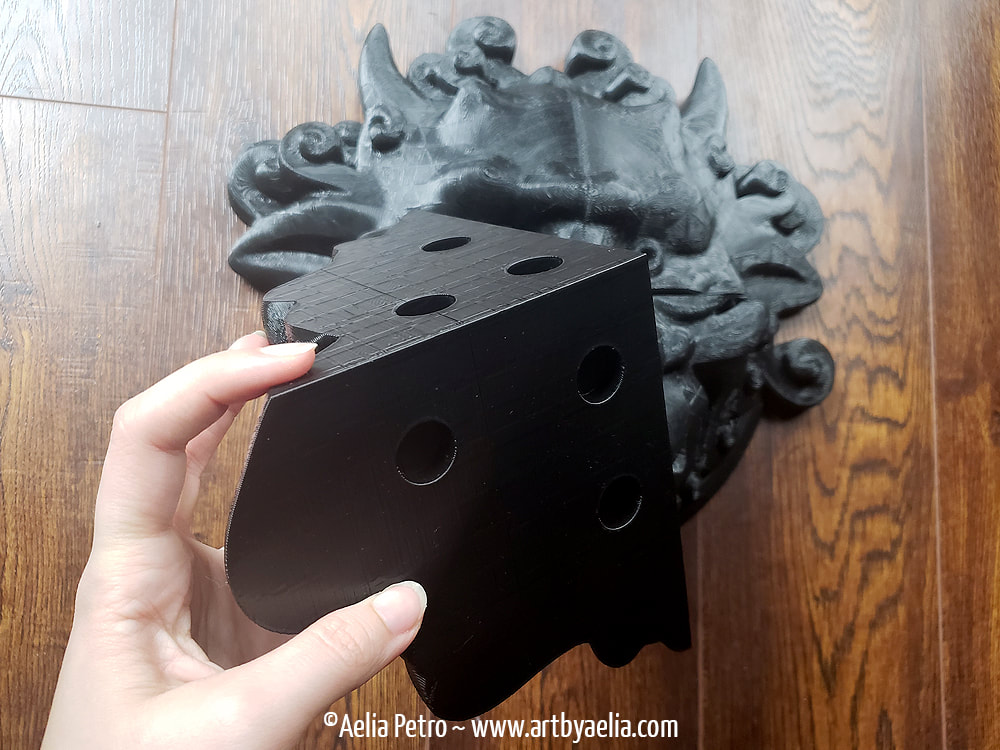
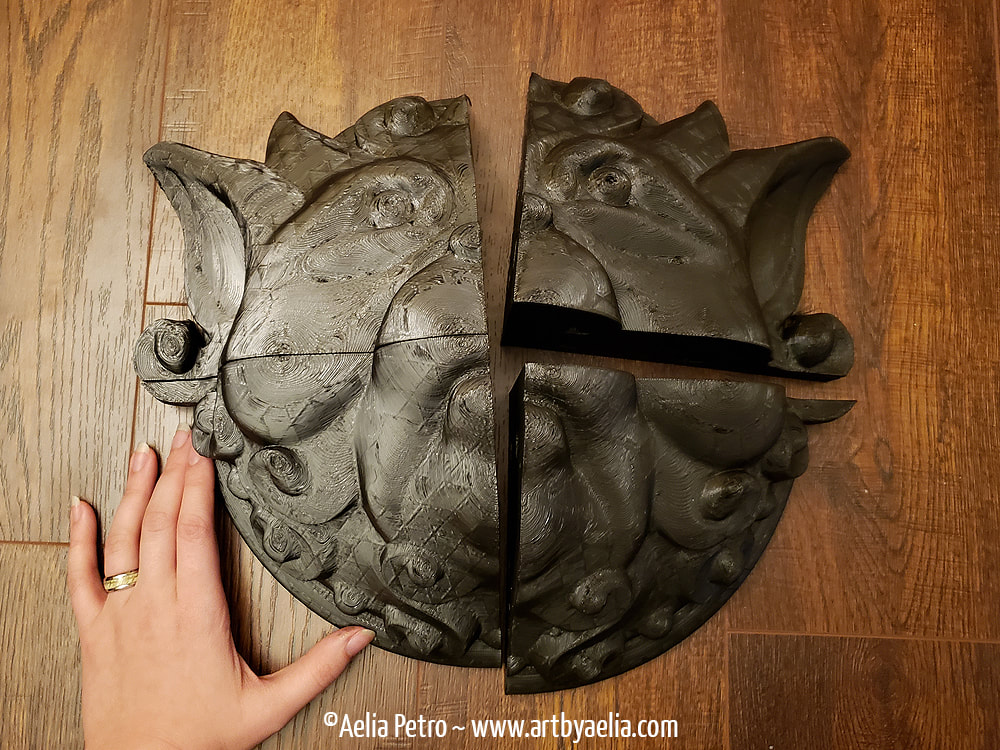
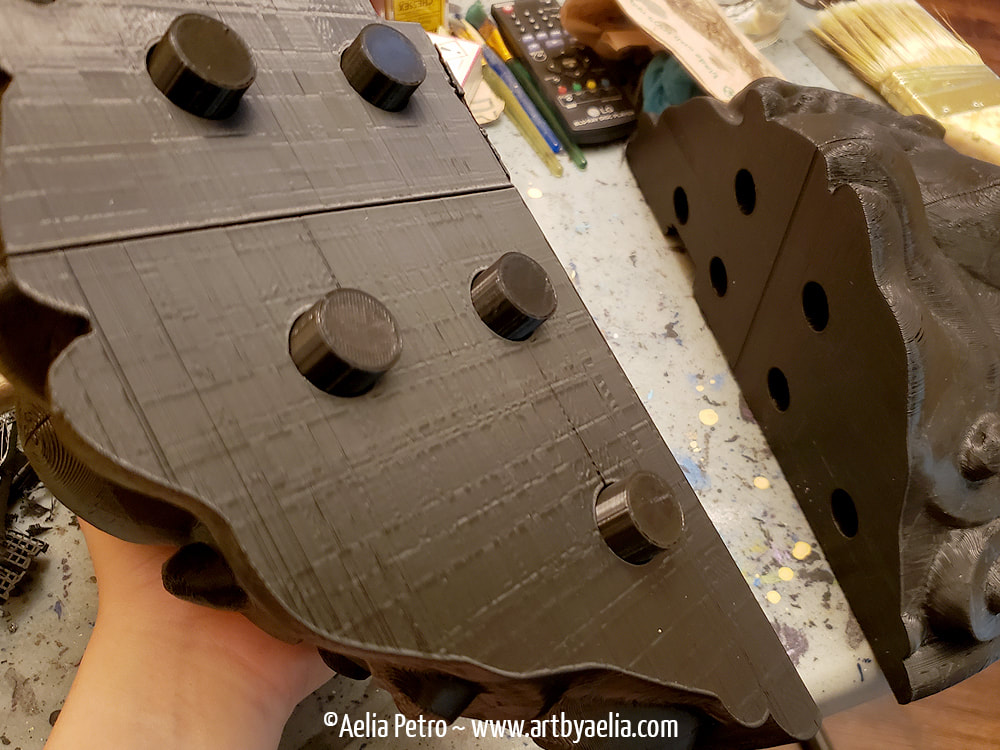
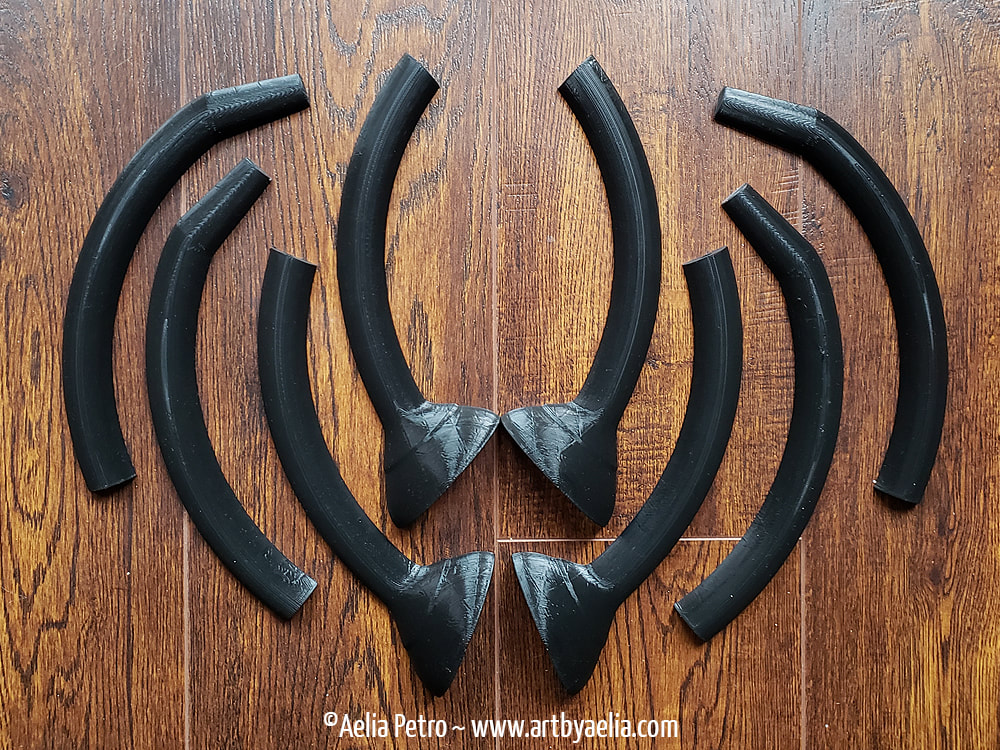
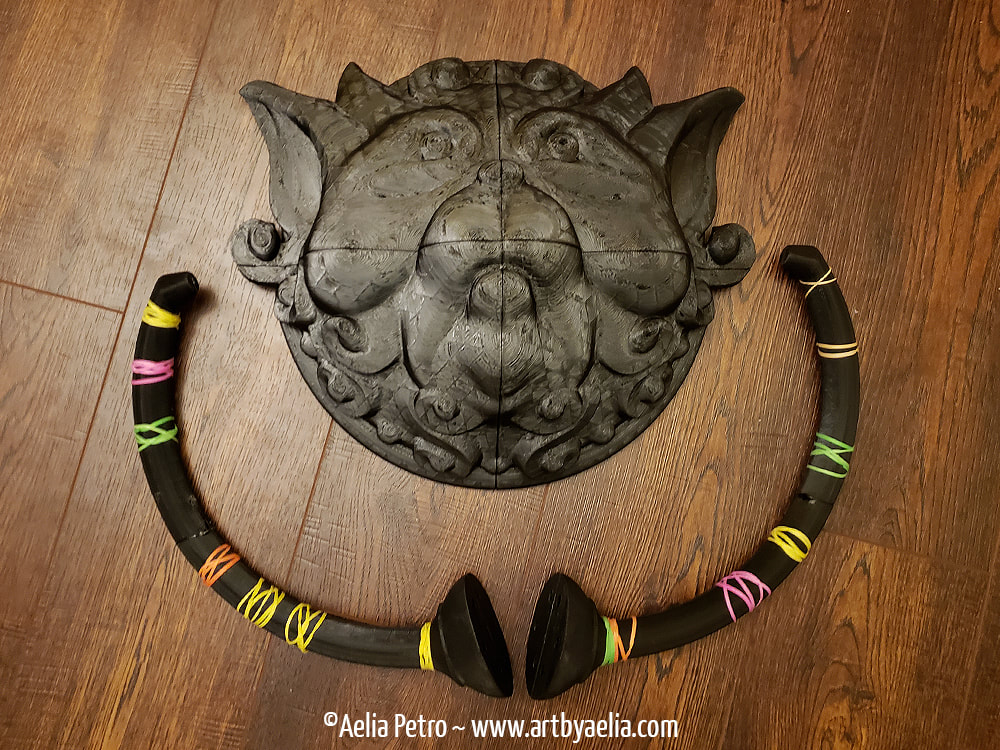
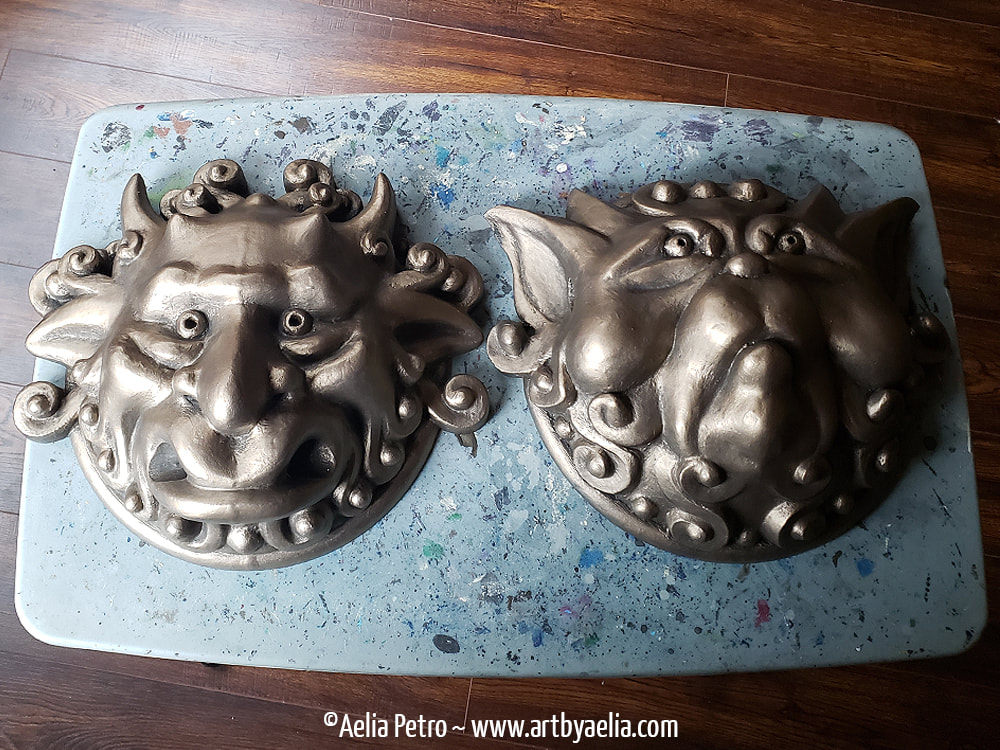
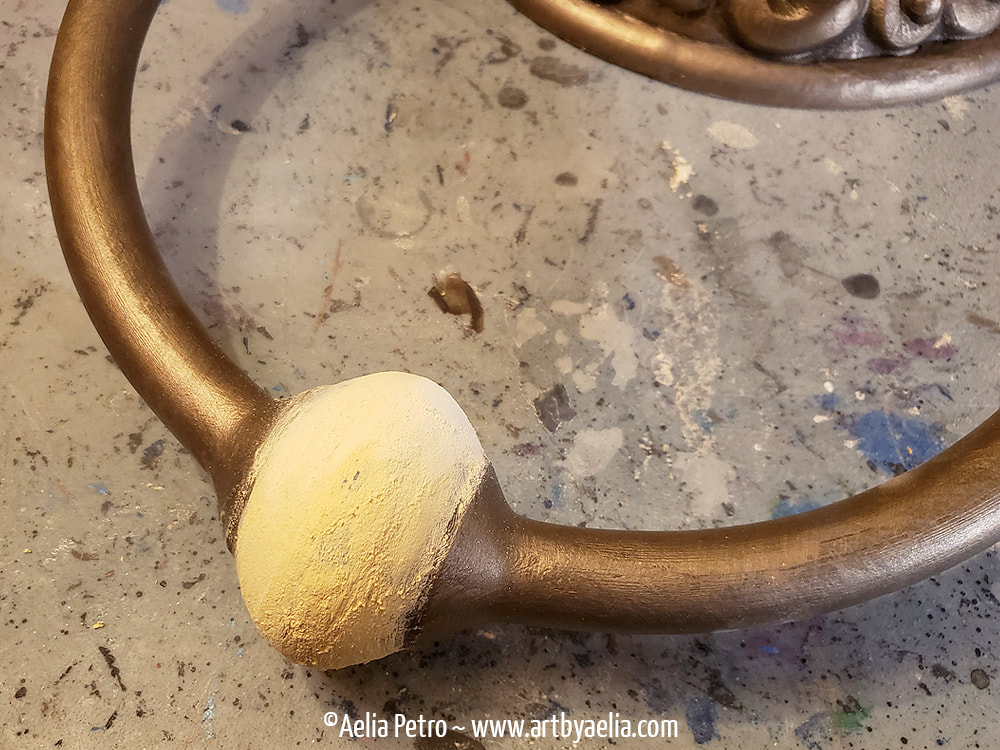
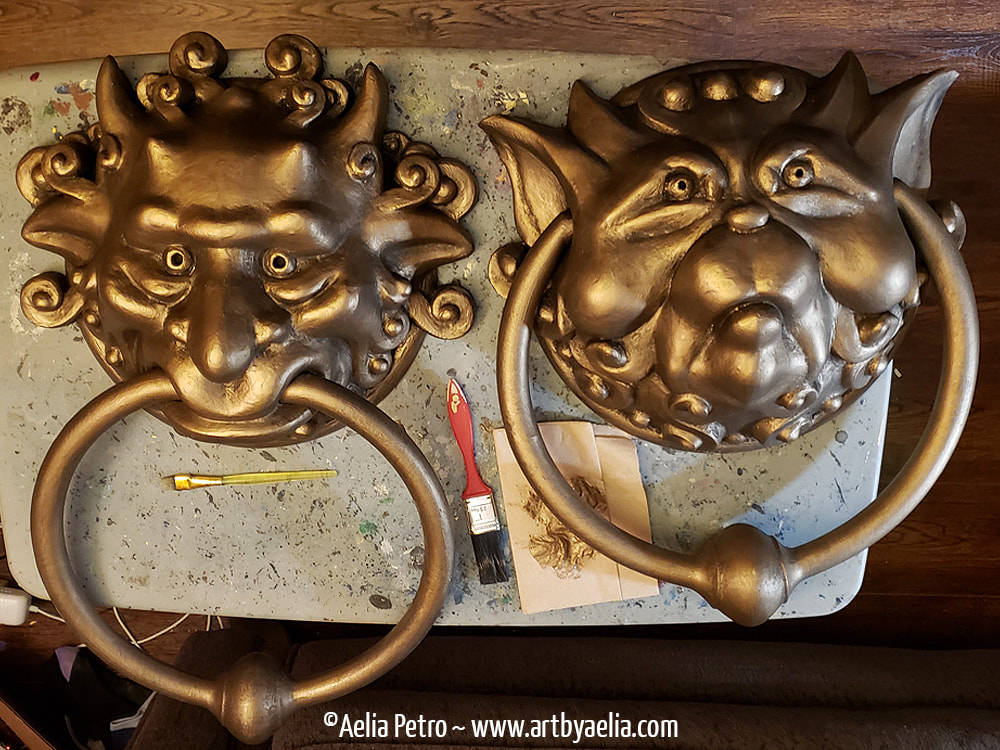
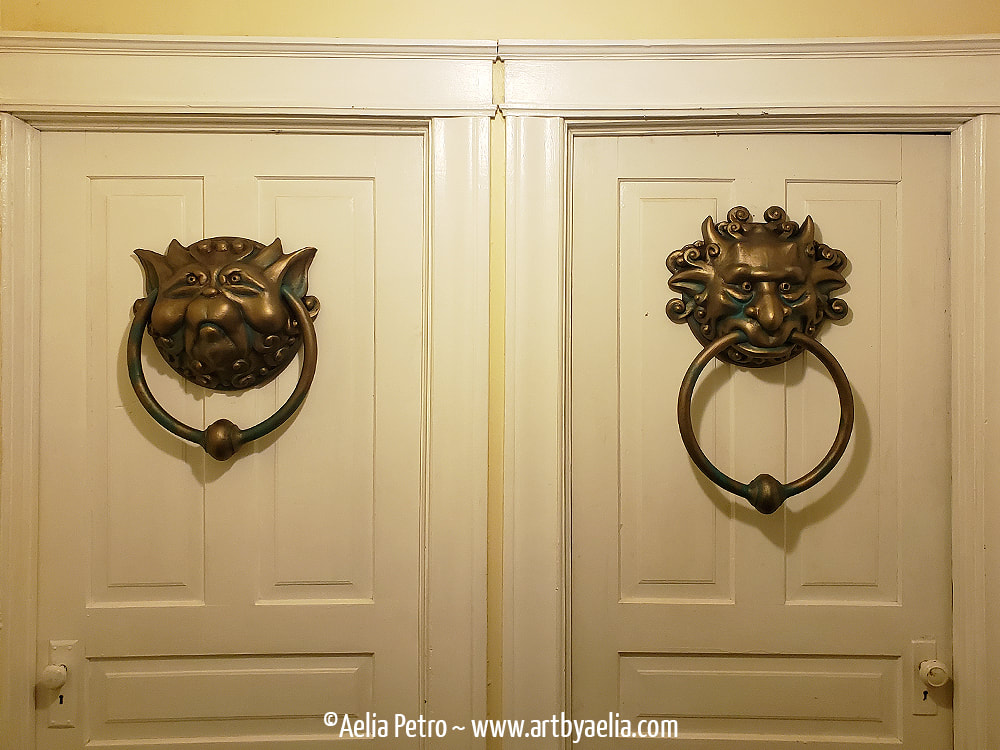
Phew! This is a project that I'm glad to be finished. With no where near enough experience with 3D modelling, slicing, or printing, I embarked upon my most ambitious project to date. I just so happened to have two bedroom doors side-by-side, and a burning desire to adorn them with these knockers. I expected it to be a lot of work, but even so, I was surprised by what it took to get them done. Step 1: Editing the 3D filesMy starting point for this project was a pair of 3D files that I found online. These were sculpted by OnyxDigitalStudios on Cults3D.com. These were a good place to start, but they weren't accurate enough for my liking. I imported the files into ZbrushCore and started sculpting. You can see the original files (before) and my updated files (after) below. As someone with VERY little 3D sculpting experience, I was thrilled with how these turned out, especially the left knocker. I started with the right knocker, as it required less sculpting. I dropped the eyes and changed the shape of the forms around the eyes. I made the nose bigger and the nostrils much more prominent. I made the ears and horns bigger, and the lower lip more pouty. I also added additional swirly things next to the horns since they were missing in the original file. The left knocker required a lot of additional sculpting and editing. Basically the only things I didn't change are the bottom row of swirly things. I dropped his mouth down and made it more narrow. I also changed the forms on the chin to be more narrow. I made the cheeks a bit chubbier and changed their position on the face. I lowered the nose and made it rounder and more prominent. I made the ears much larger, and the shape more accurate. I changed the shape and size of his horns. The swirls on the sides needed to move closer to the head. The eyes were also lowered, and all the forms around them resculpted. After all of these changes were made, I exported the knockers as .obj files for further processing. Step 2: Preparing the 3D Files for PrintingThe files were set up for printing around 5" wide. I wanted them to be over 14" wide. Such large pieces would never fit on my Ender 3 printer. To print the knockers at full size, I had to break them into smaller pieces. The faces would need to be done in 4 pieces each. To facilitate assembly after printing, I built a rudimentary locking system with pegs. I couldn't figure out how to do this with Zbrush, so I opened the files in Meshmixer and processed these actions there. Each side-face has 3 holes, for a total of 12 holes and 12 pegs per face. The rings had to be broken down even further than the faces. To best print them, they needed to be able to lay flat on the printer bed. This meant the minimum number of pieces for each ring was 2 (one for the front, one for the back), but given the massive scale of the finished pieces I needed to break each half further down into 4 pieces (for a total of 8 pieces per ring). Just like with the faces, I then created a locking system with pegs so that alignment wouldn't be a problem. The assembled pieces would require 28 pegs per ring. Each individual piece was then saved as an .obj file. Step 3: SlicingIn order to print the 3D files, I had to convert them to gcode (the file format the printer reads). I did this in Cura. Cura is a great piece of free software for slicing models. I sized the pieces up to over 300% of their original size and then it was time to slice. These pieces were going to be huge, so to save printing time, I opted for a .3 layer height. At .3 each quarter was going to take around 10-12 hours (so the full faces would be 40-48 hours EACH). To improve the quality to .2 layer height would have more than doubled the print time. I personally don't like to run my printer overnight, so the .3 height was my best bet. I knew it would increase the presences of layer lines, and therefore increase the amount of sanding and filling required for a smooth finish. That's just the trade I chose to make. I opted to use 10% infill, because I didn't want the finished pieces to be too heavy (they are gigantic, and need to hang on a door). This also saved a lot of material, which was helpful since each face took an entire roll of filament. I sliced the pegs at .3 layer height as well, but upped the infill to 25% so that they'd be a bit stronger. Probably should have printed the pegs at 50%, but hindsight is 20/20, right? Step 4: PrintingI started with the right knocker, since he's my favourite. The printing process was pretty straightforward for the first quarter. It printed without any issues and really whet my appetite for the project. The second piece also printed simply and uneventfully. Step 4b: First HurdlePrinting the 3rd quarter I encounted my first problem. I ran out of filament! Having started the project with only a partial roll, I should have predicted this, but didn't keep an eye on it. I heard the printer click off, and ran to check out the finished piece, only to discover that it had run out of filament about an hour or two before the print ended... leaving exposed infill and an incomplete print. I didn't want to reprint the entire piece, because it would waste both time and material. Instead, I opted to print the missing part of the file. I chose an easy to recognize position on the print (where the cheekbone meets the cheek), and counted the number of layers that printed in that area. I used that to figure out the exact line on which the print had stopped, and then reimported the model into Cura. I sunk the model below the printer bed until only the layers that failed to print were on the bed's surface. Then I sliced it using the same settings as the rest of the face. Below you can see the failed print (bottom right quarter), and the freshly printed patch (in my hand). Thankfully there was enough surface area making contact for the glue to hold it in place well.
Step 5: SmoothingI knew this stage was going to suck, but I didn't appreciate exactly how much it was going to suck. The process:
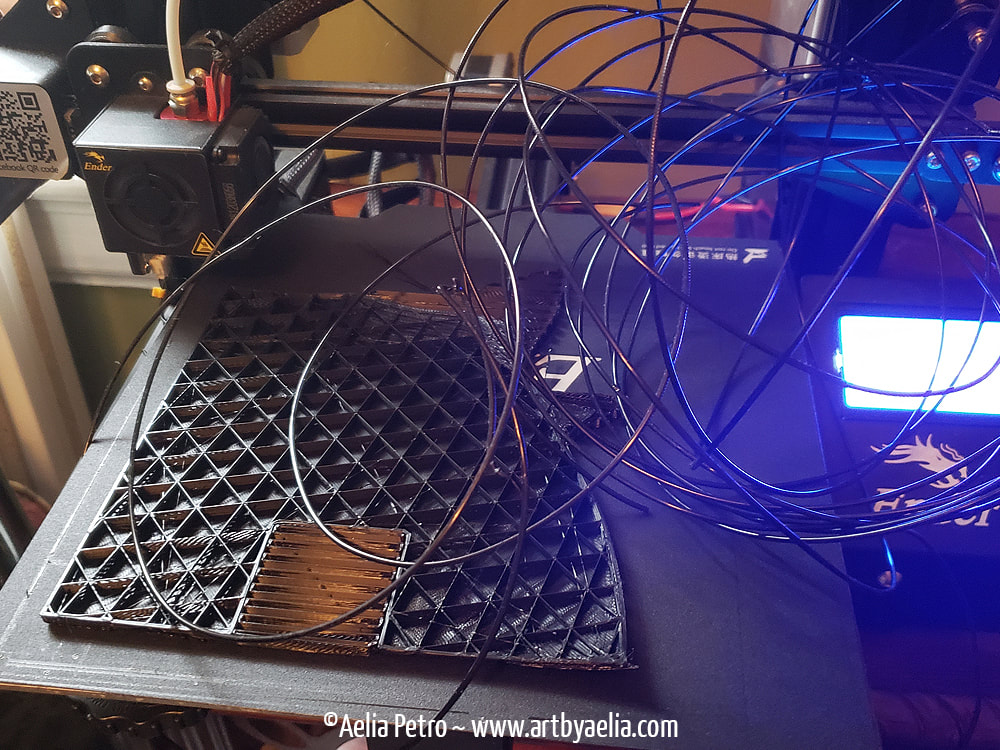
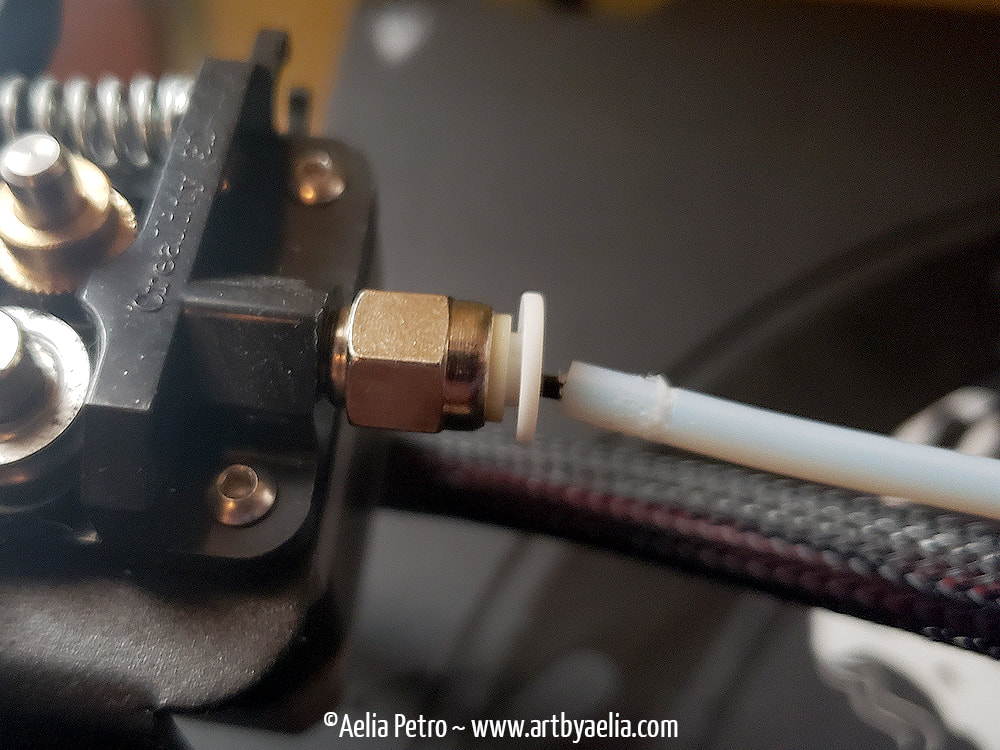
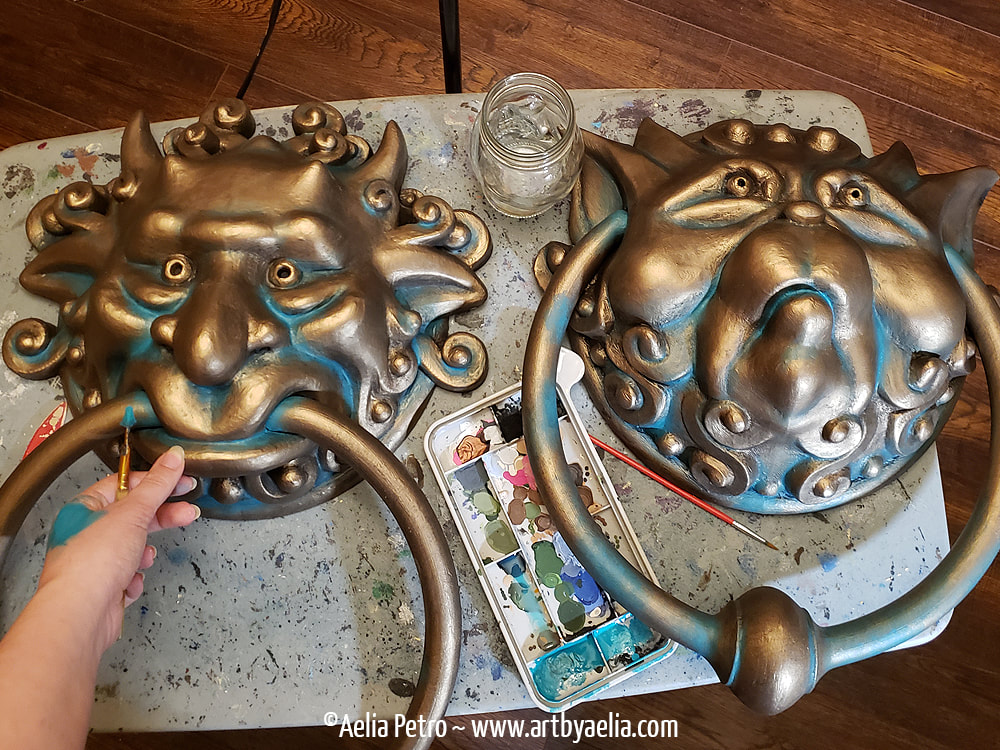
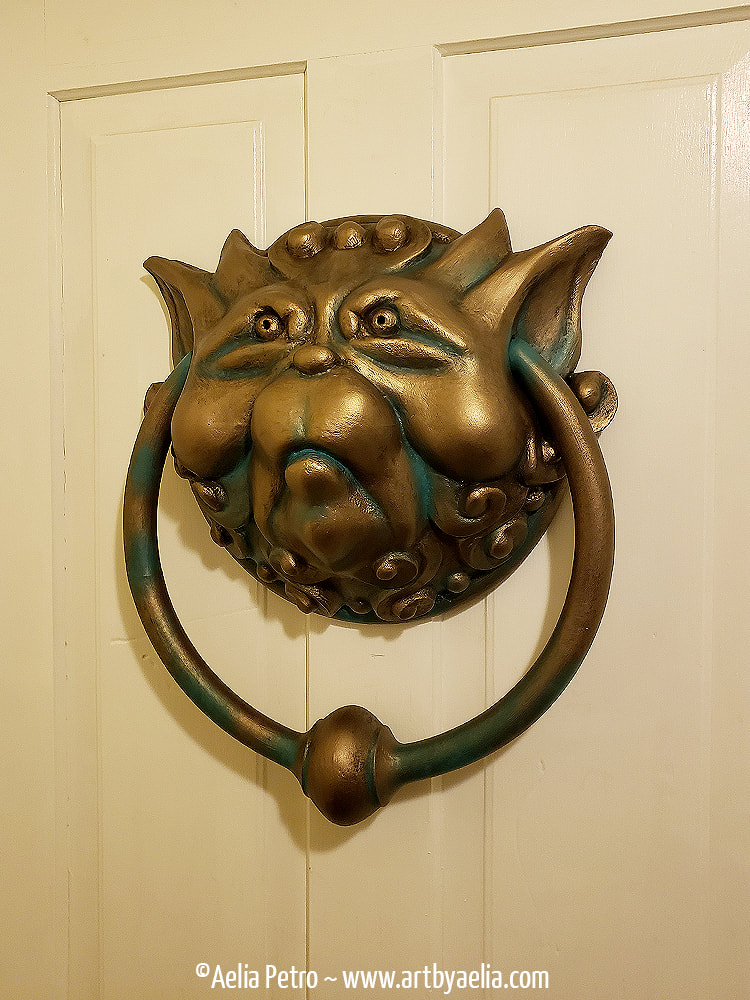
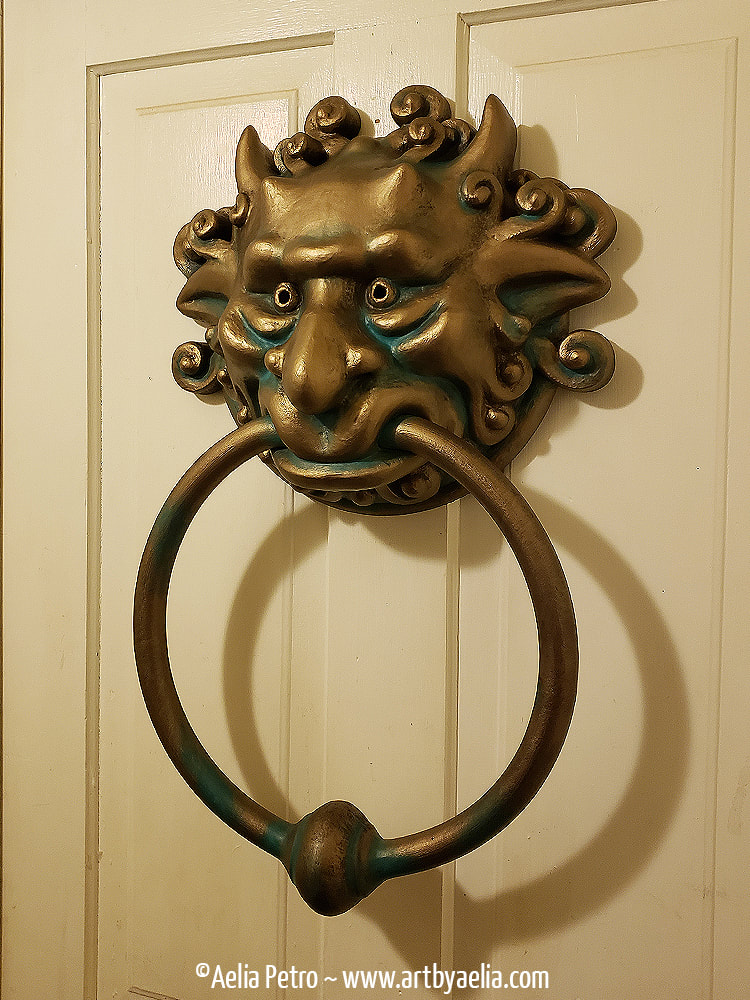
Step 6: Printing Leftie... Until Catastrophe StrikesWhile working on gluing/sanding/filling/priming the right knocker, the printer was already at work printing the left knocker. This is when catastrophe struck. I had hoped that running out of filament would be my biggest issue on this print. Nope! I set up one of the face pieces to print and left it alone for a few hours. When I checked in on the print all I could see was spaghetti! I've never seen this kind of error before. After a momentary panic, I examined the printer and discovered the source of the problem. See the innocent looking thing below? Doesn't look too bad... but in reality, it was enough to ruin an entire print. The coupler broke, or more accurately, the ring lock on the coupler broke. This meant that as the filament was pushed from the extruder into the bowden tube, the tube was pushed along with it. Normally the ring lock would keep the tube secured, but this one refused to hold. I fed the bowden tube back into the coupler, and tried again. This time I watched it like a hawk, and saw the bowden tube pop out after less than a minute of printing. A friend suggested that cutting the tube may be enough to fix the problem (if the ring lock had been ok, it was possible that the wear on the tube from the lock could have been the problem, and that cutting off the worn part of the tube could have fixed it), but no such luck. Fortunately there is a 3D printing store about 40 minutes away, so I didn't have to wait for replacement parts to ship. I got a new coupler, and was back in business! Once the coupler was fixed, the rest of the pieces printed without issue. Here you can see the pegs lined up for assembly. The second knocker was glued together in exactly the same way as the first. Step 7: Printing and Assembling the RingsNext I printed the rings. The 8 pieces here come together to form the ring on the right knocker. The rings were glued together the same way as the faces, using the peg/hole locking system. I didn't want to spend forever holding the pieces while the glue dried, so I broke out a bag of elastic bands and let them do it for me. I should note that I didn't glue the middle part of the rings together. Since the prints are ridged, they wouldn't be able to bend or flex for assembly. I didn't want to paint the faces with the rings attached (they were huge and unwieldy enough without the rings... and I also knew that as the rings bounced around during painting it would chip the paint), so I decided to do everything EXCEPT attaching the rings. That will be done later. Step 8: Smoothing Leftie and the RingsStep 9: Painting the Base ColourNext it was time to paint! I gave them a dark brown base colour, and then drybrushed them with bronze. I used a black wash to darken the crevasses and add some contrast. Then I drybrushed them with bronze again to brighten them up. I painted the rings at the same time, except for the middle bit which was yet to be glued. Step 10: Affixing the RingsI put the rings in place (one through Rightie's mouth, and one through Leftie's ears), inserted the guide pegs, and then glued the center part of the rings together. This left a rather large gap which then needed to be filled and sanded. Shown above prior to sanding. After sanding, I painted the same sequence of colours as I had done elsewhere so that the center matched the progress everywhere else. Below you can see the knockers assembled, including completed rings, prior to adding the patina. Step 11: Adding the PatinaThe Knockers in the movie were weathered and aged including a lovely patina. I thought of a hundred different complicated ways of doing this, and then rewatched the movie (for the 1000th time or so lol). On the bluray it was clear that the approach was fairly simple, so I decided to keep it that way. I used two acrylic paints, carefully applied to give the impression of patina. In the photo below you can see the work in progress. I used a relatively large brush, and dabbed off the excess paint on my hand. I always find it easier to gauge how much paint is on the brush using my hand. Step 12: HangingI incorporated a small indent on the back of the faces when I split the pieces apart in Meshmixer... but didn't really have a plan as to how they were going to hang. I wish I had spent more time figuring out how I planned to actually get them hung up before printing. Leaving it till the end was a mistake. My long-suffering boyfriend was kind enough to help me make sense of the mess I'd made. Because the faces have only 10% infill, they couldn't have hooks drilled into them for picture hanging hardware (it wouldn't be secure at all, and would likely break and fall). The little nook I carved out of the back of the model wasn't large enough to fit most hangers. Ultimately we wound up finding some L shaped screws, which were screwed into the door. Some Macgyver shenanigans with a metal plate and some dremelled holes ultimately got the job done. The backs resemble a crime scene, but I don't mind since they're exactly where I want them, and I'll hopefully never see the back again lol That's All Folks!Cost BreakdownFinancial costs:
Credits
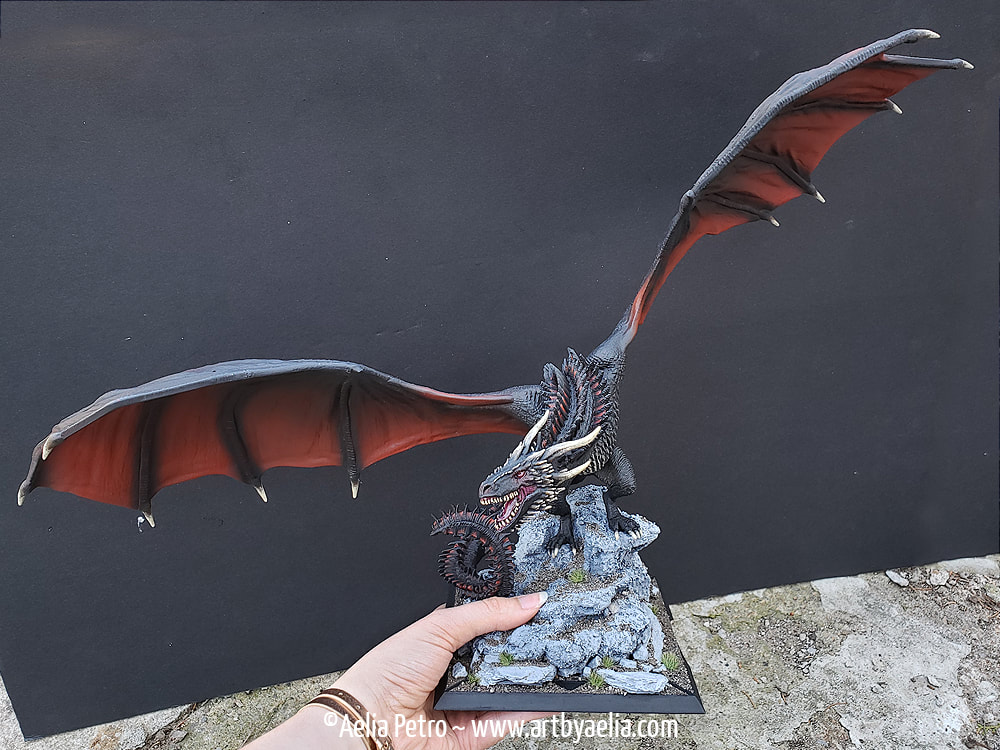
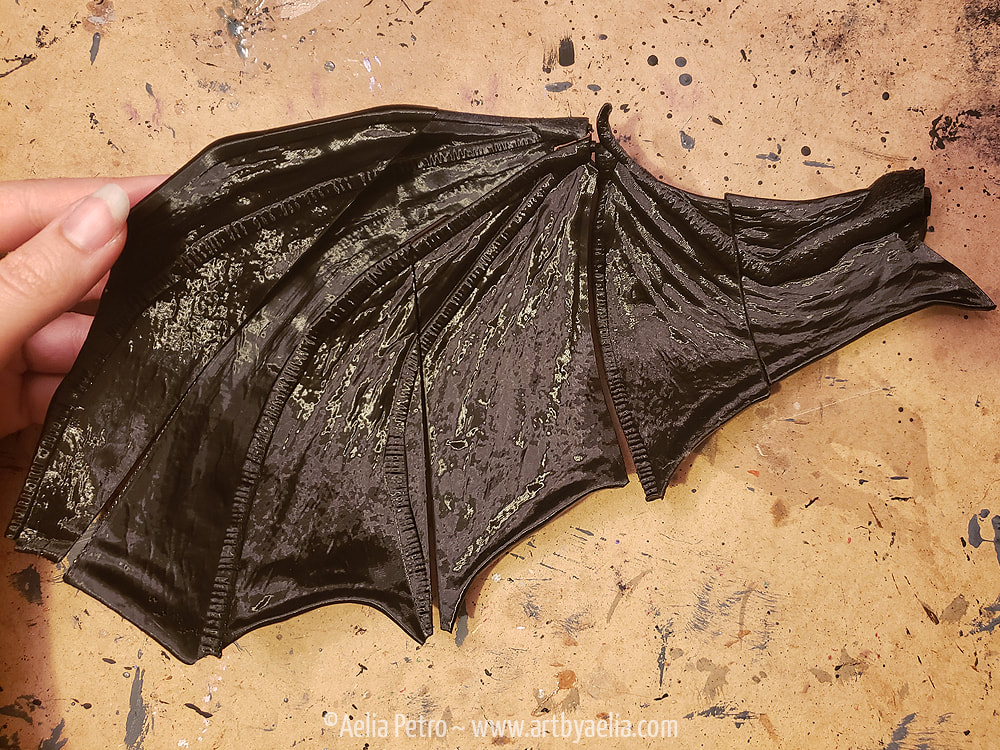
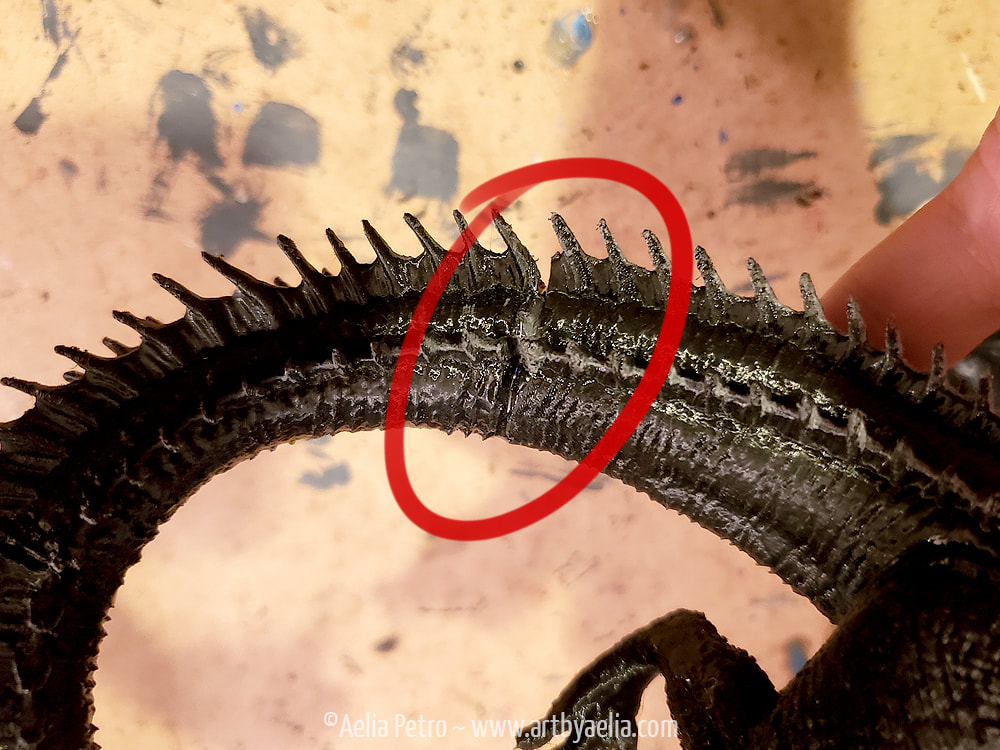
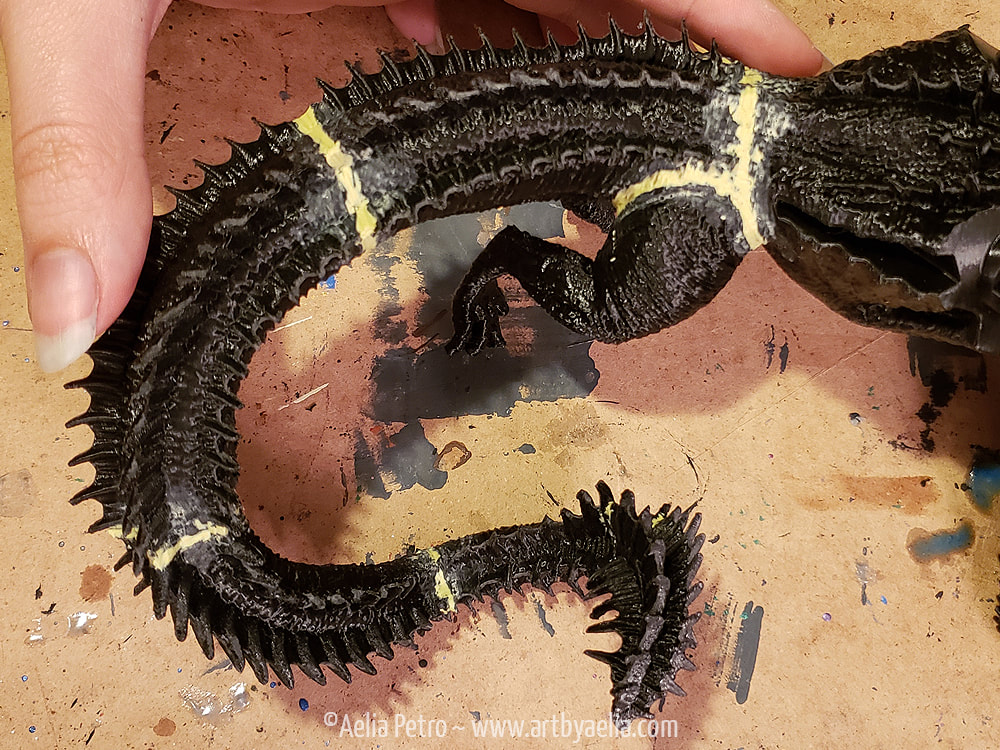
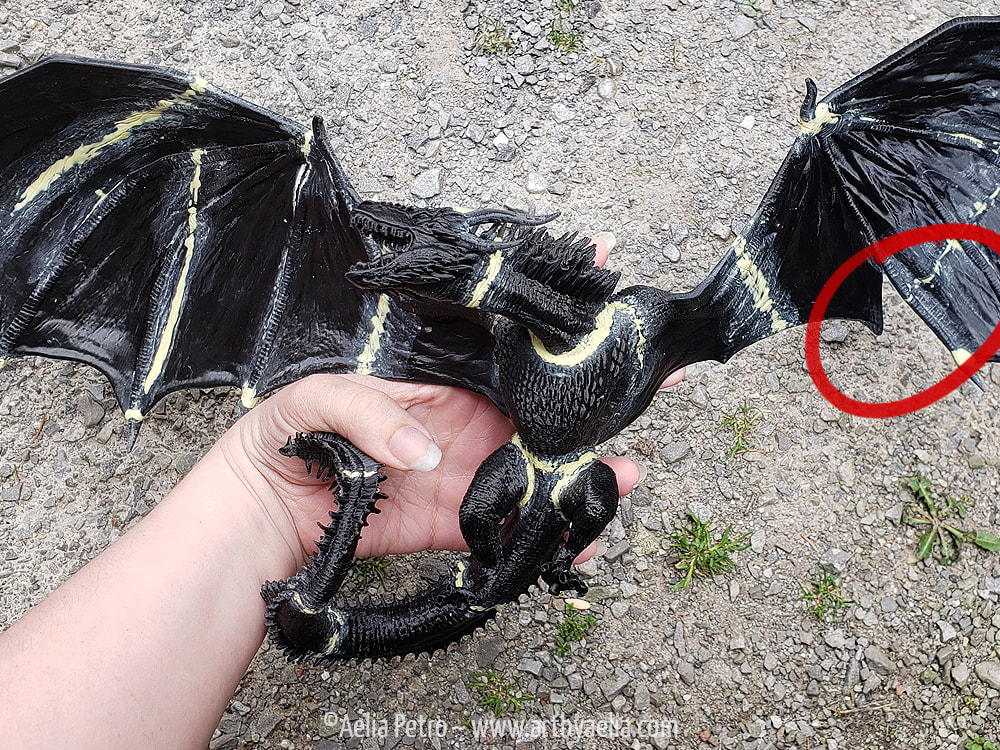
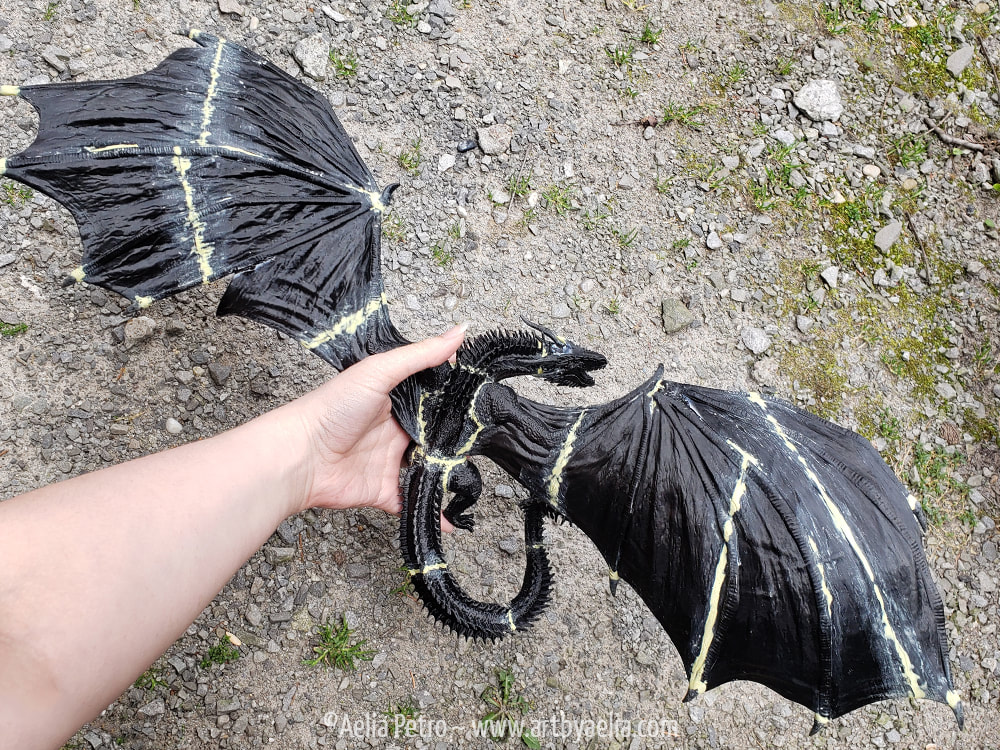
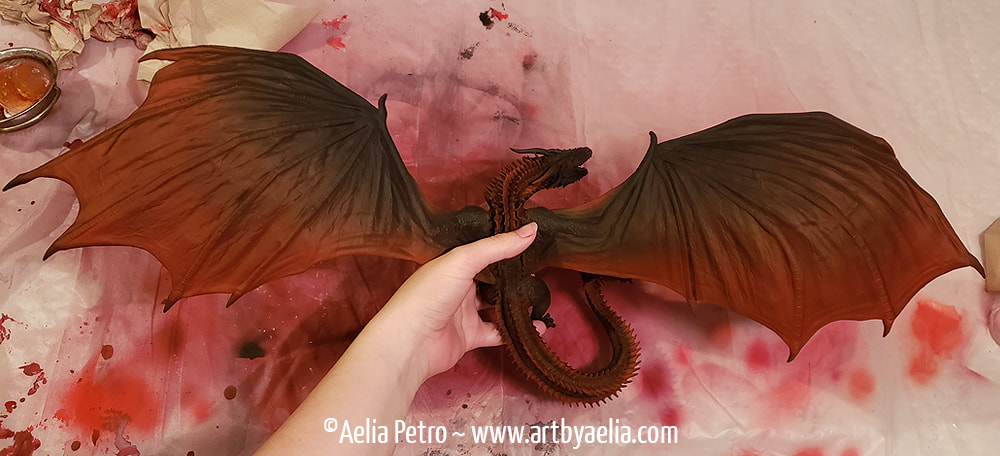
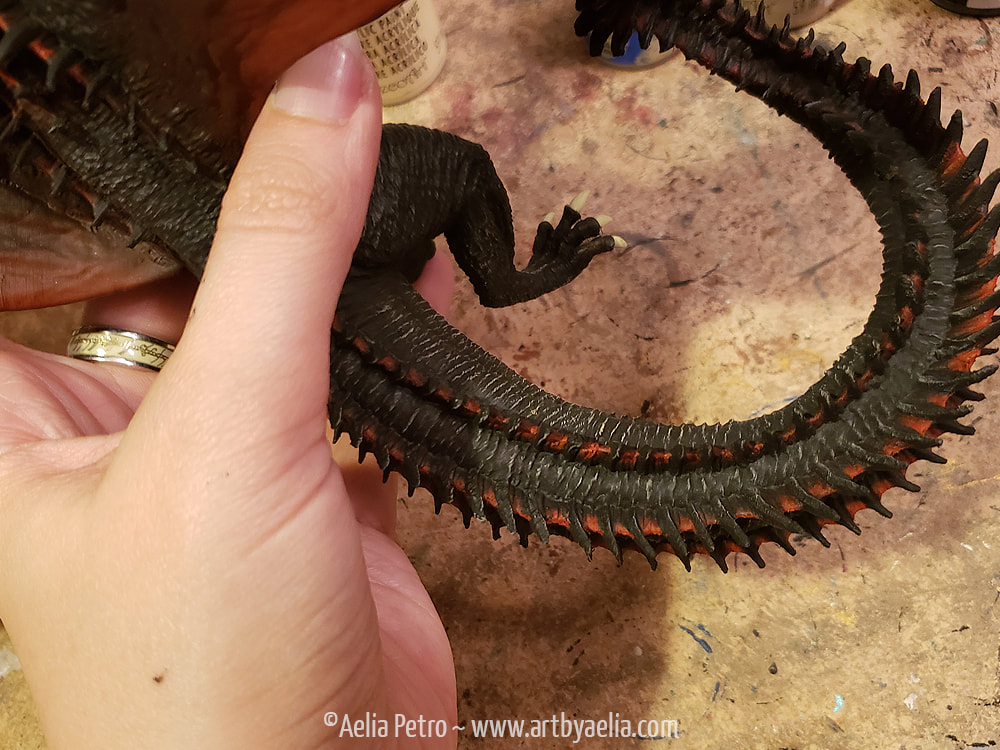
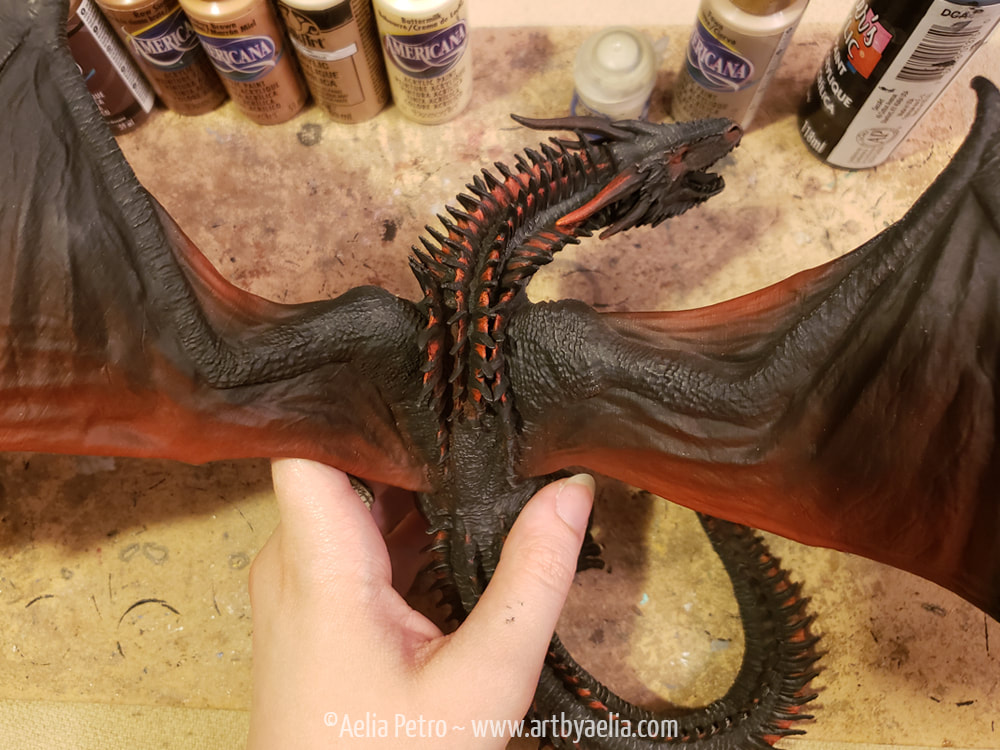
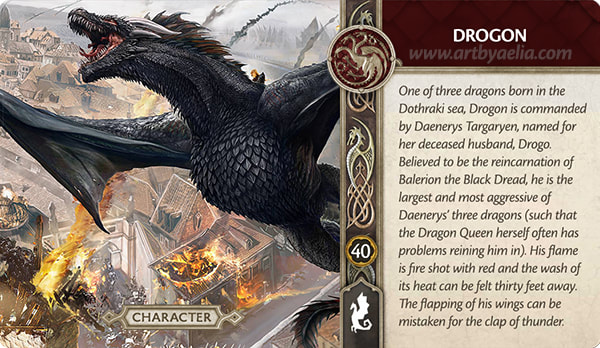
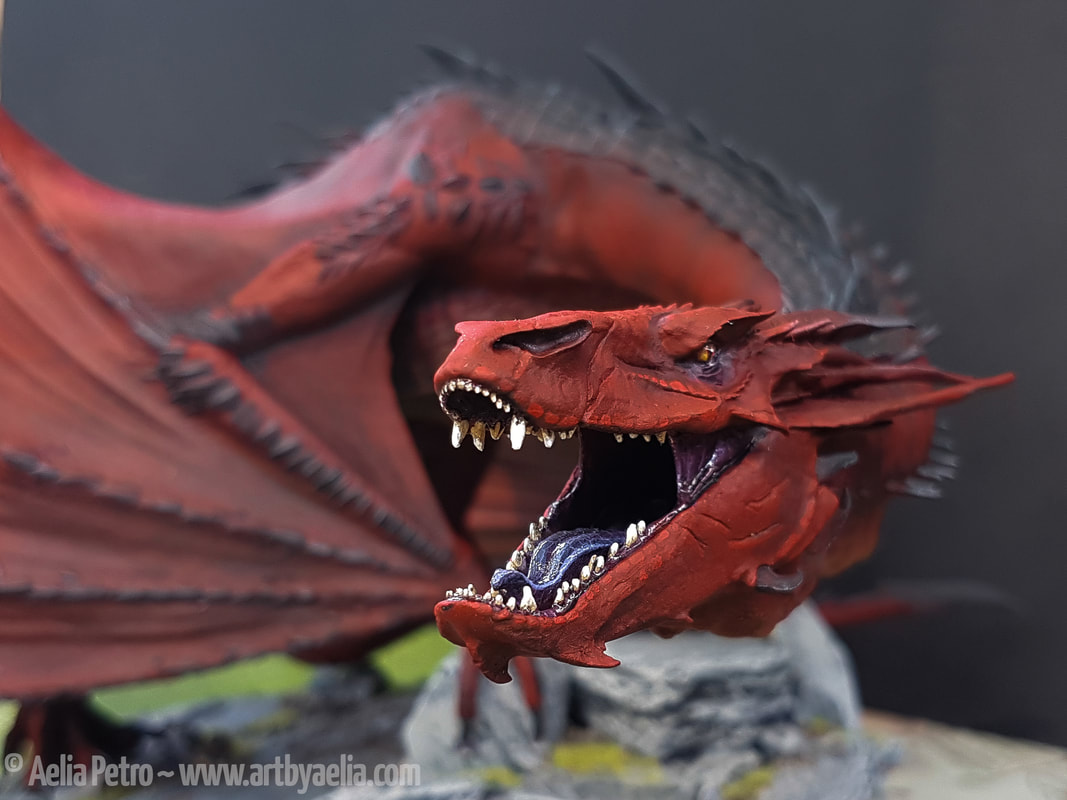
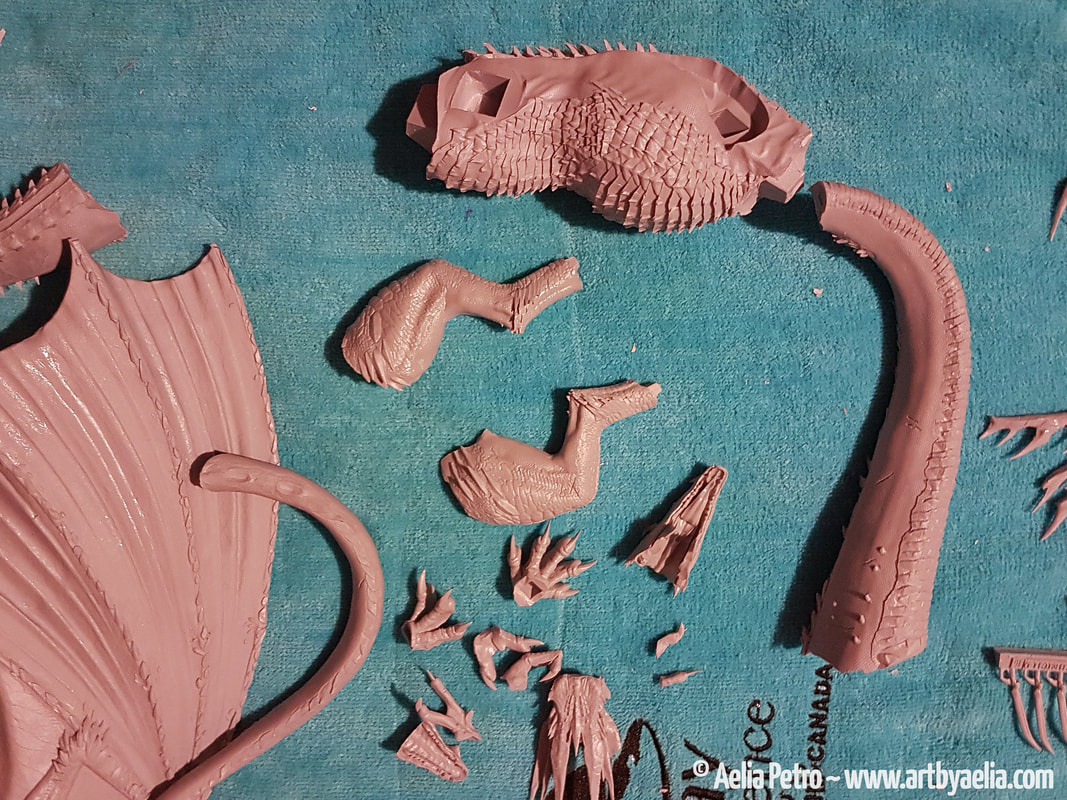
Original 3D files credited to OnyxDigitalStudios on Cults3D Edited 3D files sculpted by Aelia Petro 3D printing, post-processing and painting by Aelia Petro This project is completely not-for-profit. It is entirely for fun. As the title implies, I decided to print myself a Drogon for the CMON Song of Ice and Fire Miniatures Game! I absolutely love the game, but as of yet, there are no dragons. I got a hankering to rectify that situation and took to the interwebs to find a 3D model. I was not disappointed! gambody.com had an exquisite 3D model, sculpted by Xander3D. I bit the bullet, and purchased the stl files, despite being a total and complete 3D printing noob. This was going to be a challenge of epic proportions.
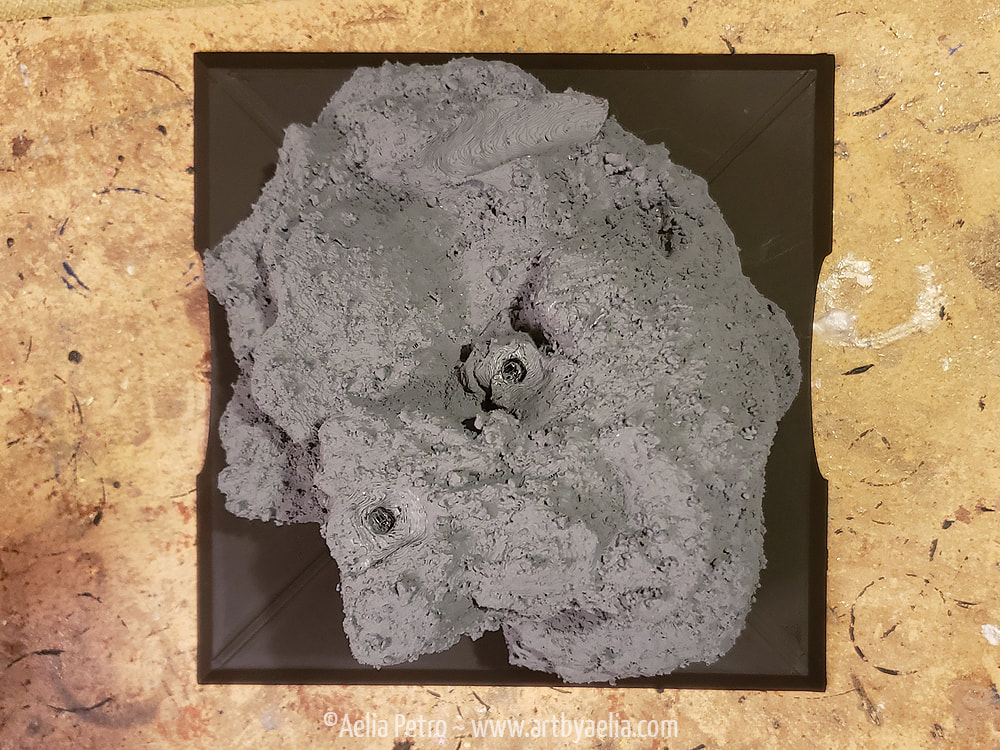
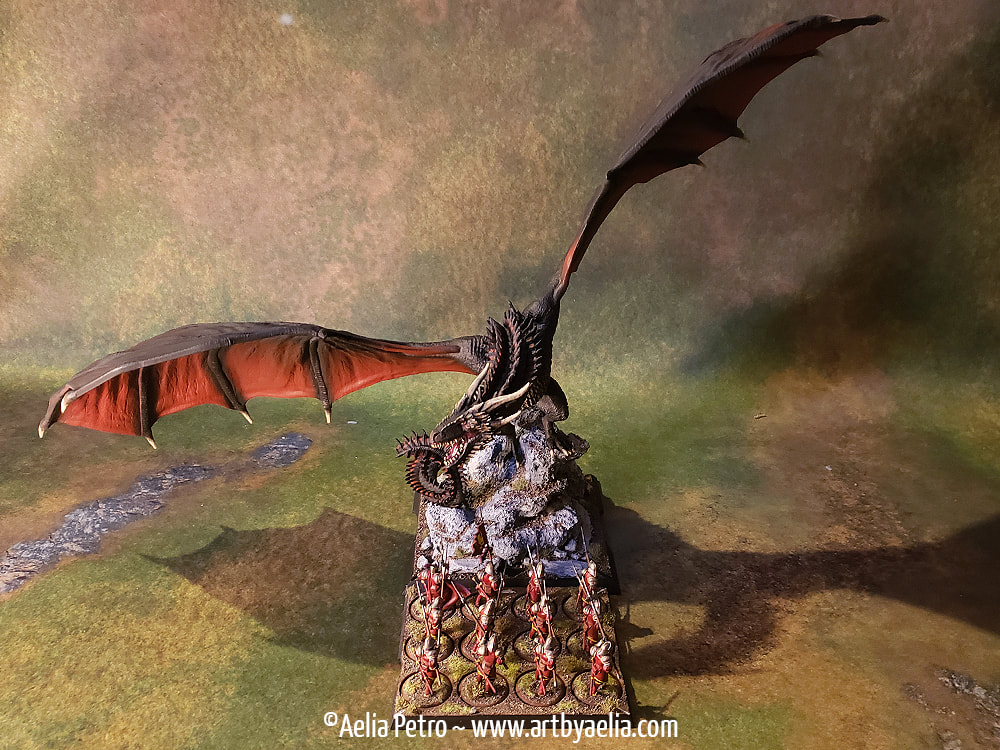
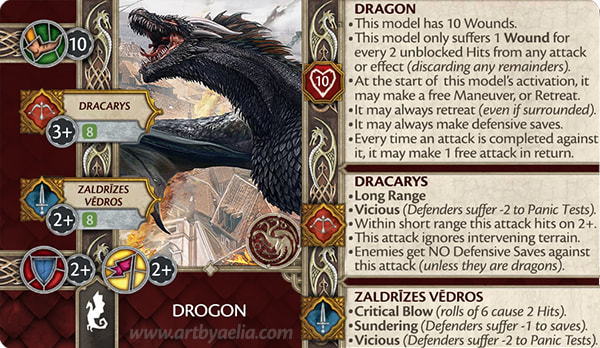
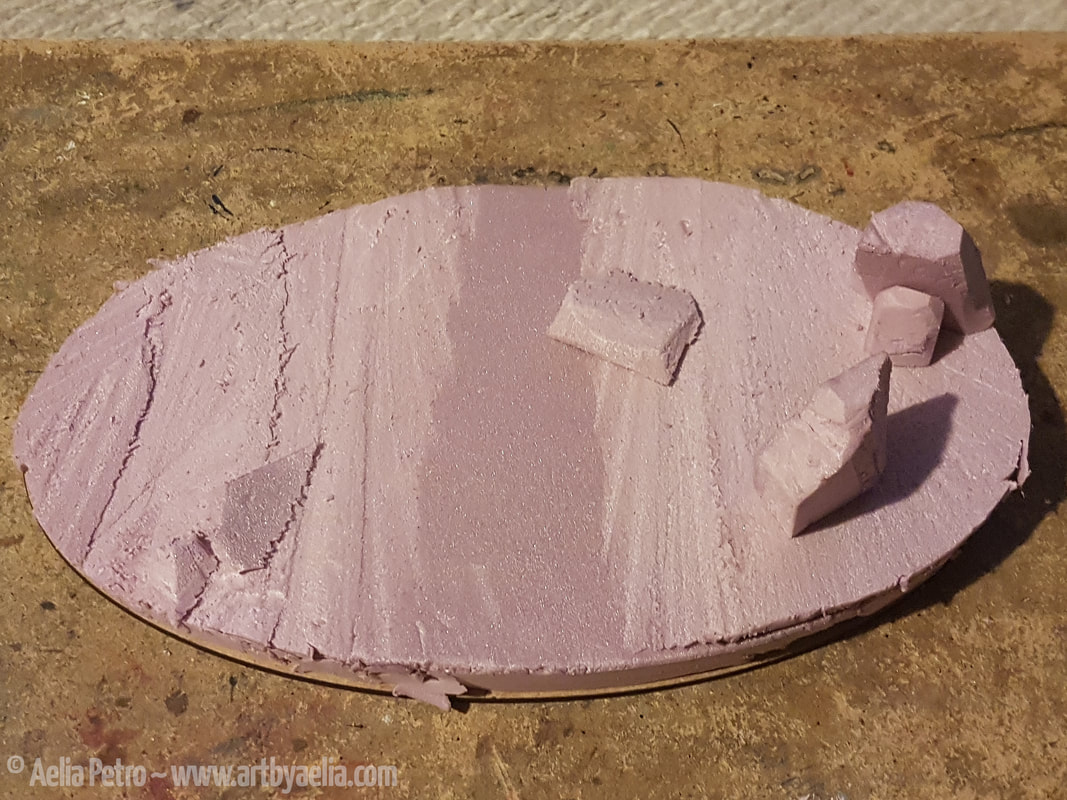
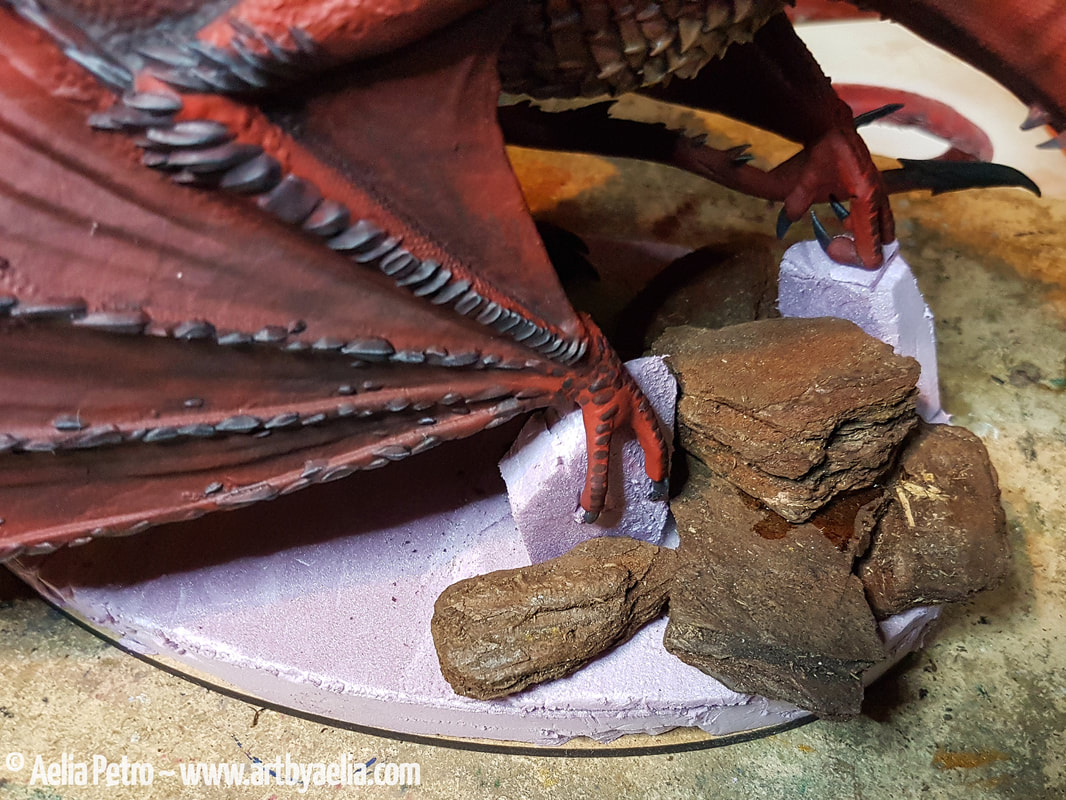
To wrap it all up, I built up the base further with some stones and rocks. I then drybrushed it with different shades of grey, and then added some sand in assorted colours to break it up. I covered the remaining exposed surface of the base in the same sand I use to base my armies. I glued Drogon to his base, and then gave the whole thing a good coat of Testos Dullcote, my favourite varnish for all hobby needs. I finished the base with some small tufts of grass. I would have added some flock as well, but didn't want to commit this theming to either warm or cold climates (since in the show he was in both environments). I included Roose Bolton in one of the photos to give you a sense of scale with the other models. His finished size is 15" tall, a whopping 24" from wing to wing, and around 11" from front to back. Drogon, pictured above taking on some Lannister Halberdiers! Because I'm crazy, just building this model was not good enough. I wanted to play with it! So I set out to make in-game rules for him. In consultation with my wonderful boyfriend/arch-nemesis (he's a Lannister player... enough said lol), I wrote up a set of stats and special rules. He is 40 points, the cost of an average army. Seems fair lol... He hasn't been fully play-tested yet, I hope to do so in the days to come. I expect his rule set to change and evolve as he gets play, the goal being as balanced a profile as possible. To further demonstrate my obsession with this game, I built a custom Unit Card Template and formatted his rules properly. I even hunted down the same font used on the real cards. Had to play a little fast and loose with the spacing of the text because his rules required so much explanation. Now for the fun part... WE PLAY! :D Credits
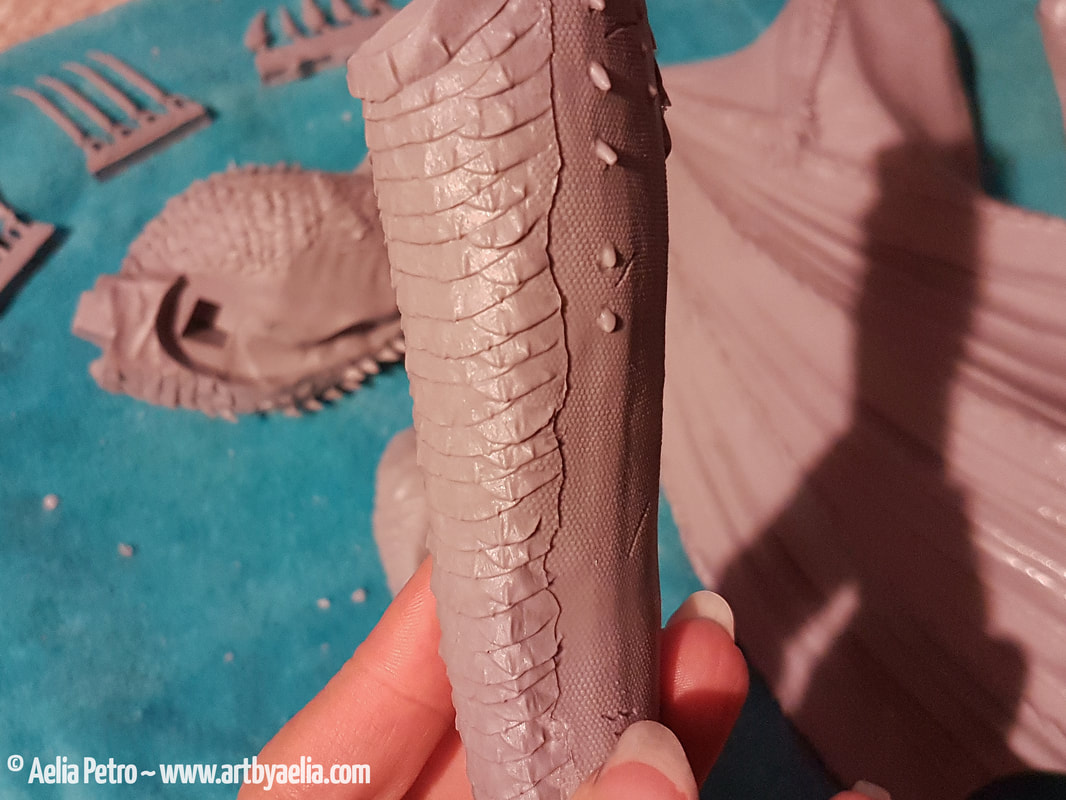
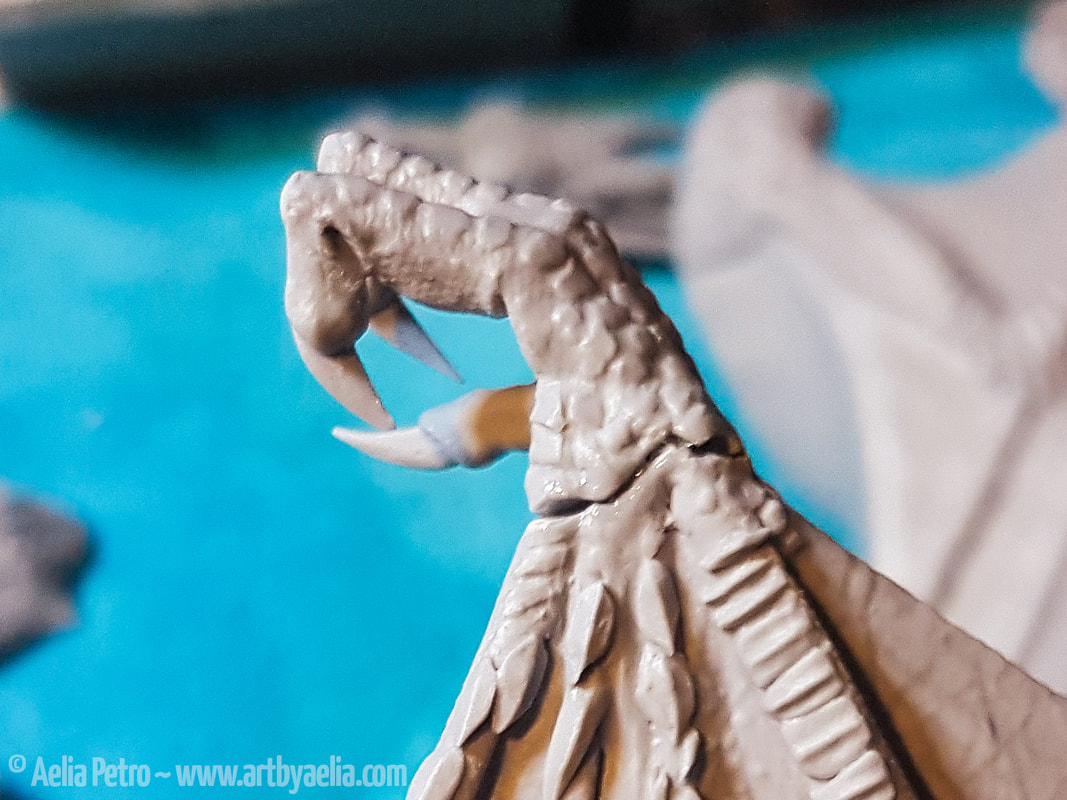
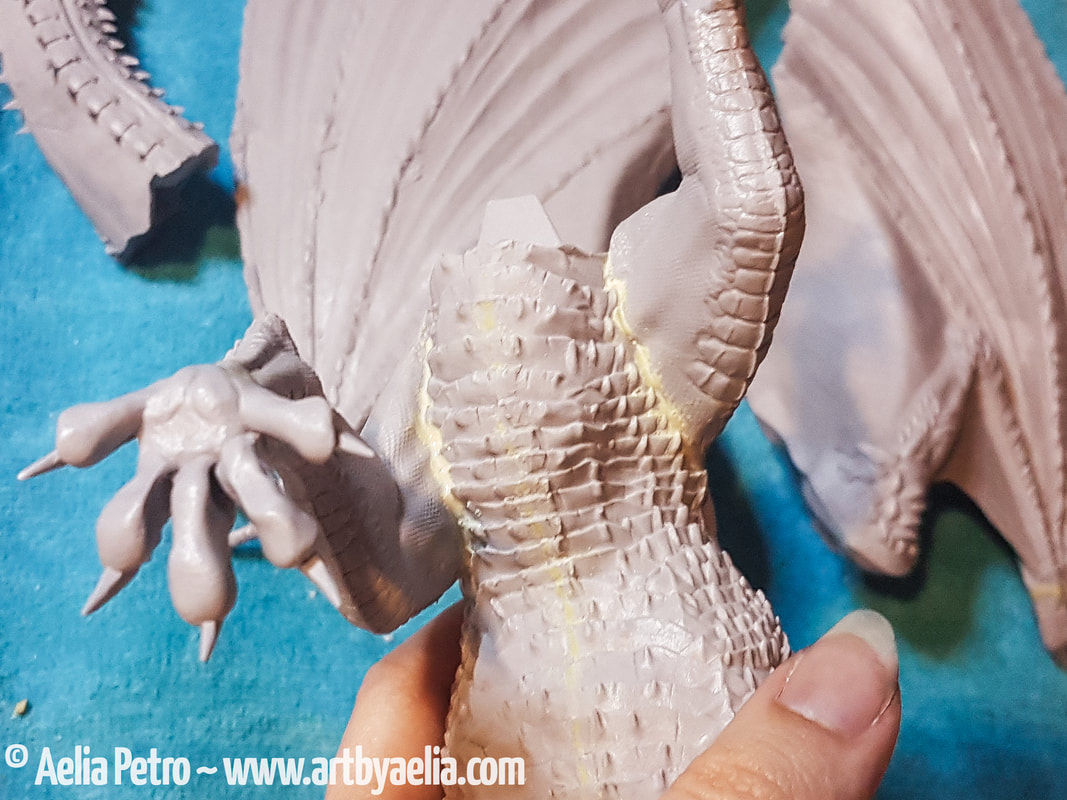
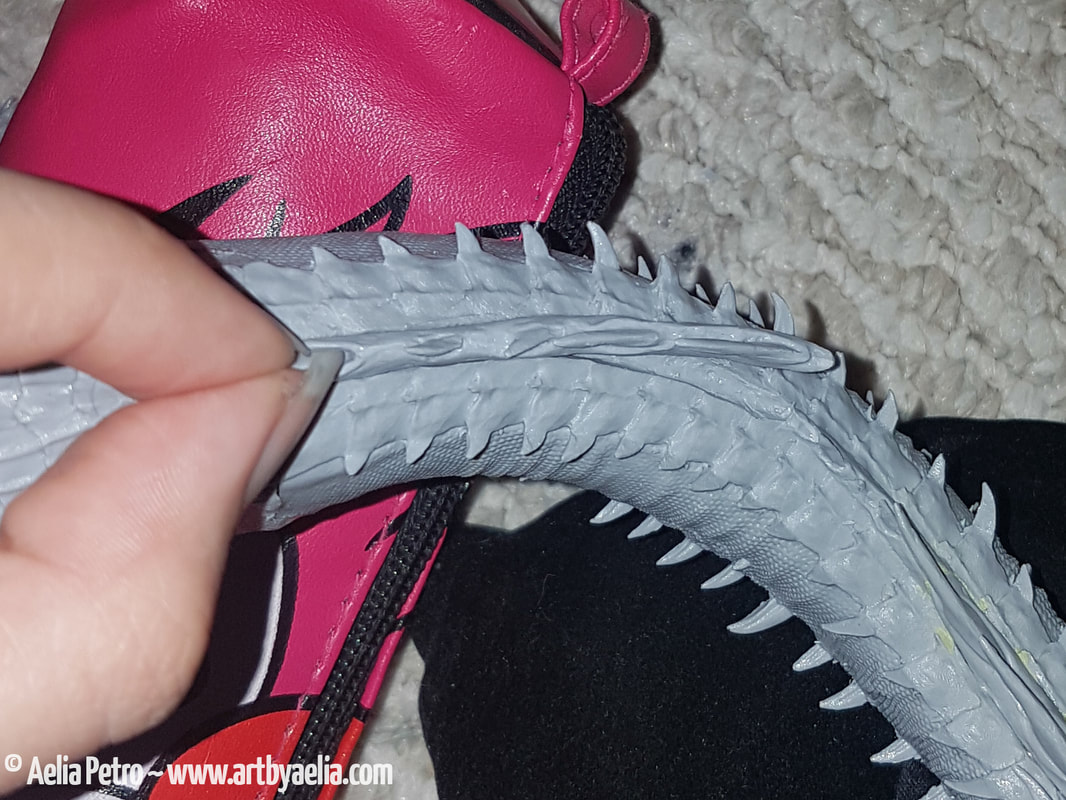
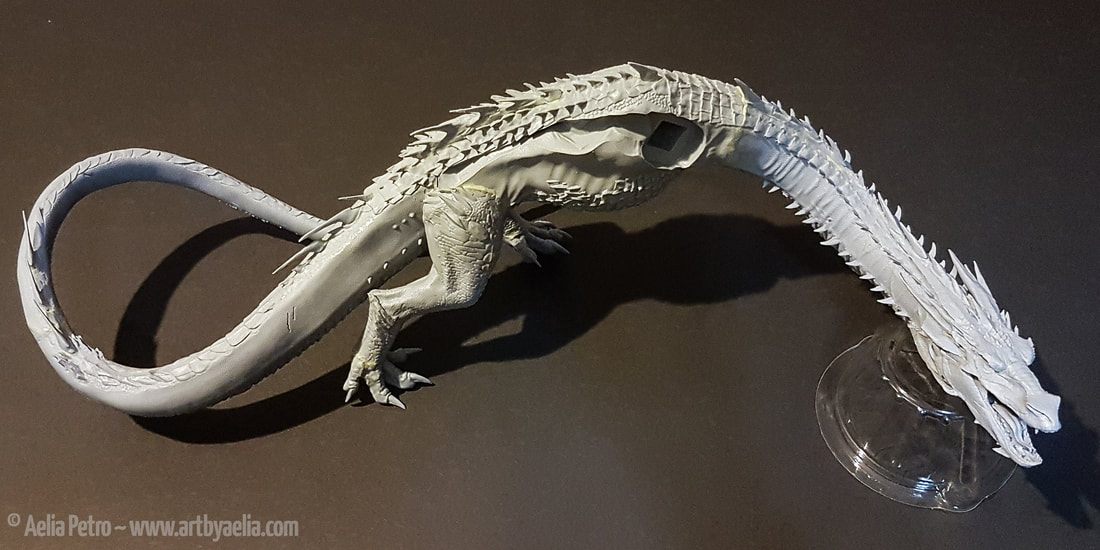
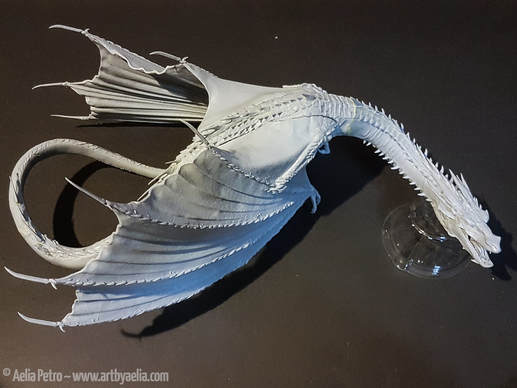
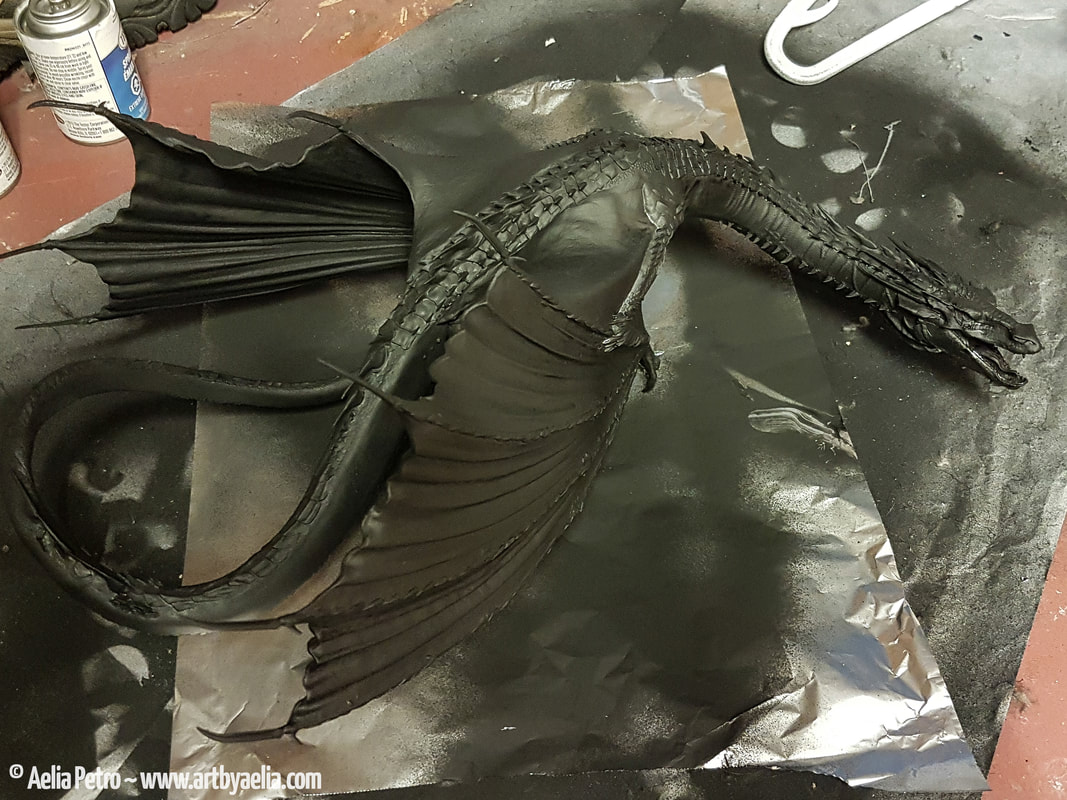
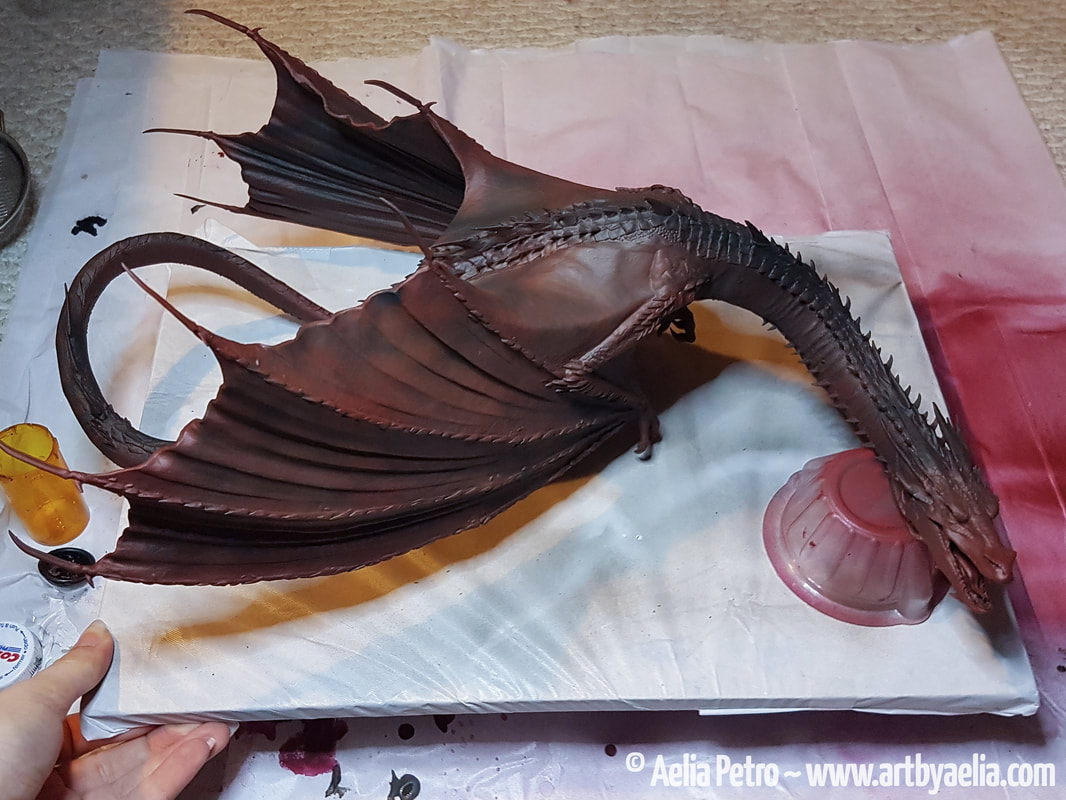
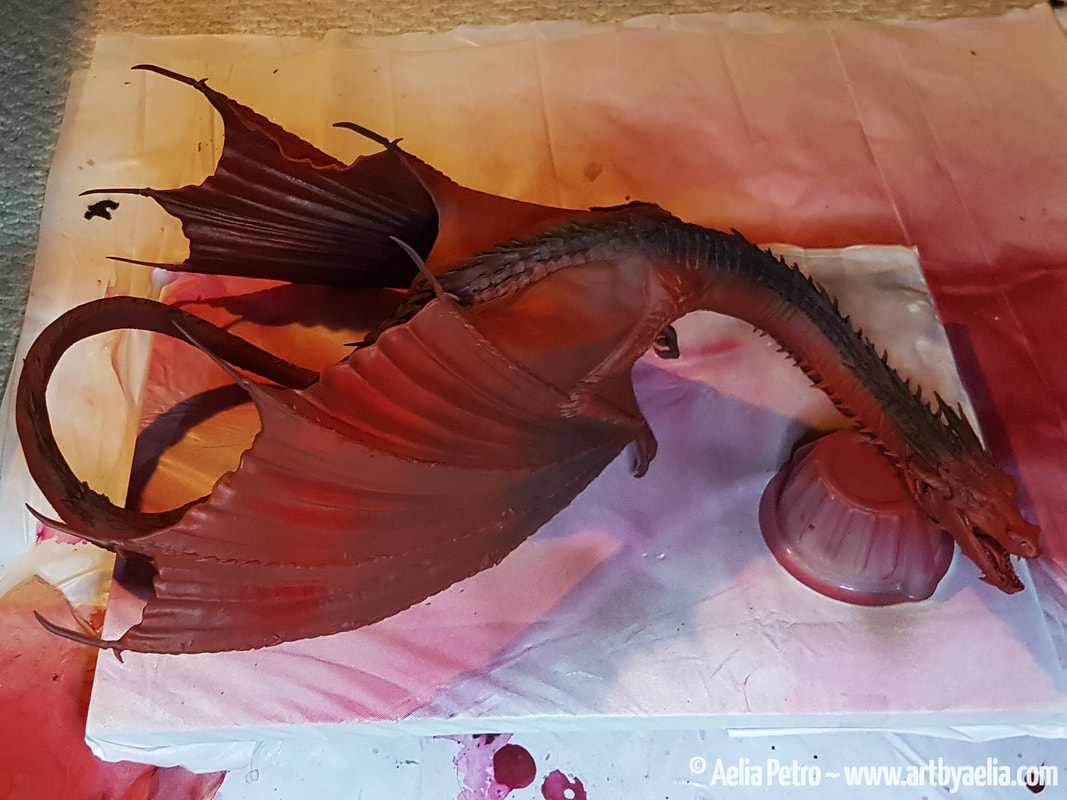
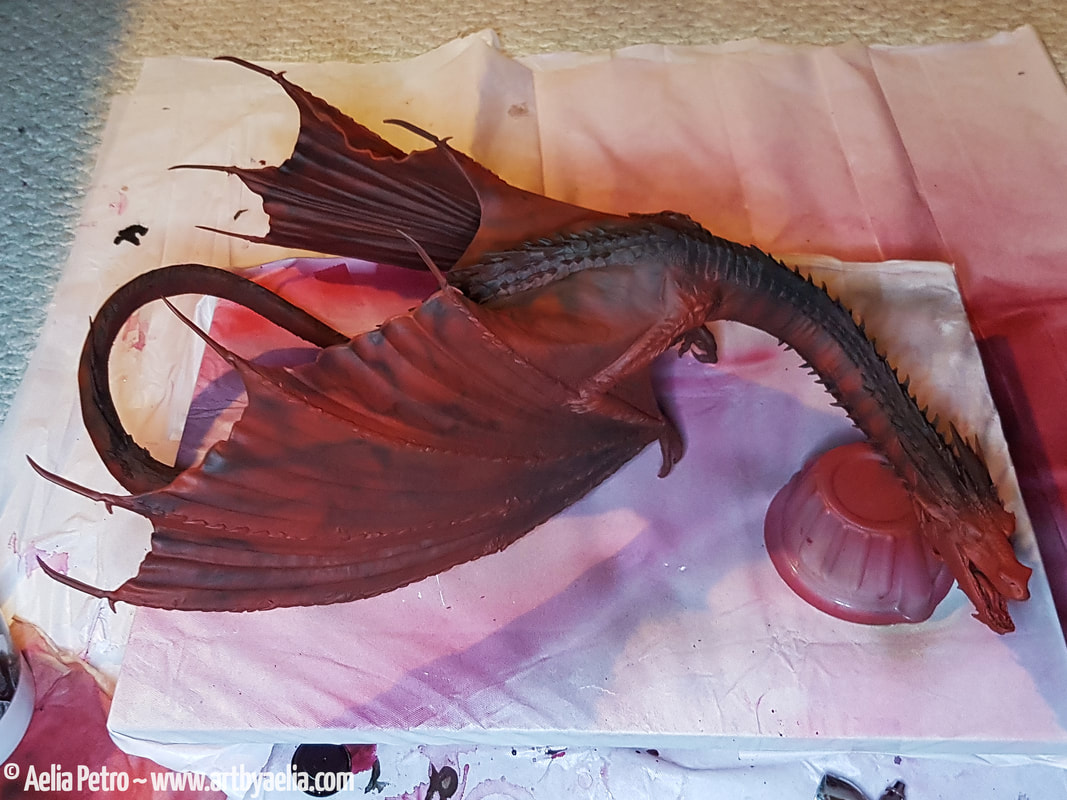
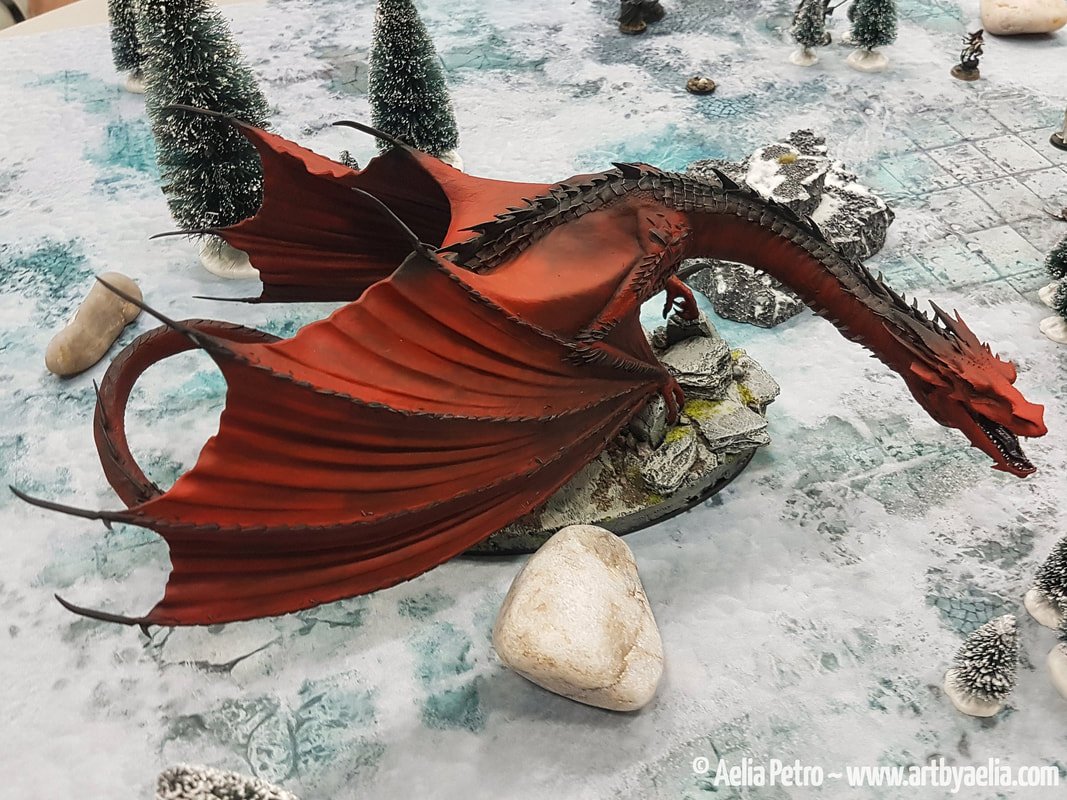
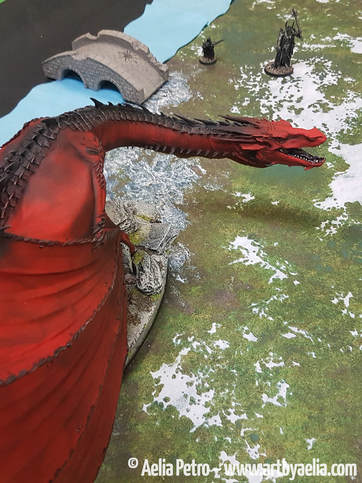
3D Model - Xander3D on Gambody.com 3D printing, model building, painting and finishing - Aelia Petro Digital Painting of Drogon - ertacaltinoz on deviantart. Celtic Dragon Art for the borders - Kevin Dyer. Dragon stats, rules, and profile by Aelia Petro A Song of Ice and Fire Miniatures Game by CMON This project is completely not-for-profit. It is entirely for fun. I finally did it... I assembled and painted Smaug. I've had the model for months, but have been too intimidated to give it a go. With a 1000 point all-hero tournament coming up, my ever helpful boyfriend suggested that I break out this beastie. I immediately loved the idea, and hated the fact that it would force me to work so quickly (for me, that is a VERY short timeline). Probably for the best, since otherwise this model probably would have been completed in spurts over the course of months lol... and thus, with 16 days to go before the event, I got to work! FYI.. Games Workshop states on their website: "This miniature is not recommended for children under the age of 14. Advanced modelling skills are required". This is no joke. I've been painting models since I was 2, and modelling for decades, and this guy was a serious challenge. If you want to do him justice, there can be no short cuts, and he is not beginner friendly. You'll need a shape blade in your x-acto, a couple of solid glues, a metric crap-load of filler (Milliput or Green Stuff, or what-have-you), and a great deal of patience. He will surprise you. He will test you. He will break. You will break. But with perseverance, you will wind up with an unbelievably gorgeous centerpiece to your collection.
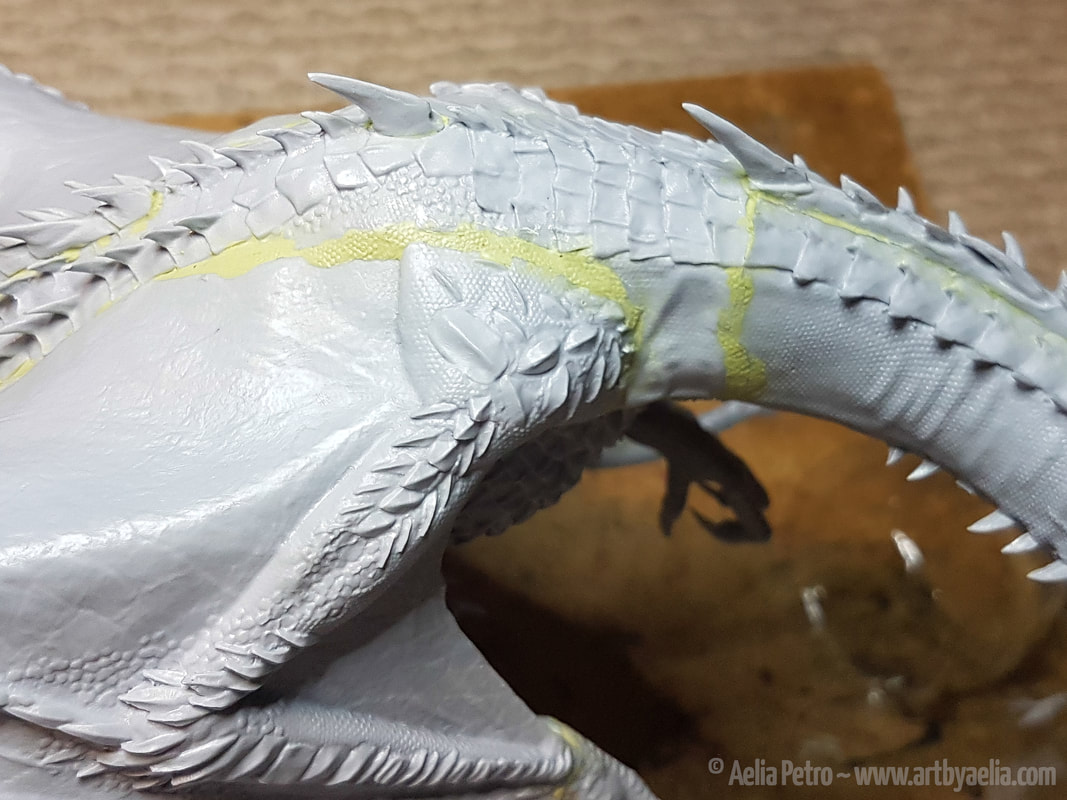
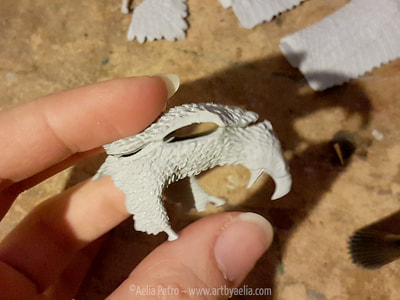
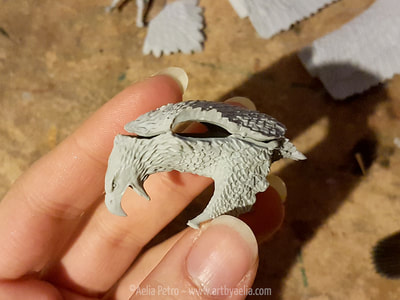
Next I assembled the head and filled the gaps in those pieces. I followed by gluing the head to the neck, and filling the gaps that followed. Then the neck and tail were attached to the body. Gaps aplenty. The texture stamp I created was helpful for maintaining the scale pattern in the newly sculpted areas.
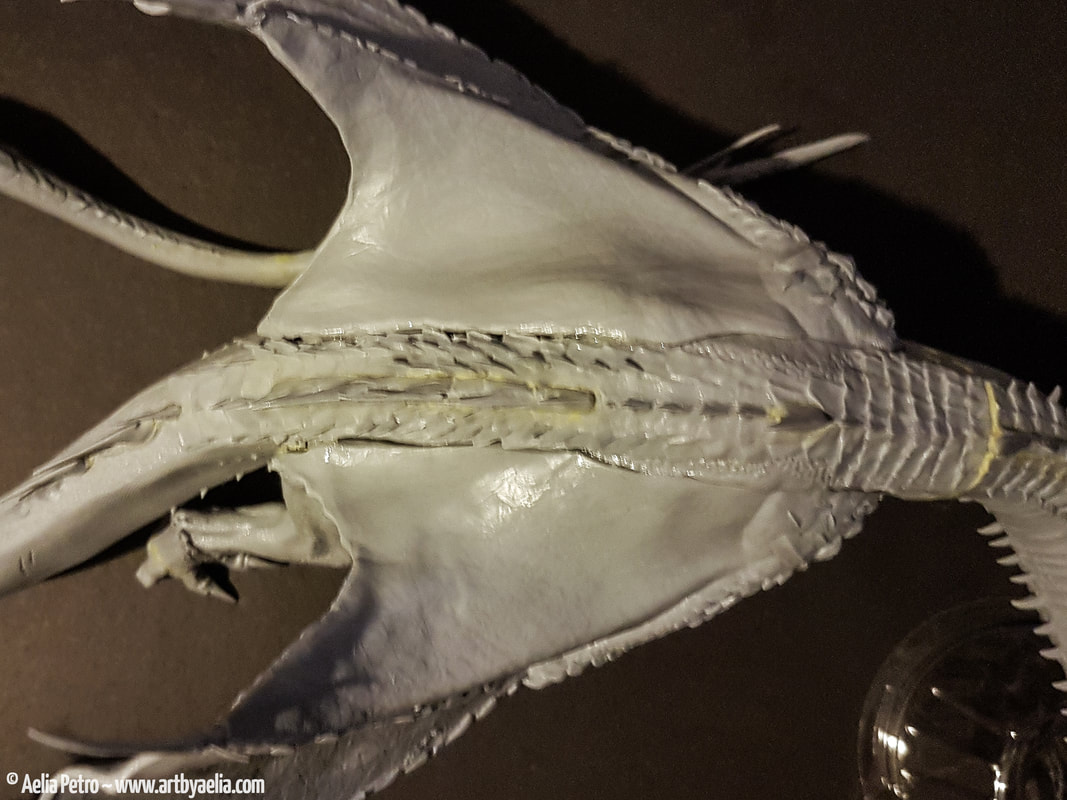
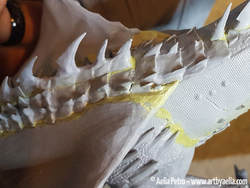 More repairs and texture matching in progress. There was a massive space between the end of the wing and the side of Smaug's body, which had to be bridged.
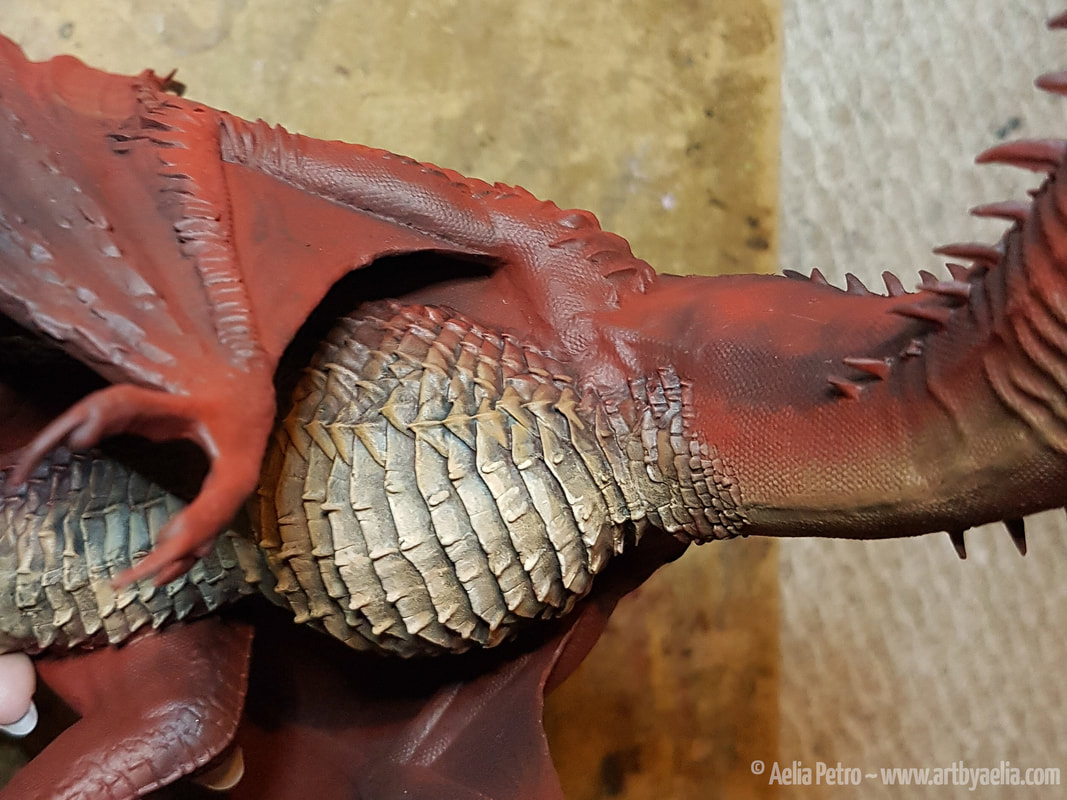
Belly scales were next, and the pressure was on! I wasn't expecting to be so happy with the outcome of the air brushing, so getting the belly to a place I was happy with was difficult. I used a combination of airbrushing, dry-brushing, washes, and edge highlights to get to this point. Several shades of tan and brown were blended using dry-brushing, blending into the red of the body. Both Agrax and Nuln washes came in handy.
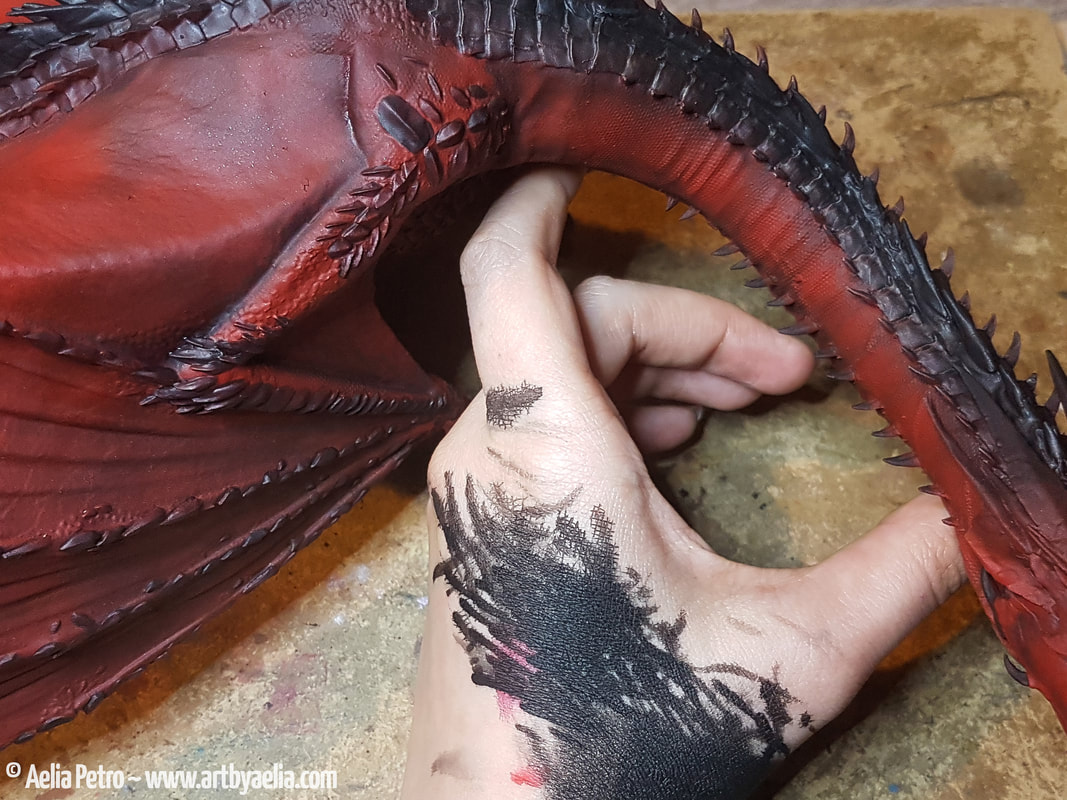
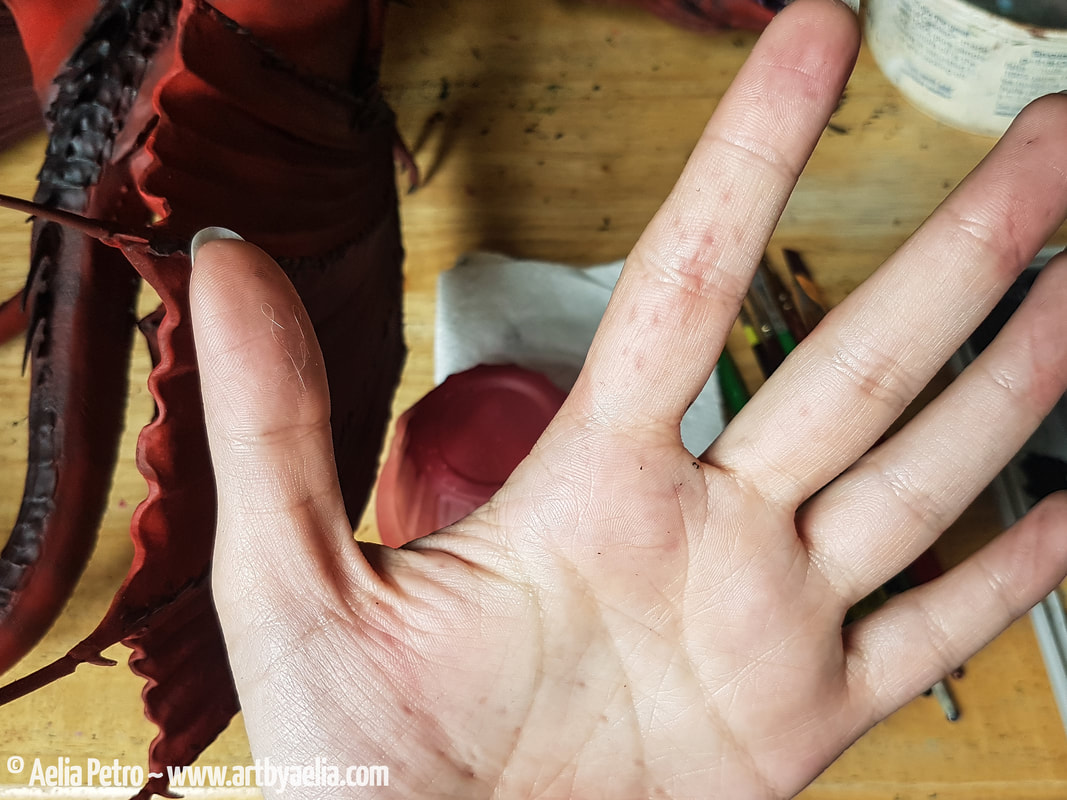
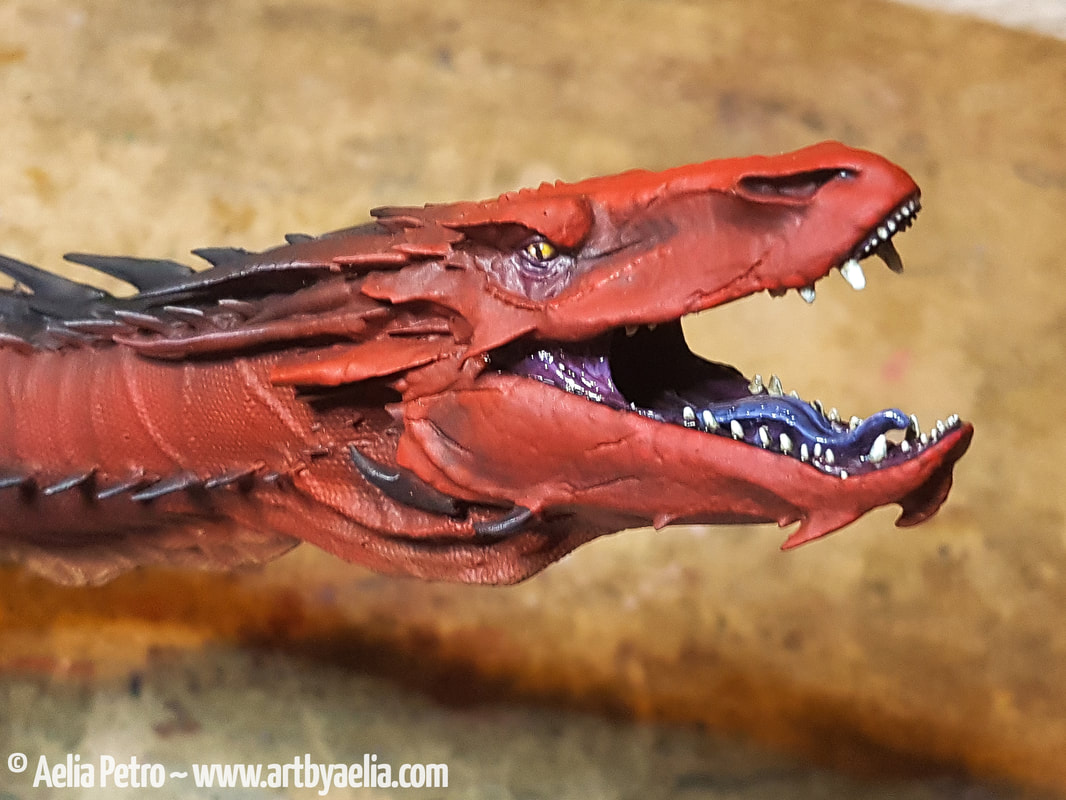
Holding Smaug proved to be one of the biggest challenges. I didn't want to paint in pieces and assemble afterwards because matching the blends to fill the gaps would have been impossible. It would have made some things a great deal easier however... getting a grip on him to access different parts was difficult and sometimes painful. You can see some of the little dents in my hand from his spines above. The mouth was a lot of fun to paint, I used a variety of shades of purple for the tongue and gums. The teeth were first painted brown, then a tan, then white, so that they looked suitably aged and shaded. I picked out a lot of face scales by hand with a liner brush, but it's difficult to see them in the photo. The entire dragon was varnished with Testor's Dullcote (my personal favourite varnish), and then I glossed the eyes and mouth to make him a little more life-like.
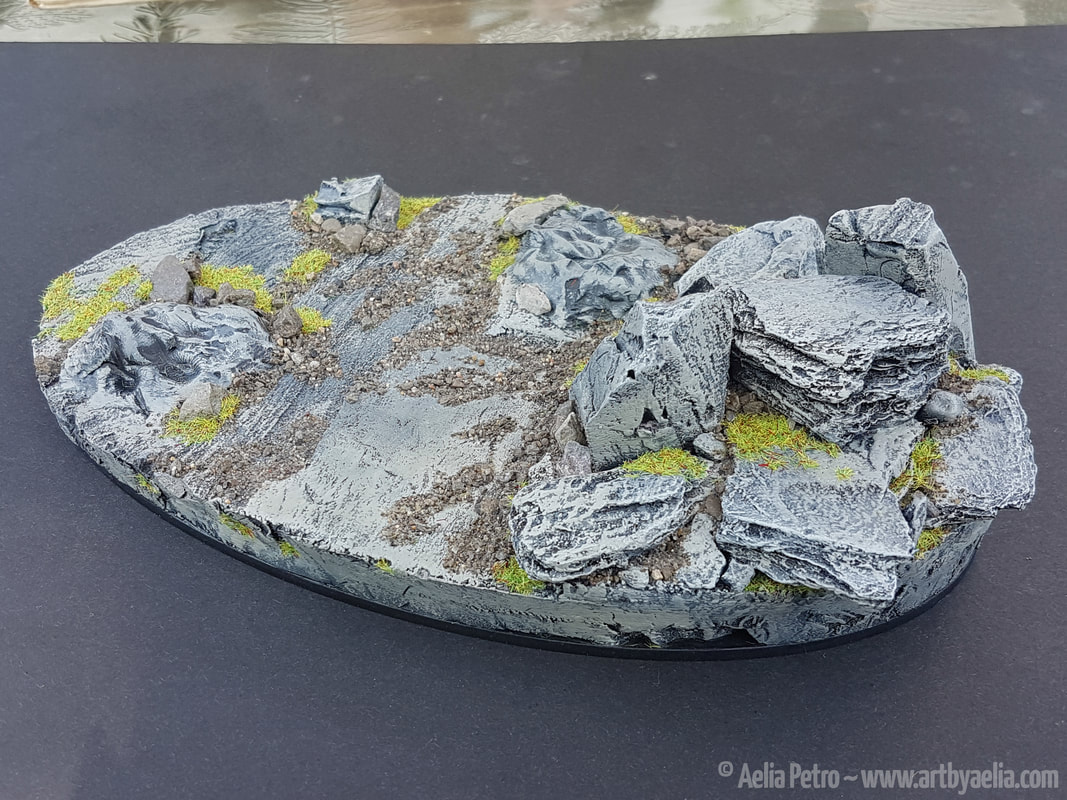
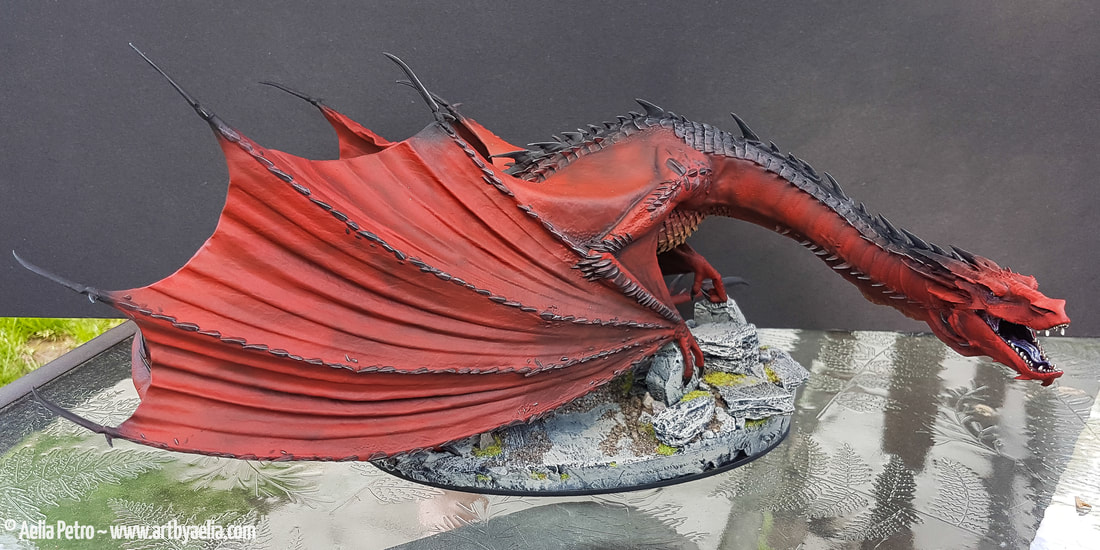
The finished base! I painted in several shades of grey, and then added some natural sand and stones to vary it up. I also added flock. Here's the finished Smaug on his custom base!
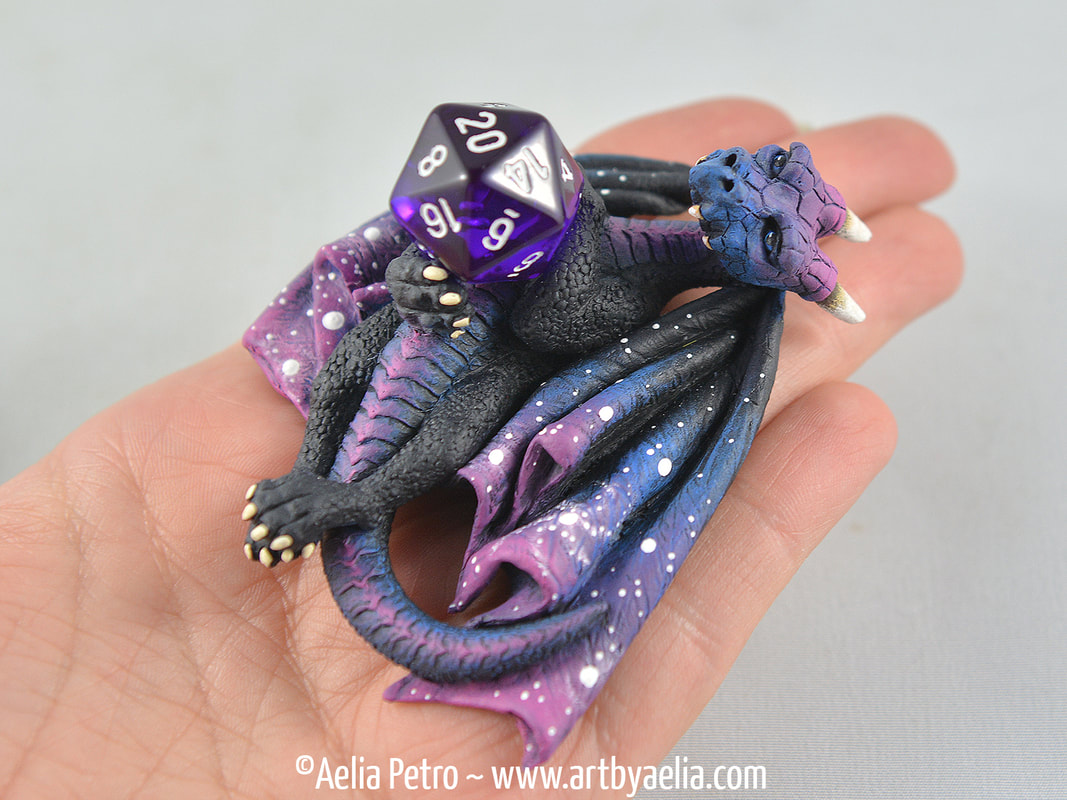
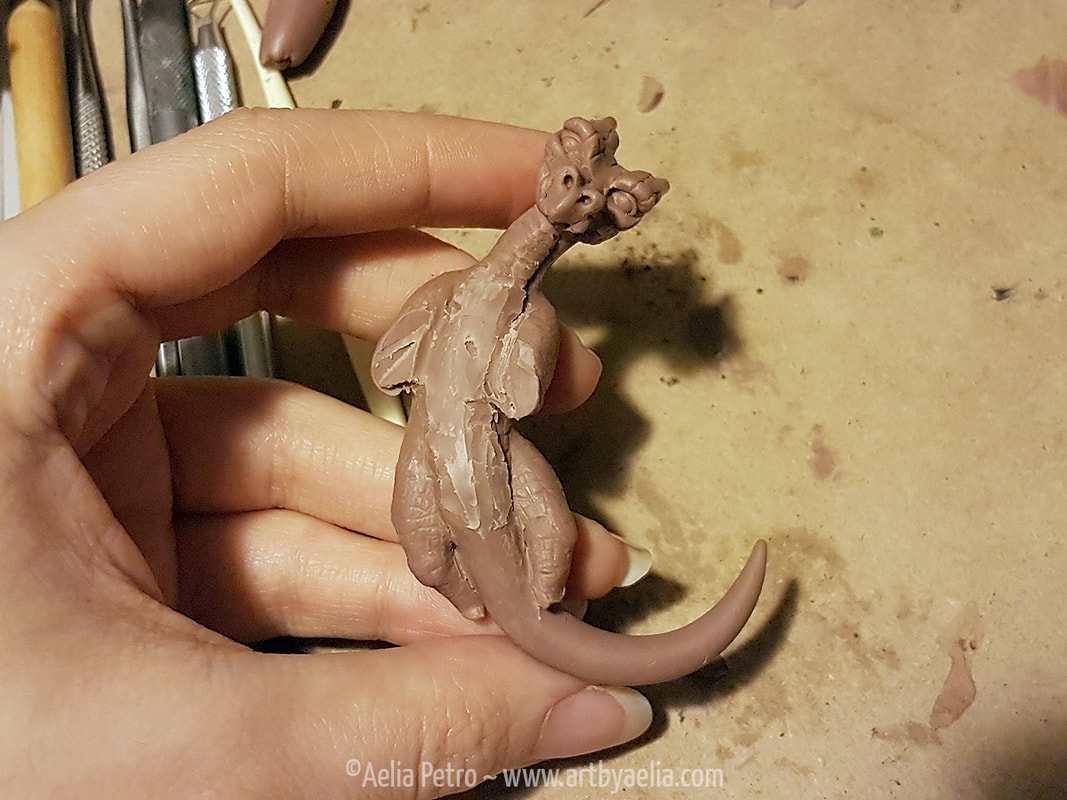
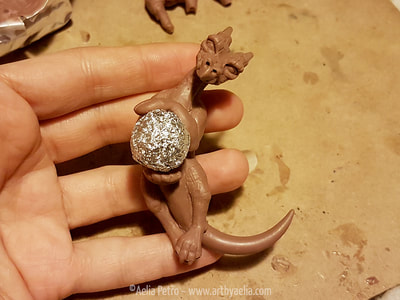
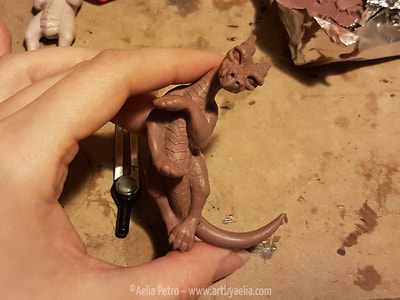
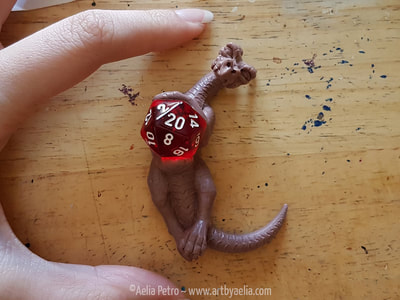
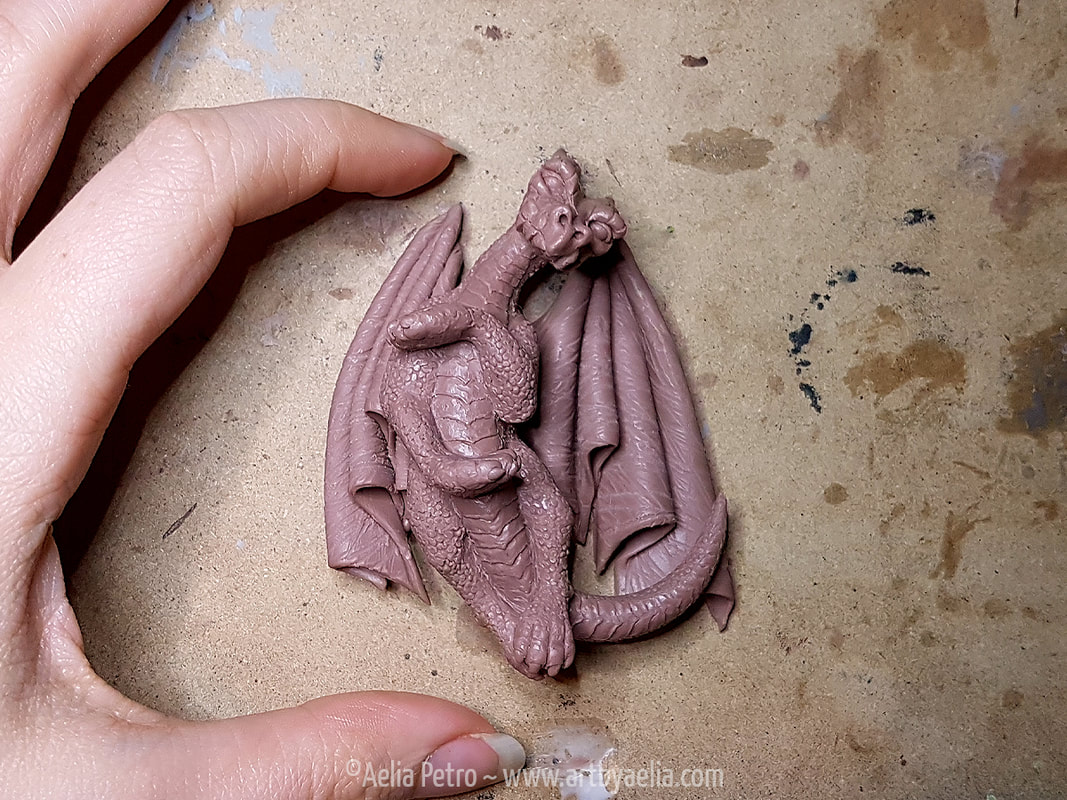
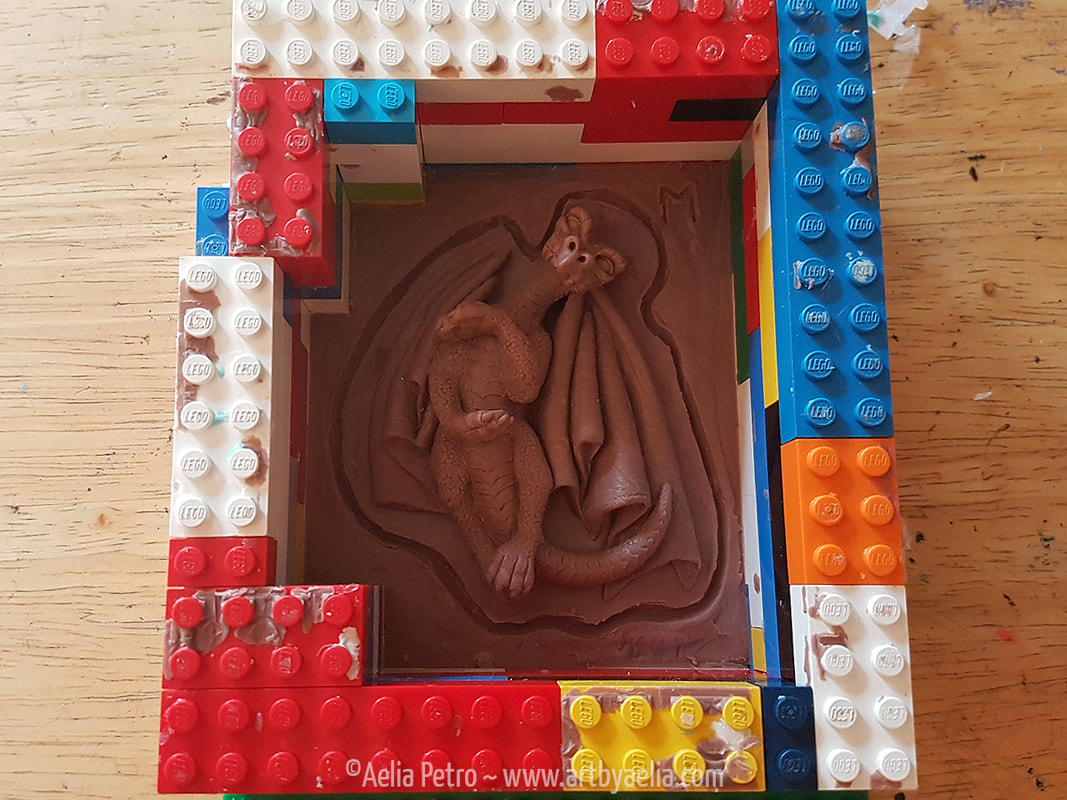
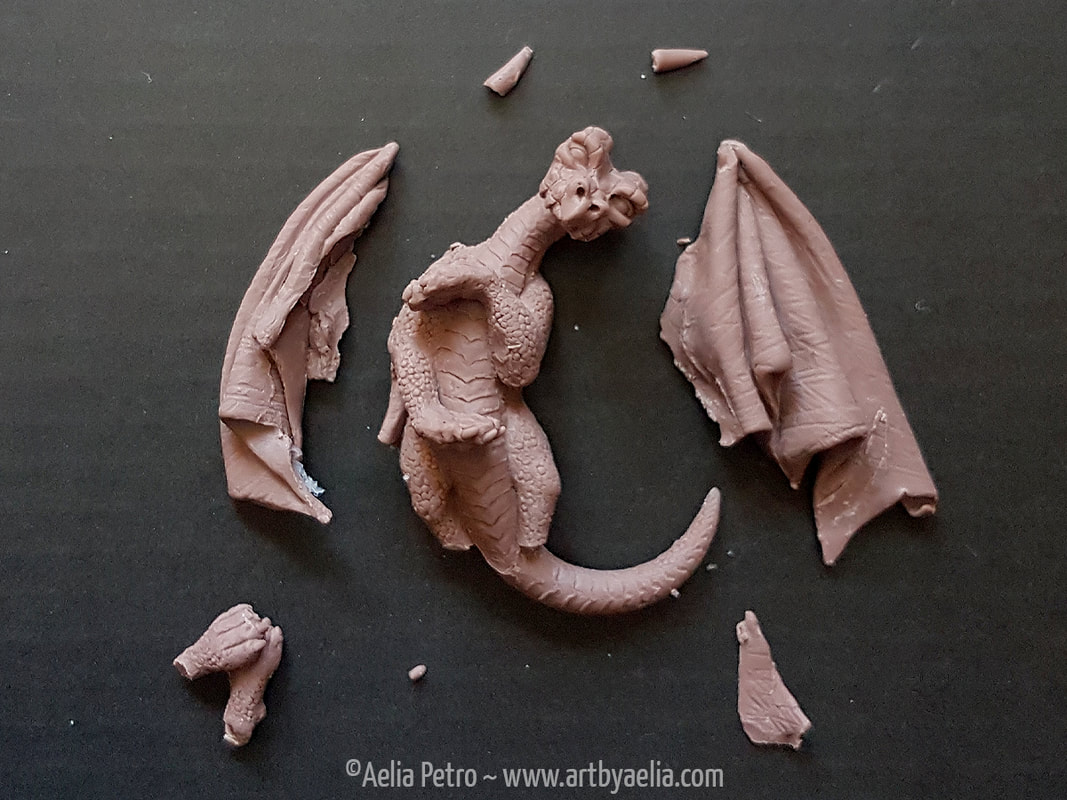
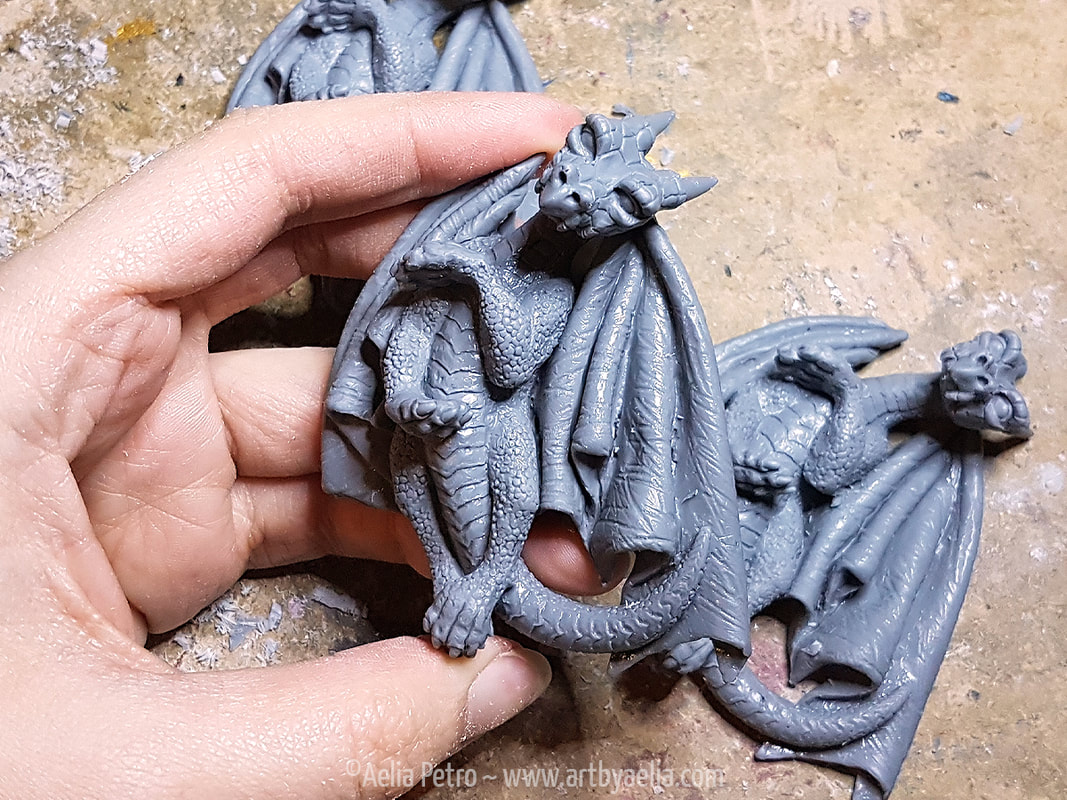
Dice Dragons have been on my to-do list ever since I sculpted my first dragon! I wanted to wait until I had more experience with the anatomy and textures before giving it a shot though. Here's a quick walk-through of the process!
Since I intended for it to hold a D20, I made a D20-sized ball of tin foil to use to get the pose right. With a great deal of fiddling, I had a pose I was happy with. Then I began working on the details, using very small tools. The hands were a particular challenge, so they were adjusted and readjusted dozens of times before the sculpt was finalized.
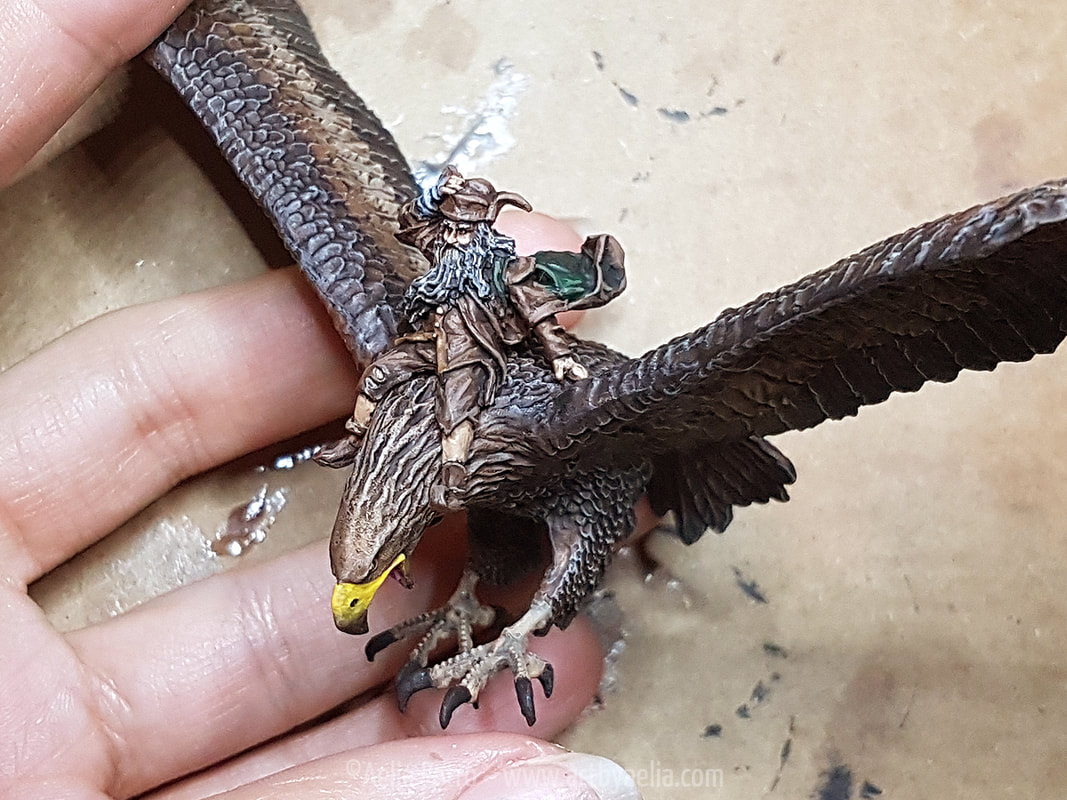
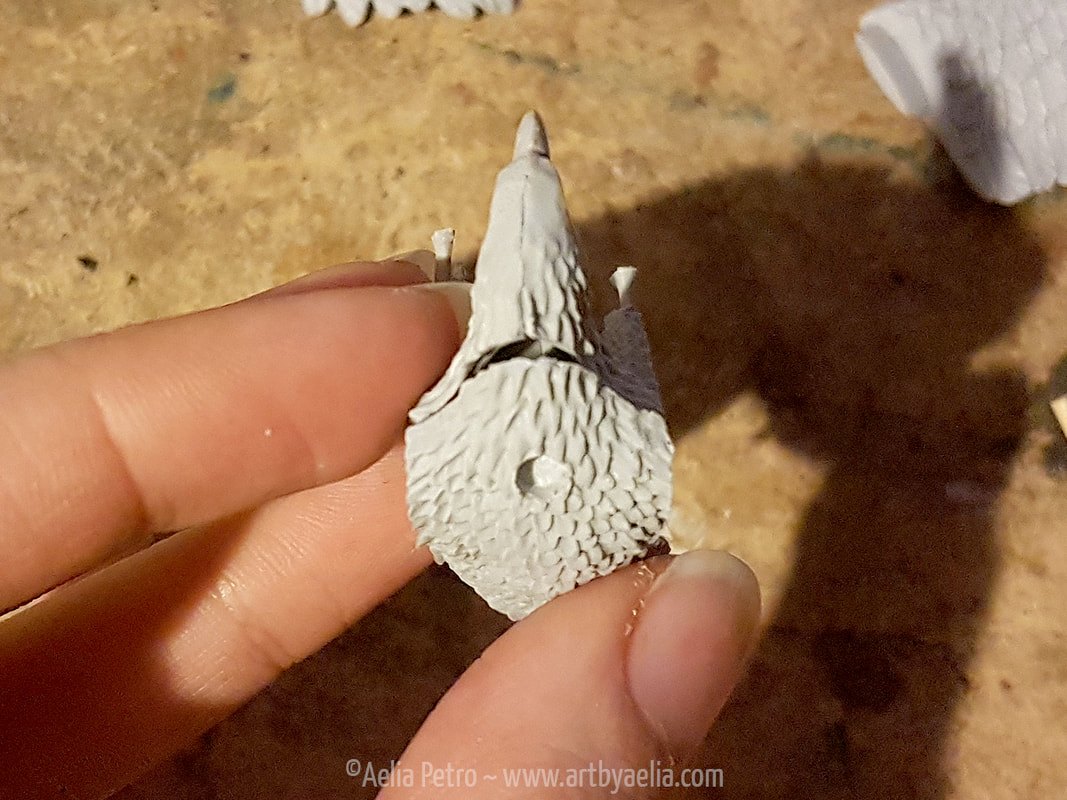
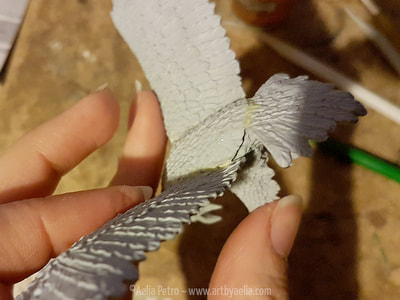
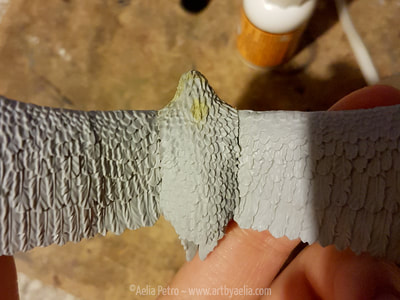
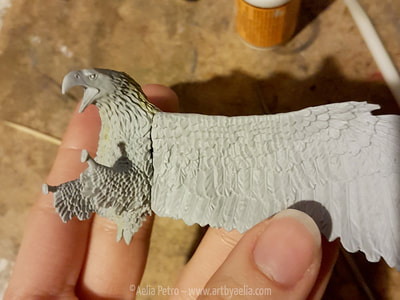
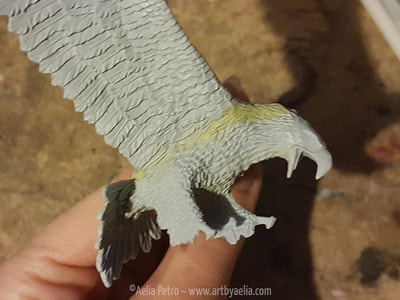
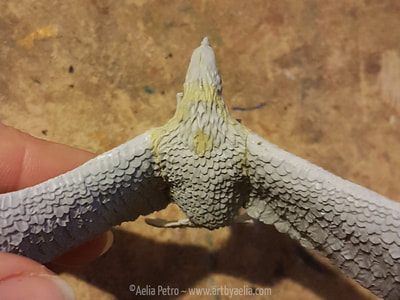
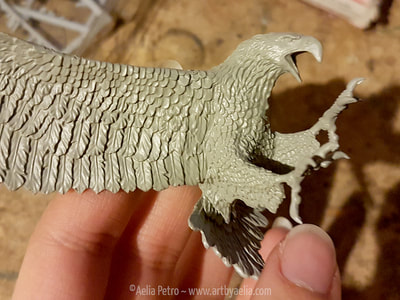
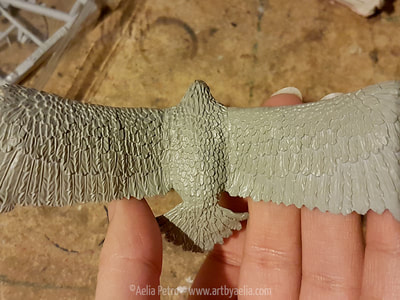
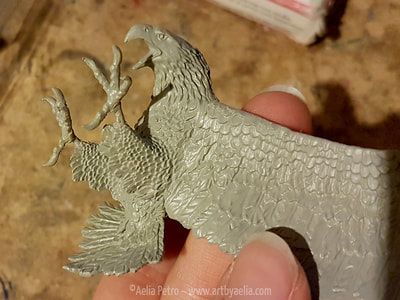
Below is a gallery of photos of my first 3 Dice Dragons! I am beyond thrilled with the way these have turned out, and look forward to making them in more colours :) Another hobby project! This time a Games Workshop model, Radagast the Brown on Great Eagle. Looks relatively simple, yes? NO! As if VERY poorly fitting pieces weren't enough, I had to way over-complicate things for myself. Allow me to explain. The terrible, horrible, no good, very bad fit.WHY GAMES WORKSHOP, WHY?!?! This resin model kit has some truly appalling joins. I mean seriously. The unintentional gap where the neck meets the body is almost as wide as the intentionally made hole for the wings! WOWZA. There are also huge gaps where the wings meet the body, and along either side of the body between the wings and tail. Just awful. A bit of hot water was able to warp the two body halves into fitting together well, but the rest were beyond the powers of hot water. Milliput required. MUCH Milliput. EDIT: GW did send me a replacement for the warped pieces, their customer service is super helpful. It's still not a great fit, so be prepared for that if you purchase this kit. They are super helpful though, and their support was much appreciated! Buy with confidence that they'll make it right. Let's make it complicatedIn for a penny, in for a pound. I HATE mounted models that can't be removed from their mount. In a game where riders dismount voluntarily or otherwise, it's annoying, and I might want to use the eagle without the wizard. Radagast unfortunately doesn't sit very well on the Eagle on his own, he will always fall off. Ugh. Since I want the option of using the Eagle without Radagast, and don't want to have an alternate Eagle to use if/when Radagast dismounts, gluing him onto the eagle was a hard pass. I also hate using pins because then when you remove the rider there's either a hole or a pin, and that's ugly, so no. I opted to try something new (to me), using magnets. But I did NOT want the magnet to show on the Eagle, because that'd be even worse than the pin. The plan was to drill a hole large enough for the magnet, but deeper than required so that I could sculpt a thin layer of feathers on top of the magnet, concealing it. Above is a photo showing the neck gap, and the hold I dremelled for the magnet. It almost killed me to drill into the sculpt, and I worried I wouldn't be able to match the feathers, or would ruin it... but I proceeded. I started filling the gaps with Milliput and sculpting new feathers to blend the seams. You can see some of the gaps, and the Milliput used to fill them in the photos above. Some progress photos showing the sculpting process. The gaps have all been filled. The sculpting is finished, and all base coated. I was pretty pleased with how the sculpting worked out. The painted Eagle and rider!I used my typical assortment of craft acrylics to paint up this piece, and will seal it shortly. Still planning the base. And just because I'm SO FREAKING HAPPY with the way the magnet solution turned out, here's a video. IT WORKS and I. IS. HAPPY.
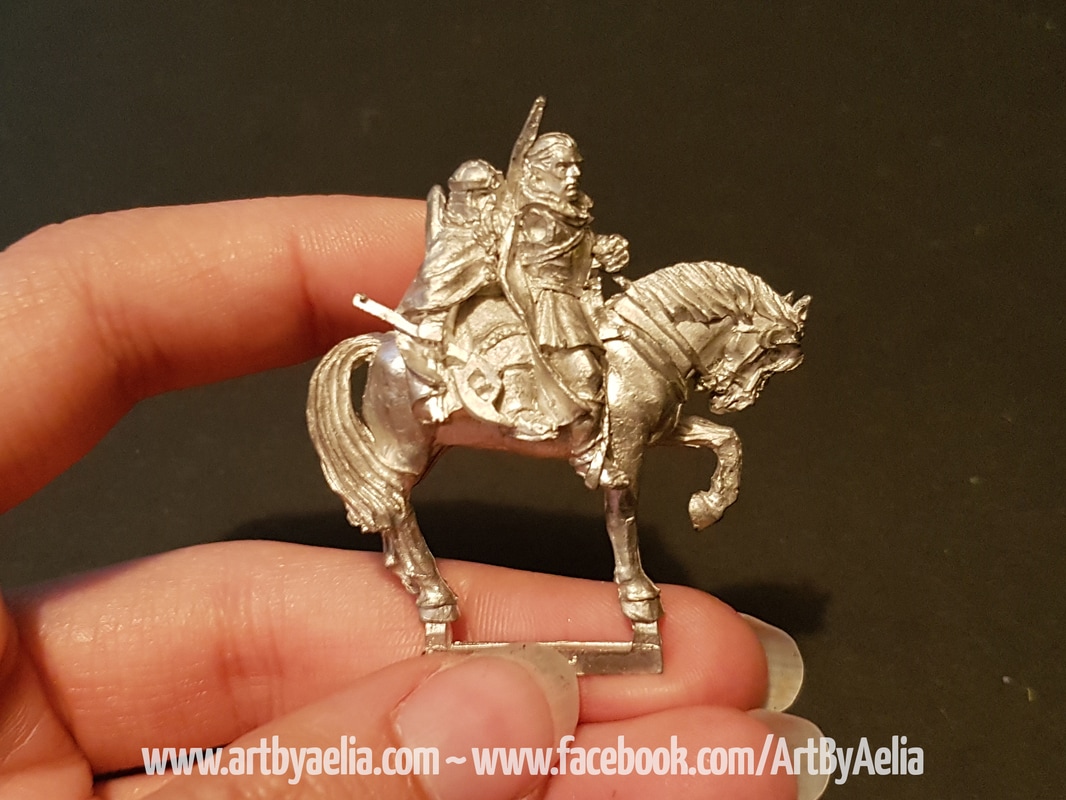
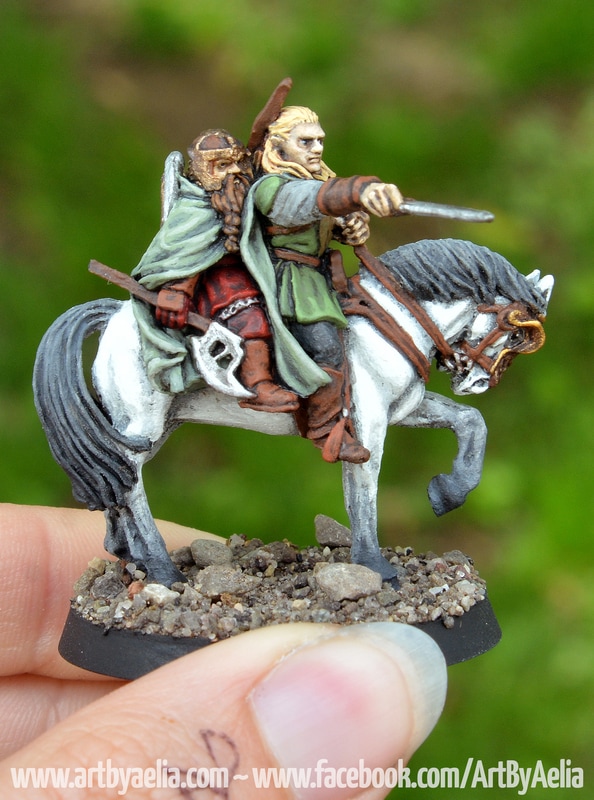
It’s been WAY too long since I blogged here, so I decided to dive back in with a passion project I’ve been working on… a Games Workshop Lord of the Rings 25mm Legolas and Gimli figure! This mini is one of my all-time favourites in the LotR line, in no small part because the Legolas/Gimli dynamic never fails to crack me up.
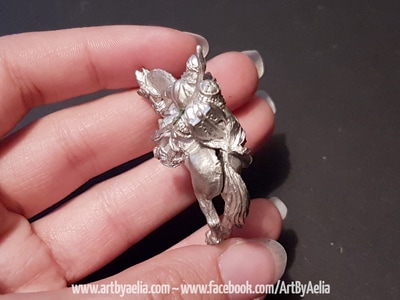
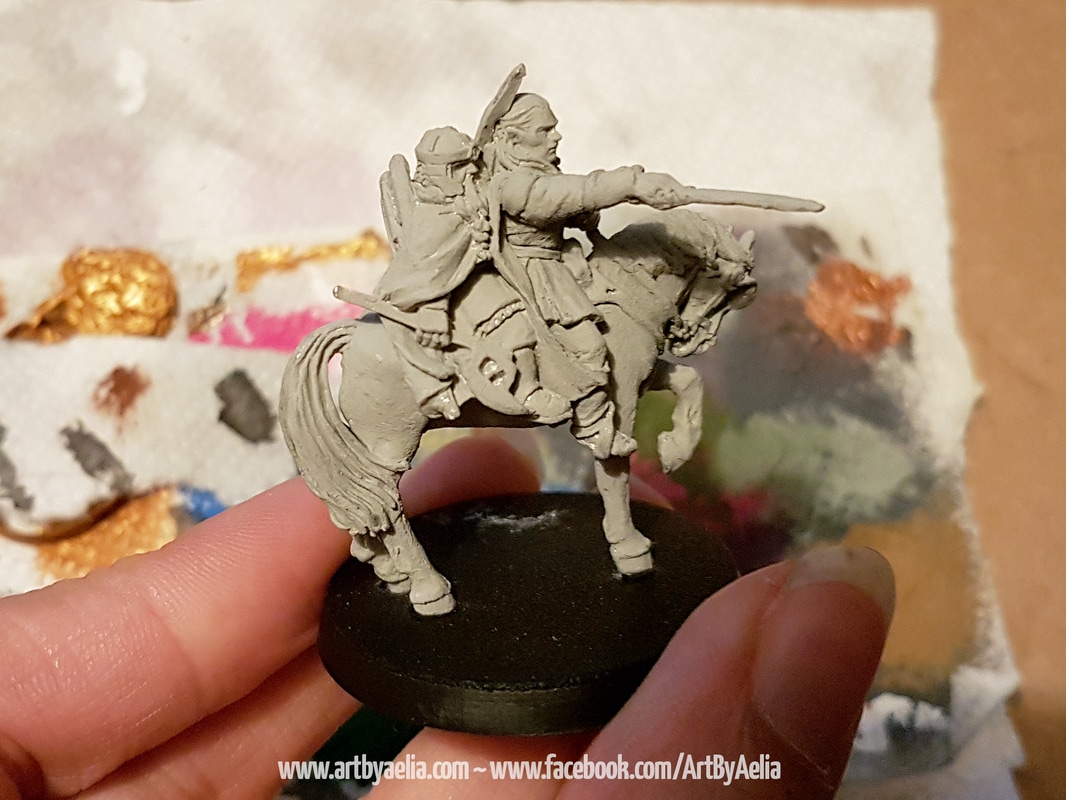
I begged a hand from my boyfriend who prised apart the two pieces for me. I cleaned off the green stuff, and reassembled using 5-minute epoxy glue. I then filled the gaps in the horse using milliput (a two-part epoxy putty like Green Stuff, but with a longer working time), and sculpted new details on the left side, to complete Legolas’ and Gimli’s waists where the two pieces fit together. Also resculpted a portion of Legolas’ bow, which was split in half for molding. The arm was the most difficult part. I used a hand and forearm I had from a “Breaking of the Fellowship” Legolas, attached it to a pin to extend it to the right length, pinned it to the shoulder, and then sculpted the upper arm and shoulder from scratch. I also wound up having to sculpt some of the bracer on his forearm. Once the sculpting and filling was complete, I gave it a quick base coat in grey to see how the details were shaping up. I began painting with the skin (I like to start my models from the skin and work my way out, layer by layer until I reach the outermost layers of clothing and weaponry). I’m just going to say this, I HATE PAINTING WHITE. It’s the worst. Single most challenging colour to get right. I know Arod, Legolas’ horse, is white/grey, and I was sorely tempted to paint it brown instead (because I actually enjoy painting brown horses), but wanted it to be as accurate as possible. I decided to go with a grey/white. Starting with a medium grey base, I used thinned paints in many layers to slowly build up colour, getting lighter and lighter until it was almost white. I did the same thing along Arod’s legs, but getting darker and darker grey. I hit the mane with a nuln oil wash to darken it, and then used thinned black paint to add the gradient effect on the mane and tail. After that I began painting the dwarf and elf skin, which involved a flesh base colour and Earthshade wash. Later on I built up the colour on the skin in several layers with a very fine brush. I even painted the eyes (which I avoid like the plague on 25mm figures, because their eyes are so unbelievably tiny, and it’s difficult not to make them look bug-eyed) using an 18/0 brush. A trick I like to use for painting such tiny things is to hold my breath, pay close attention to my heartbeat, and actually stroke the brush between heart beats so that my hands are as steady as possible. A bit of a pain, but it helps! Used the same trick for painting the hair. I’d tell you how I did the blonde hair, but I honestly couldn’t say. I painted and repainted it so many times in so many layers that I completely lost track over what was still showing. I almost ripped out all of my own hair in frustration, but ultimately reached a colour I could live with. Each bunch of hair was painted individually with the 18/0 brush. The finished model used several different shades of brown for clothing and accessories, as well as reds, greys, and greens. I couldn’t for the life of me find a paint colour in any brand that was the right colour for the Elven cloaks. Those cloaks are something between a grey and a green, in a natural shade that is apparently impossible to acquire. I broke down and mixed a custom colour, two actually. The base colour was a 50/50 mix of dark grey and green paint, followed by a nuln oil wash, followed by a 50/50 mix of medium grey and green as a highlight. I opted to use natural stones for basing because I like the random and realistic look it adds. A quick spray with Testor’s Dullcote to seal it, and it was finished! This mini presented a couple of pretty significant challenges (replacing an arm, painting white, painting blonde hair, and painting Elven cloaks among them), but was very rewarding. It has only fueled my love for this range of models, looking forward to painting something else! Thanks for Reading!My newest jewelry line has officially launched!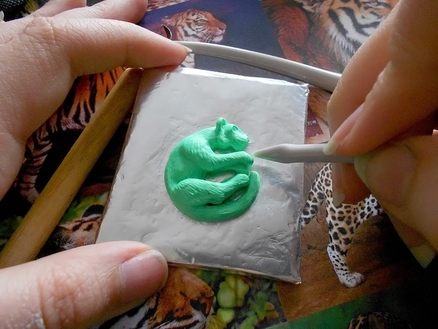 I've been working on several new designs over the last few weeks! These designs were created specifically to hang from the necklace as if wearing a harness, as opposed to hanging from a clunky jewelry finding. Each design has been carefully hand-sculpted in polymer clay. Every hair was painstakingly created by hand to give the most realistic appearance possible. 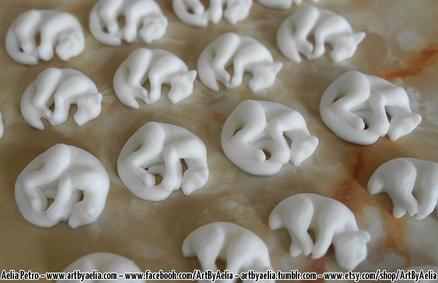 Each design is carefully cast in a durable white resin. This resin is much stronger than polymer clay, and more resistant to damage. All designs are available for order in this unpainted white resin form. You can leave them as-is, or paint and decorate them however you'd like! Unpainted pieces can be supplied with a length of black waxed-cotton cord and instructions for tying adjustable knots so that you can hang them yourself. 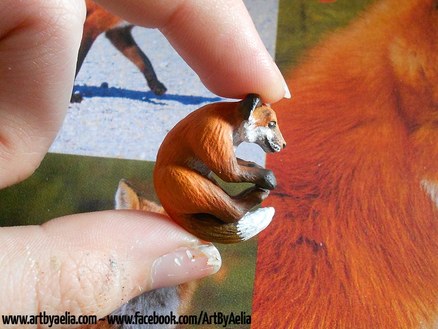 After casting, each pendant is individually painted. This process can take hours depending on the complexity of the design. Because each is created by hand from start to finish, no two are exactly the same! All designs can be custom-ordered and painted to look however you'd like! For example, the wolf sculpt could be painted to look like your pet husky, or the big cat sculpt could be painted to look like a jaguar or golden tabby tiger. 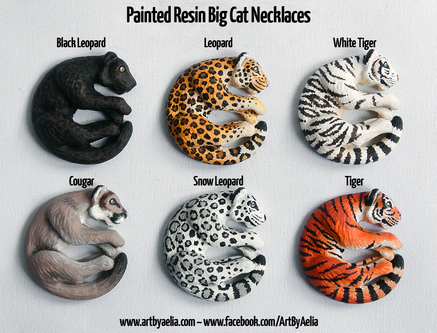 Here are some examples of finished pieces! These are all cast in the same big cat mold, but individually painted to look like different species. If you don't see your favourite big cat species here, it can still be painted as a custom order! Just email [email protected] to ask for a custom order. 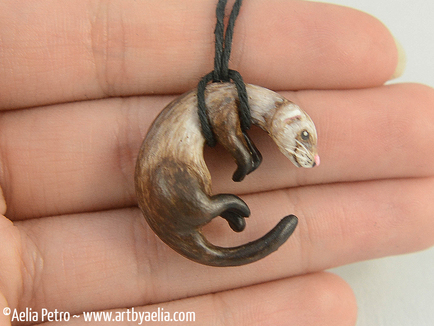 Here's an example of how these necklaces hang when strung. There is no metal finding, or hole carved in the animal. They hang naturally, giving them an additional degree of realism. Each necklace is made from durable black waxed-cotton cord and tied with slip knots so that the length is completely adjustable. If you'd prefer that they be hung via a screw eye in the back, that option is also available on request. Help me expand this line!
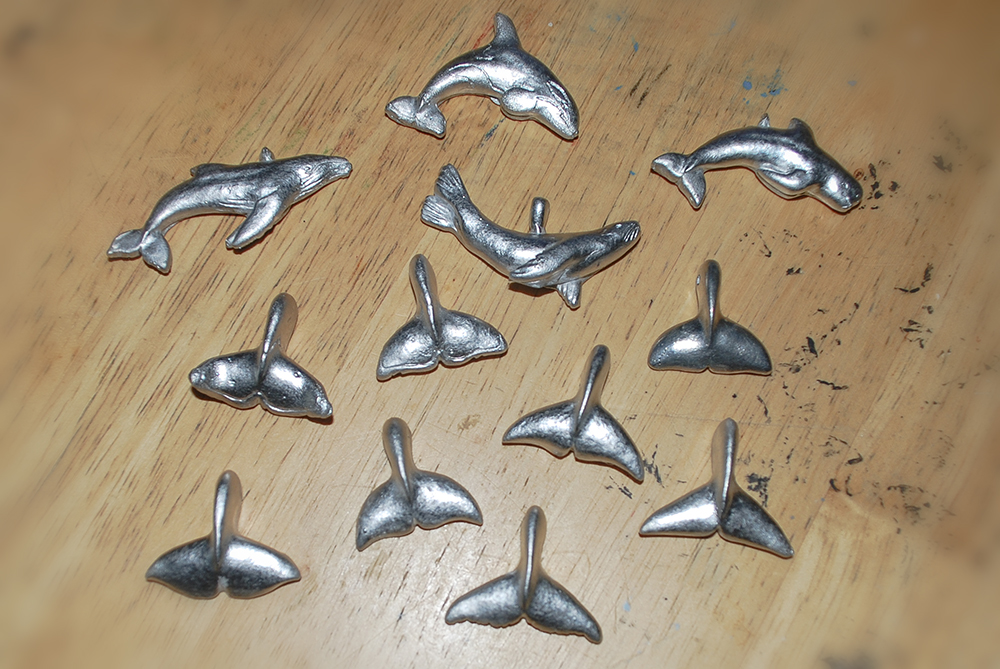
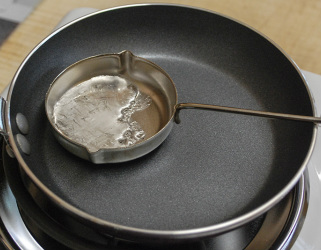
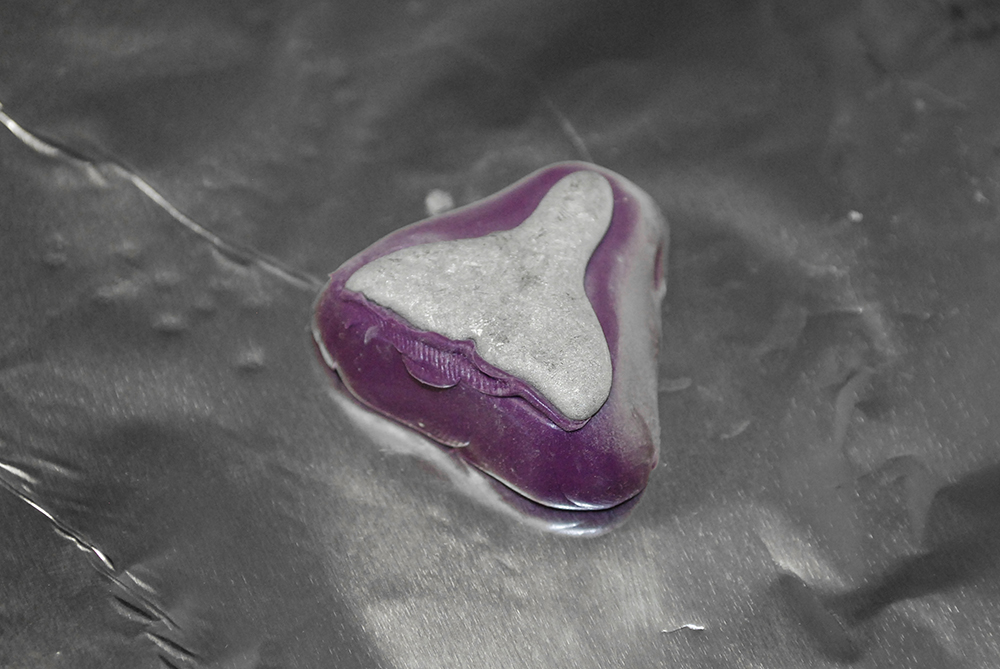
I've been a bit less active online lately, and now you can see why! I've been working on an entirely new line of items, in a brand new medium... PEWTER! I've had quite a few requests for metal jewelry, as opposed to Polymer Clay or Resin, and I'm pleased to be able to offer lead-free pewter jewelry at this time. Each unique design is sculpted in clay and used to create a finely detailed mold for casting.
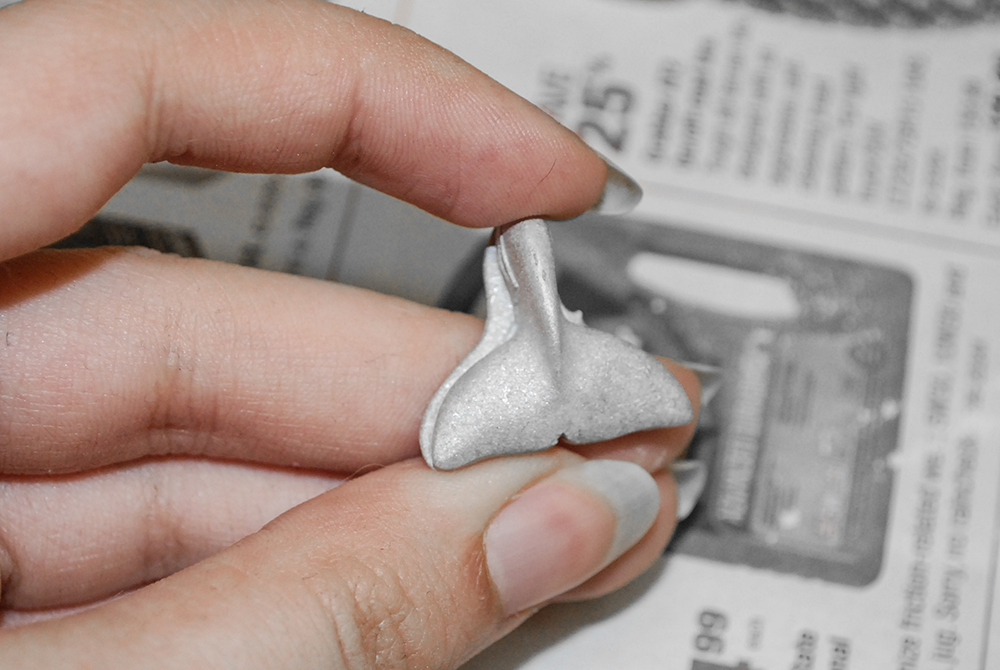
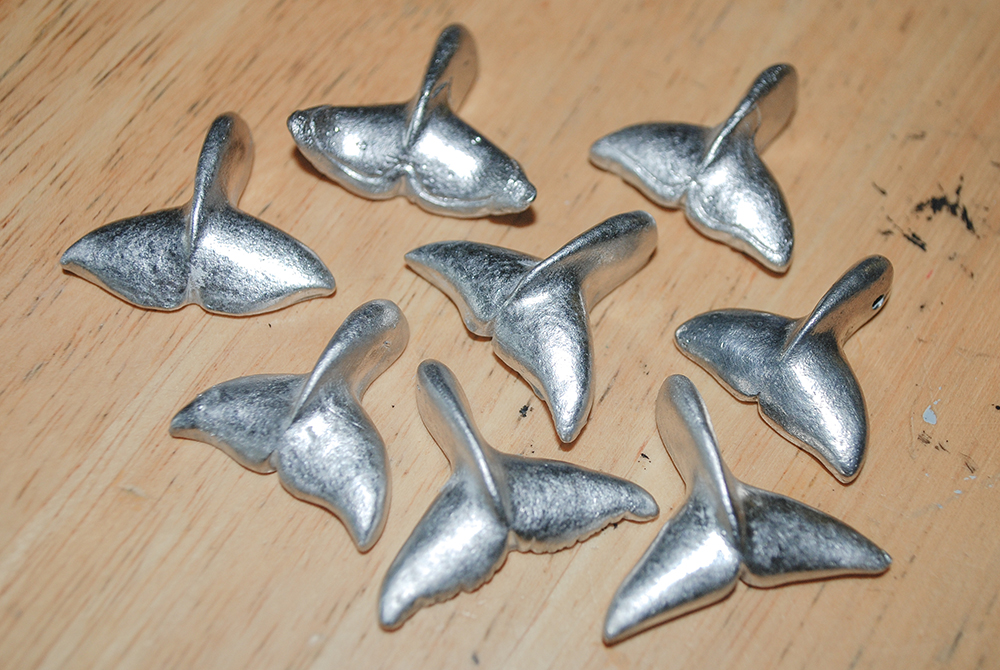
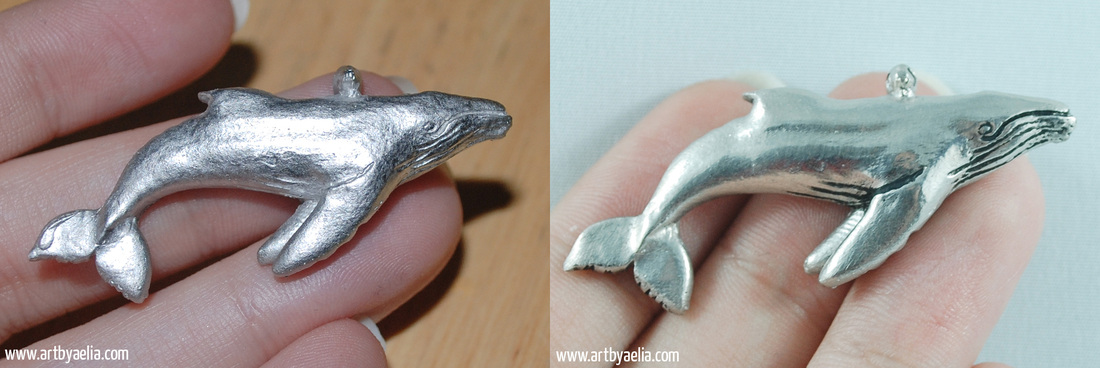
My favourite pewter piece so far, a Humpback Whale! They are one of my favourite animals, seeing them in the wild was one of the best experiences of my life. You can see the unfinished, straight-from-the-mold version below on the left, and the polished and finished version below to the right. I have also made full versions of a Sea Lion, Pilot Whale, and Orca. I will be posting my first batch of Pewter pieces for sale in the next couple of days, so stay tuned!THE CONTEST IS OFFICIALLY CLOSED AND WE HAVE A WINNER!!! Melanie Ecklund Melanie, please email me at [email protected] to claim your prize! You have 3 days to respond before a new winner will be chosen!
Thank you to all of those that entered! I really appreciate your support for my new website! |
AuthorThis is a blog for my artistic endeavours... as I experiment with new mediums, styles, and techniques, I'll post here. Archives
June 2020
Categories
All
|
All content is © Aelia Petro


 RSS Feed